
FE120 L4-4.9L DSL Turbo (2005)
-
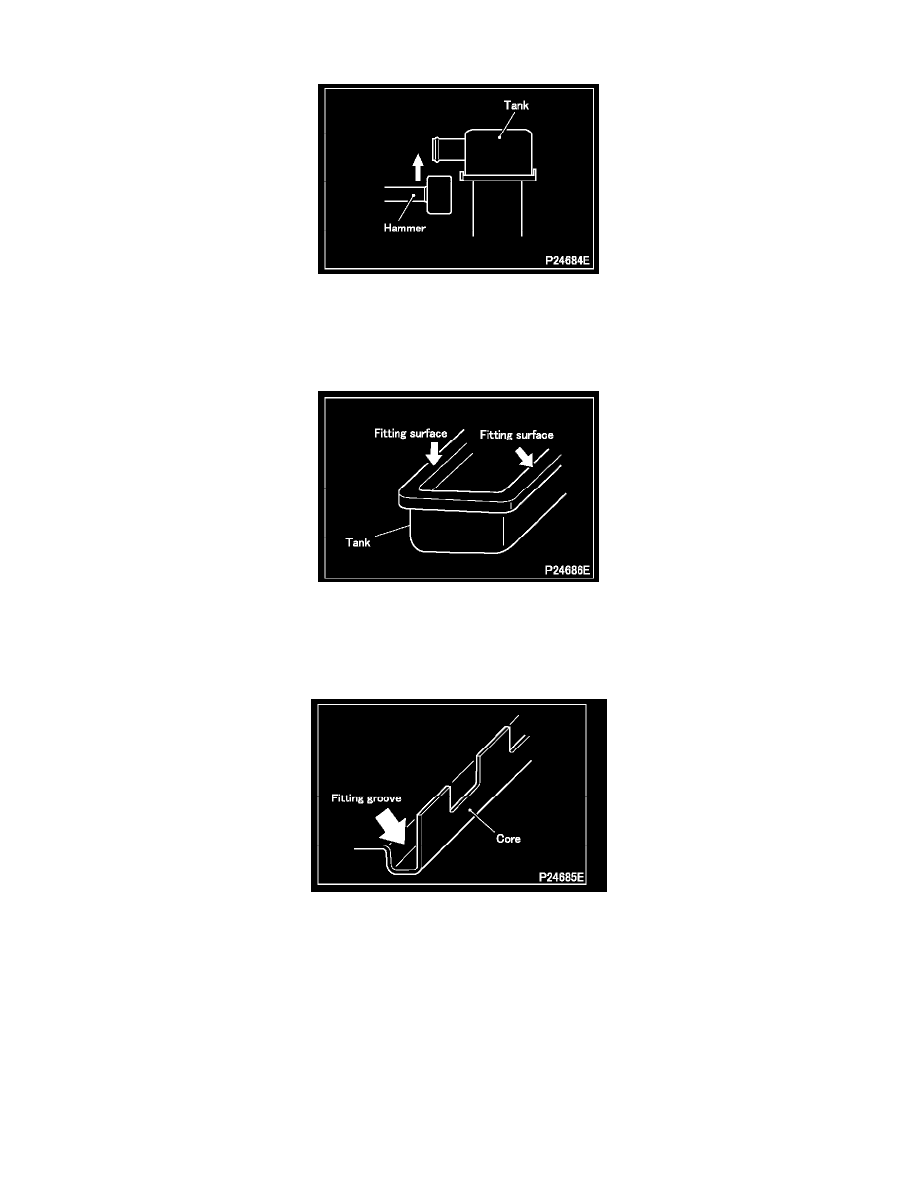
Undo all the tabs on the entire periphery of the tank, then remove the tank using the inlet hose fitting as a grip.
-
If the tank does not come off easily, tap it lightly with a soft-face hammer (rubber or plastic hammer) to loosen it.
CAUTION: Handle the tanks carefully, as they are made of plastic and may crack easily under impact.
Inspection procedure
Inspection: Core fitting surfaces of tank
-
Inspect the core fitting surfaces of the tank for any dirt or damage. If necessary, clean them thoroughly.
-
Replace the tank(s) if defective.
CAUTION: Carry out the inspection with your bare hands to avoid putting foreign matter on the fitting surfaces.
Inspection: Tank fitting groove of core
-
Check the tank fitting groove of the core for any foreign matter or cracks.
-
If foreign matter is found on the groove surfaces, lightly scrub it off with a No.1000 sandpaper taking care not to damage the surfaces, or blow it
off with compressed air.
-
If a crack is found on the groove surfaces, repair the crack or replace the core.
CAUTION: Installing a packing and tank on the core without removing foreign matter from the groove surfaces can lead to coolant leakage.
Make sure to inspect the entire groove surfaces extremely carefully. Even one strand of hair is enough to cause leakage.