
Galant L4-1997cc 2.0L DOHC (1990)
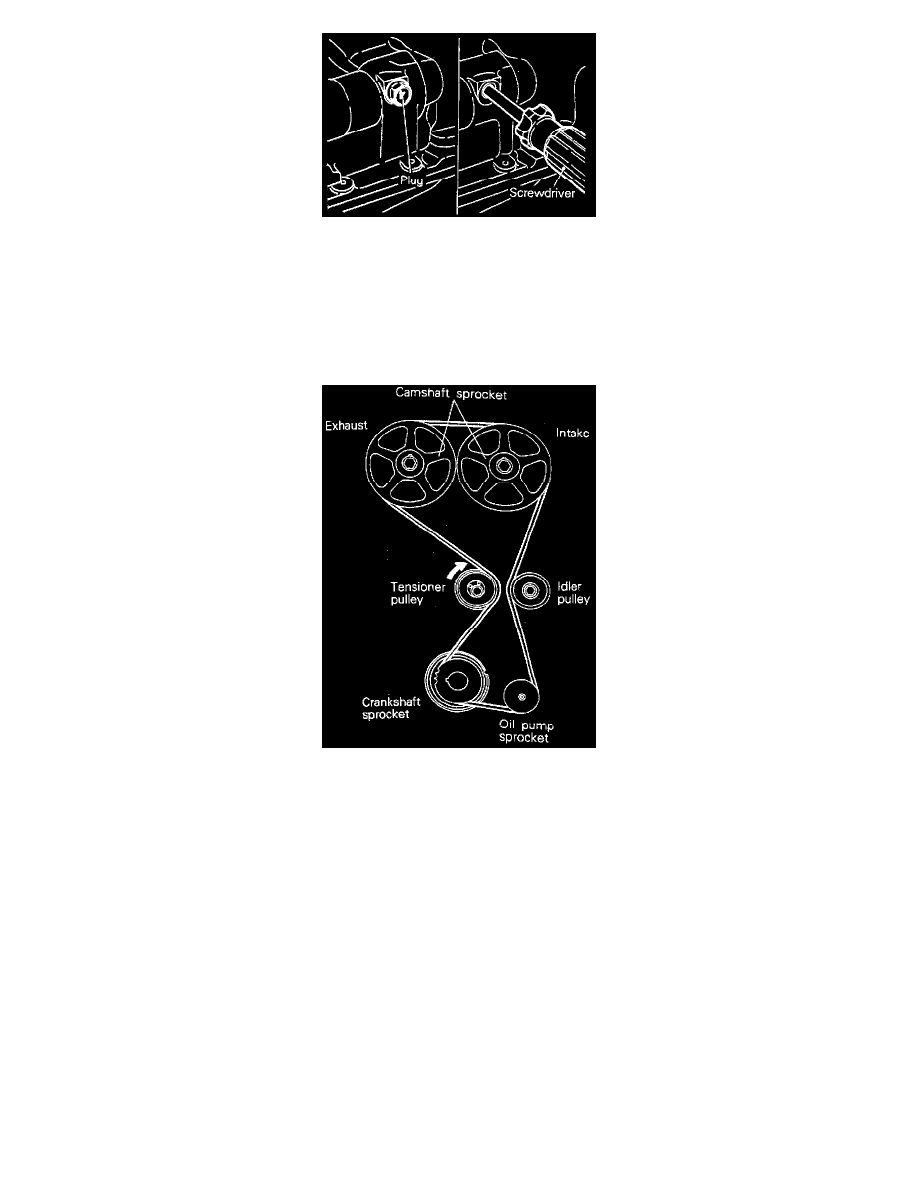
(4) Remove the plug on the cylinder block and insert a Phillips screwdriver,shank diameter 8 mm (0.31 in) through the hole. If it can be inserted
as deep as 60 mm (2.4 in) or more, the timing marks are correctly aligned. If the inserted depth is only 20 - 25 mm (0.8 - 1.0 in), turn the oil
pump sprocket one turn and realign timing marks. Then check to ensure that the screwdriver can be inserted 60 mm (2.4 in) or more. Keep the
screwdriver inserted until the installation of the timing belt is finished.
NOTE: Step (4) is performed to ensure that the oil pump sprocket is correctly positioned with reference to the silent shafts.
(5) Install the timing belt around sprockets as follows.
(a) Install the timing belt around the tensioner pulley and crankshaft sprocket and secure the timing belt onto the tensioner pulley with your left
hand.
(b) Pulling the belt with your right hand, install it around the oil pump sprocket.
(c) Install the belt around the idler pulley.
(d) Install it around the intake camshaft sprocket.
(e) Turn the exhaust camshaft sprocket one tooth clockwise to align its timing mark with the cylinder head top surface (see image in step a).
Then, pulling the belt with both hands, install it around the exhaust camshaft sprocket.
(f) Gently raise the tensioner pulley as shown by the arrow, so that the belt does not sag, and temporarily tighten the center bolt.
ADJUSTMENT OF TIMING BELT TENSION
(1) After turning the crankshaft 1/4 turn counterclockwise, turn it clockwise to move the No.1 cylinder to top dead center.