
Galant L4-1997cc 2.0L DOHC (1990)
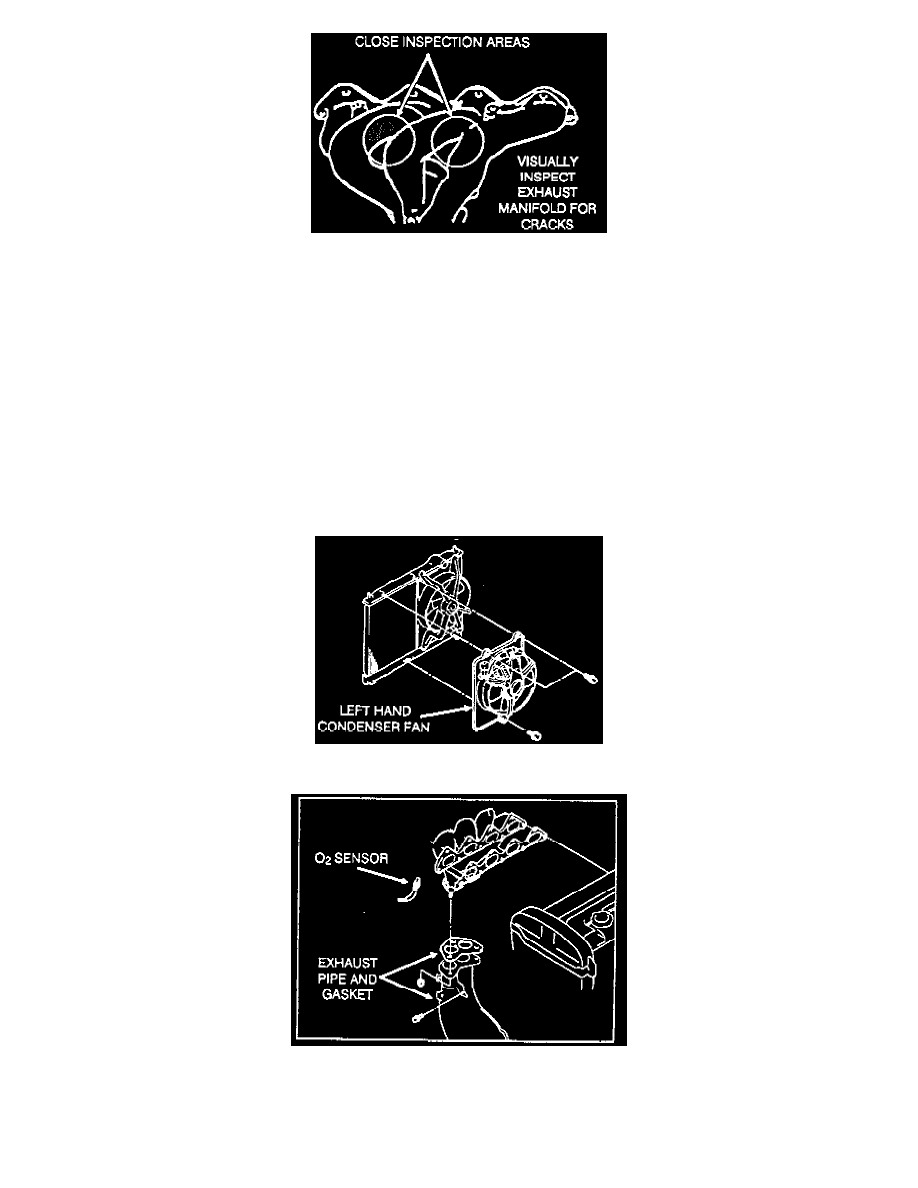
4.
Visually inspect the exhaust manifold for cracks.
Note:
The areas highlighted should be examined carefully.
5.
If no cracks are visible, reinstall the parts in the reverse order.
Only if cracks are found, proceed with "EXHAUST MANIFOLD REPLACEMENT".
EXHAUST MANIFOLD REPLACEMENT
Note:
The exhaust manifold and the exhaust manifold inner cover, must be replaced as a set. The inner cover bolt hole pattern is different from the original
manifold and not interchangeable. All other parts should be reused.
1.
The exhaust manifold cover and engine hanger bracket should already be removed and the O2 sensor wire disconnected and set aside.
2.
For clearance, if the vehicle is equipped with A/C, remove the left hand condenser fan. Remove the 3 bolts and unplug the connector.
3.
Remove the exhaust pipe and gasket from the exhaust manifold by unscrewing the 3 self locking nuts and 1 bolt.
4.
Remove the O2 sensor from the exhaust manifold using special tool MD998703.
5.
Remove the exhaust manifold from the engine by removing the remaining nuts and washers from the cylinder head studs.