
Galant L4-1997cc 2.0L SOHC 16 Valve (1993)
Connecting Rod: Service and Repair
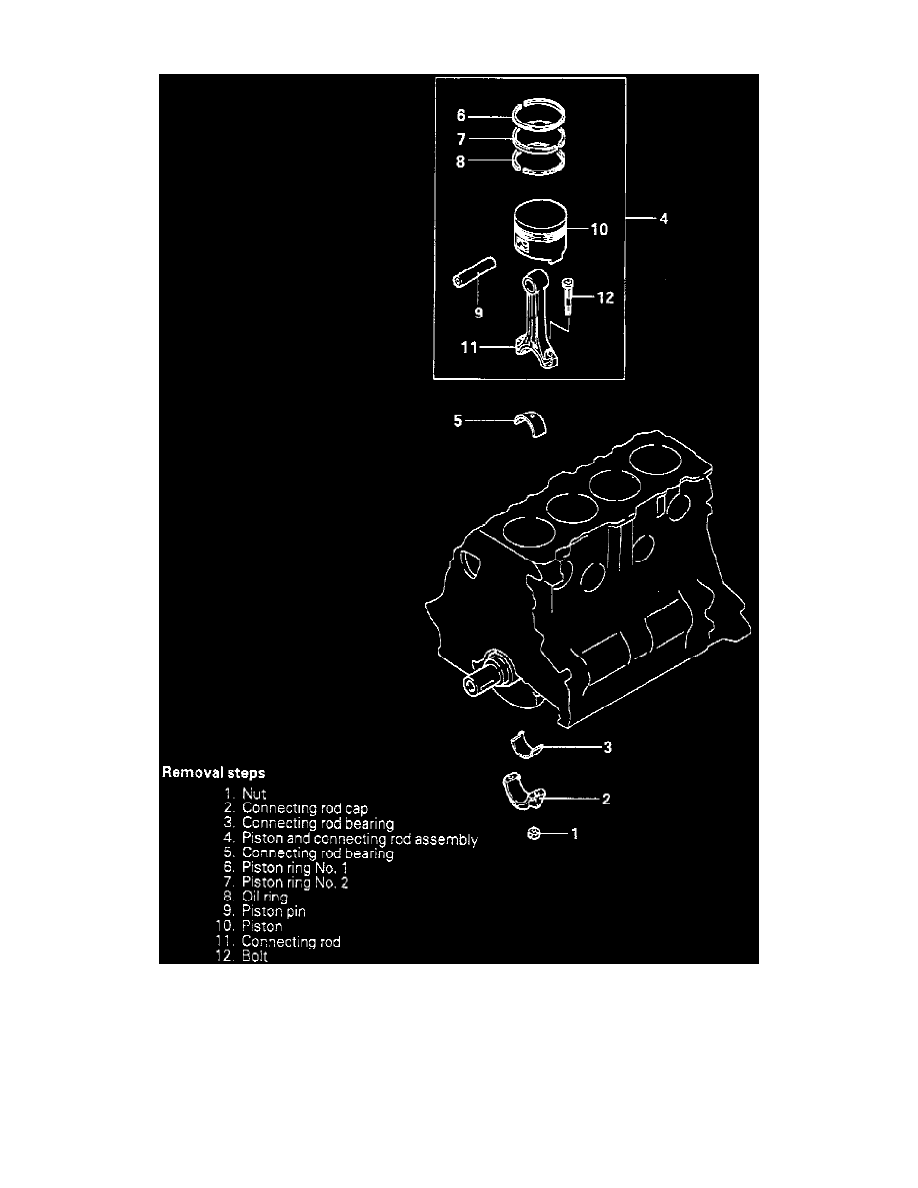
Fig. 55 Exploded View Of Piston & Rod Assembly
Refer to Fig. 55 when removing piston and rod assembly. Keep all components, such as connecting rod caps and bearings, in proper order for
installation.
1. Inspect piston, piston ring and piston pin for wear or damage and replace as necessary.
2. Reverse procedure to install, noting the following:
a. Install piston pin and ensure piston moves smoothly. Due to production tolerance variations, it is necessary to visually inspect piston pin
depth after installation to verify piston pin is centered.
b. Install oil ring into piston ring groove, then the upper and lower side rails. Do not use piston ring expander when installing side rail.
c. Using piston ring expander, install Nos. 1 and 2 piston rings with marks on crown side facing up.