
Galant L4-1997cc 2.0L SOHC 16 Valve (1993)
Fluid - A/T: Testing and Inspection
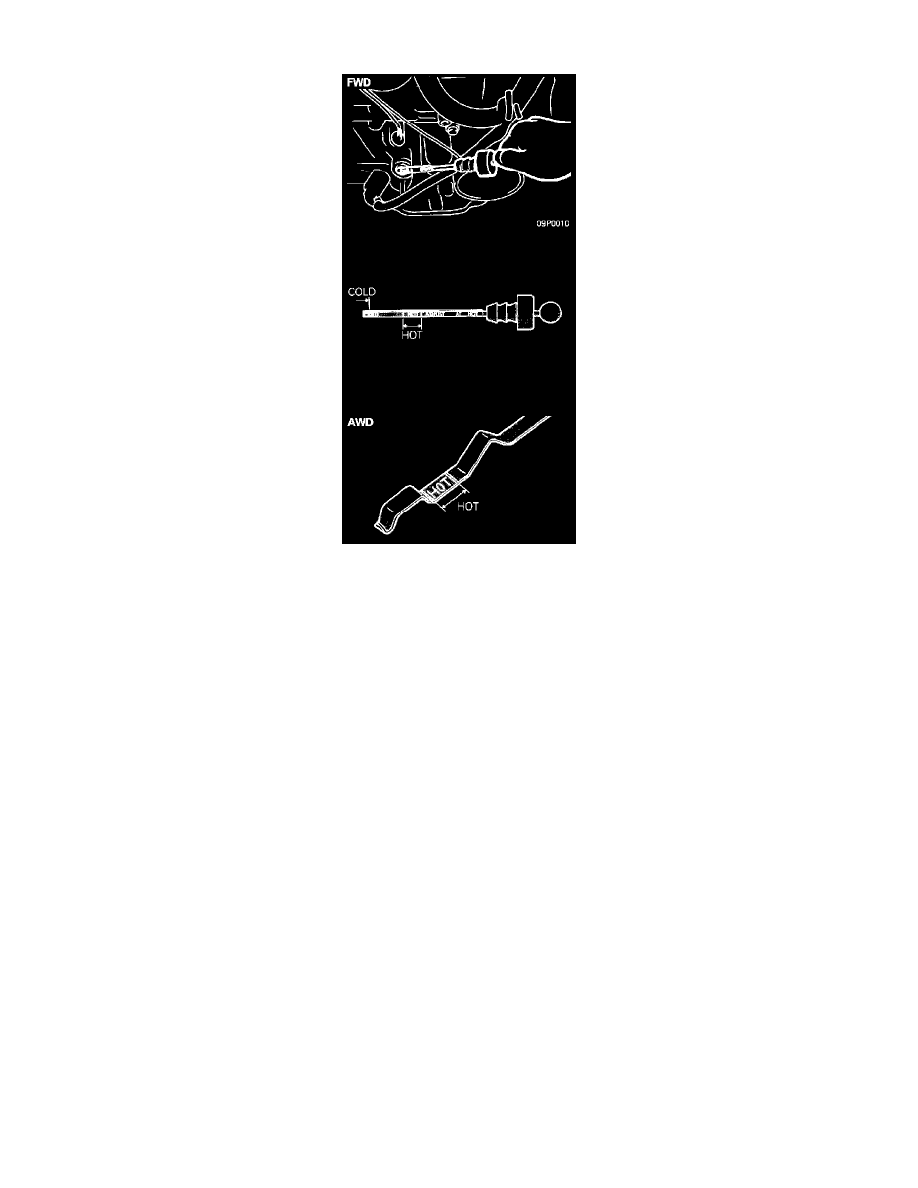
Dipstick
CHECKING FLUID LEVEL AND CONDITION
1. Drive until the fluid temperature reaches the usual temperature 70-80°C (160-180°F).
2. Place vehicle on level floor.
3. Move selector lever sequentially to every position to fill torque converter and hydraulic circuit with fluid, then place lever in "N" Neutral position.
This operation is necessary to be sure that fluid level check is accurate.
4. Before removing dipstick, wipe all dirt from area around dipstick. Then take out the dipstick and check the condition of the fluid. The transaxle should
be overhauled under the following conditions:
- If there is a "burning" odor.
- If the fluid color has become noticeably blacker.
- If there is a noticeably great amount of metal particles in the fluid.
5. Check to see if fluid level is in "HOT" range on dipstick. If fluid level is low, add automatic transaxle fluid until level reaches "HOT" range. Low fluid
level can cause a variety of conditions because it allows pump to take in air along with fluid. Air trapped in hydraulic circuit forms bubbles which
make fluid spongy. Therefore, pressures will be erratic. Improper filling can also raise fluid level too high. When transaxle has too much fluid, gears
churn up foam and cause same conditions which occur with low fluid level, resulting in accelerated deterioration of automatic transaxle fluid. In either
case, air bubbles can cause overheating, fluid oxidation, which can interfere with normal valve, clutch, and servo operation. Foaming can also result in
fluid escaping from transaxle vent where it may be mistaken for a leak.
6. Be sure to examine fluid on dipstick closely.