
Galant V6-2972cc 3.0L SOHC (1988)
Exhaust Manifold: Service and Repair
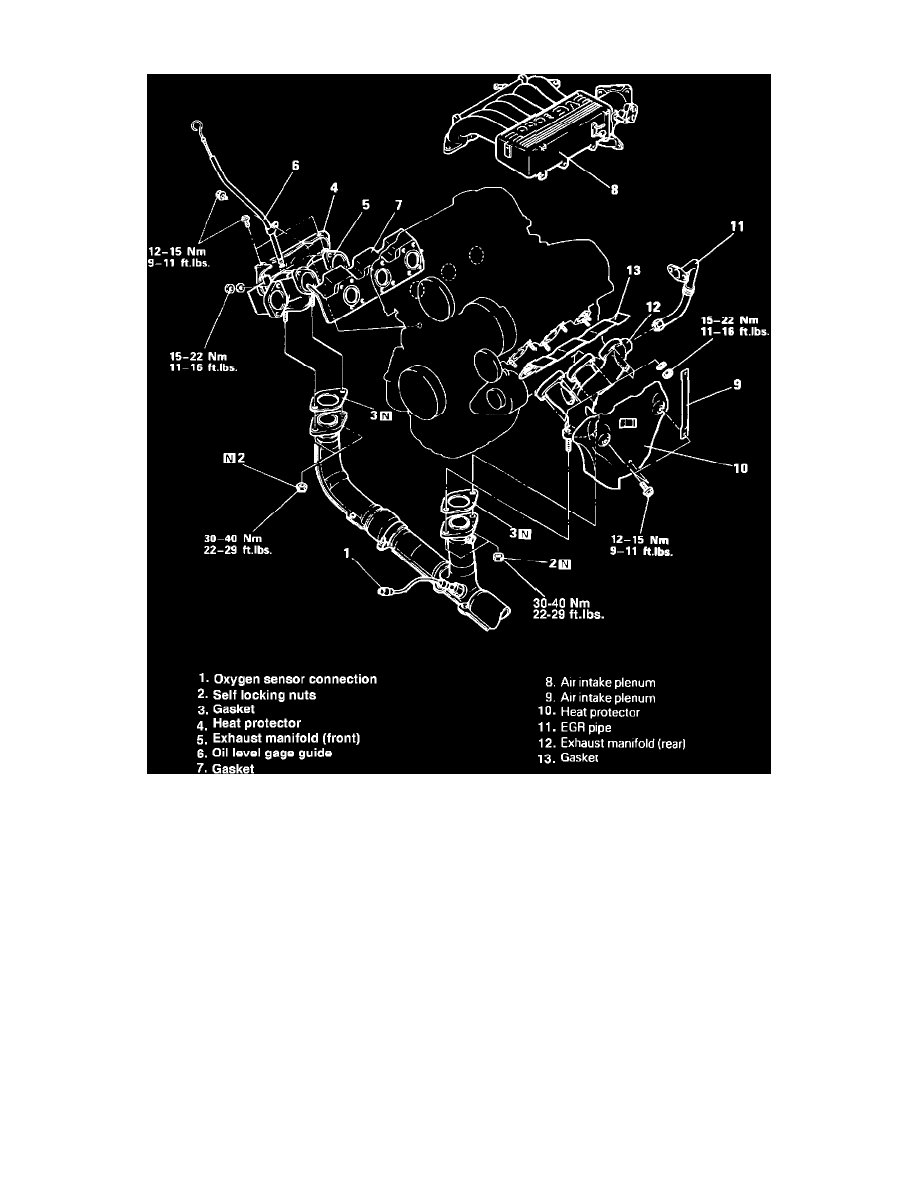
Fig. 4 Exhaust manifold removal and installation
1.
Disconnect battery ground cable, then raise and support vehicle.
2.
Disconnect exhaust pipe from rear exhaust manifold, Fig. 4.
3.
Remove EGR tube from rear manifold, then disconnect oxygen sensor lead.
4.
Remove cross over pipe attaching bolts, then the cross over pipe.
5.
Remove rear manifold attaching bolts, then the rear manifold.
6.
Lower vehicle, then remove heat shield attaching bolts from front exhaust manifold, then the heat shield.
7.
Remove cross over pipe to front exhaust manifold attaching bolts.
8.
Remove front exhaust manifold attaching bolts, then the front exhaust manifold.
9.
Reverse procedure to install, noting the following:
a. Discard gaskets and clean gasket surfaces on both manifolds and cylinder head.
b. Use a straightedge to ensure gasket surfaces on manifolds are flat and within .004-.008 inch per foot of manifold length.
c. Torque rear exhaust manifold attaching bolts to 191 in. lbs.
d. Torque exhaust pipe to exhaust manifold attaching bolts to 250 in. lbs.
e. Torque crossover pipe to manifold attaching bolts to 51 ft. lbs.
f.
Torque front exhaust manifold attaching bolts to 191 in. lbs., then install heat shield and torque bolts to 130 in. lbs.