
Galant ES V6-3.0L SOHC (2000)
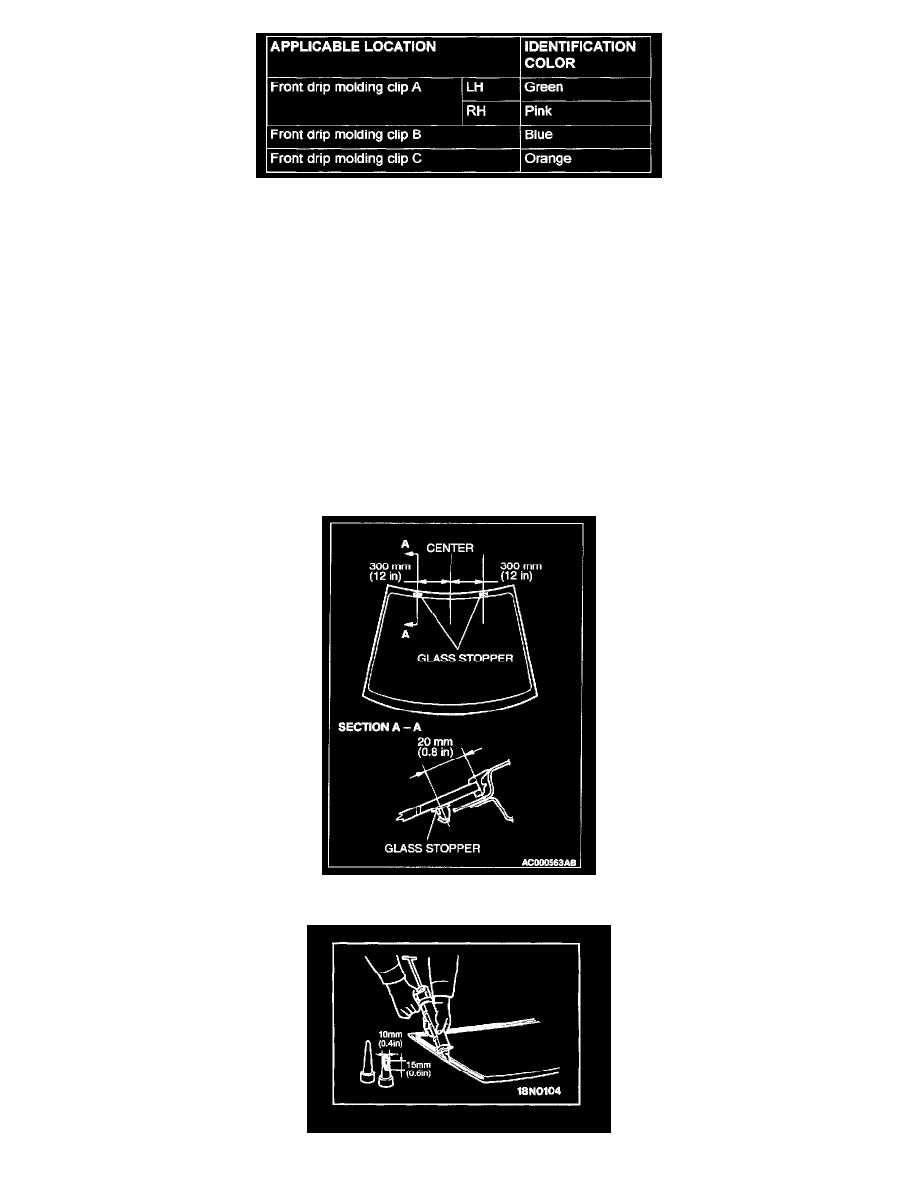
>>B<< FRONT DRIP MOLDING CUP A/FRONT DRIP MOLDING CLIP B/FRONT DRIP MOLDING CLIP C INSTALLATION
The clips A, B and C differ according to where they are used, so check the identification color before installation.
>>C<< WINDSHIELD UPPER MOLDING/WINDOW SPACER/GLASS STOPPER/WINDSHIELD INSTALLATION
1. When replacing the windshield, temporarily set the windshield against the body, and place a mating mark on the windshield and body.
2. Use 3M(TM) AAD Part number 8906 or equivalent to degrease the inside and outside of the windshield and the body flanges.
CAUTION:
-
The primer strengthens the adhesive, so be sure to apply it evenly around the entire circumference. However, a too thick application will
weaken the adhesive.
-
Do not touch the coated surface.
3. Soak a sponge in the primer, and apply evenly to the windshield and the body in the specified places.
4. Apply the primer, and then let it dry for 3 to 30 minutes, depending on ambient temperature and humidity.
5. Install the windshield upper molding to the windshield.
6. Place the window spacer to the windshield so that it inclines toward the windshield and its right and left clearances are equal. Then install the
spacer firmly so that it is firmly anchored.
7. Install the glass stopper to the shown dimension.