
Galant LS V6-3.0L SOHC (1999)
5.
Install the new, shorter float arm into the float arm pivot then gently snap the float arm lock over the arm.
6.
TEST THE SENDING UNIT. To make sure that the sending unit resistor card was not damaged during the float arm replacement, test the sending
unit with an ohm meter.
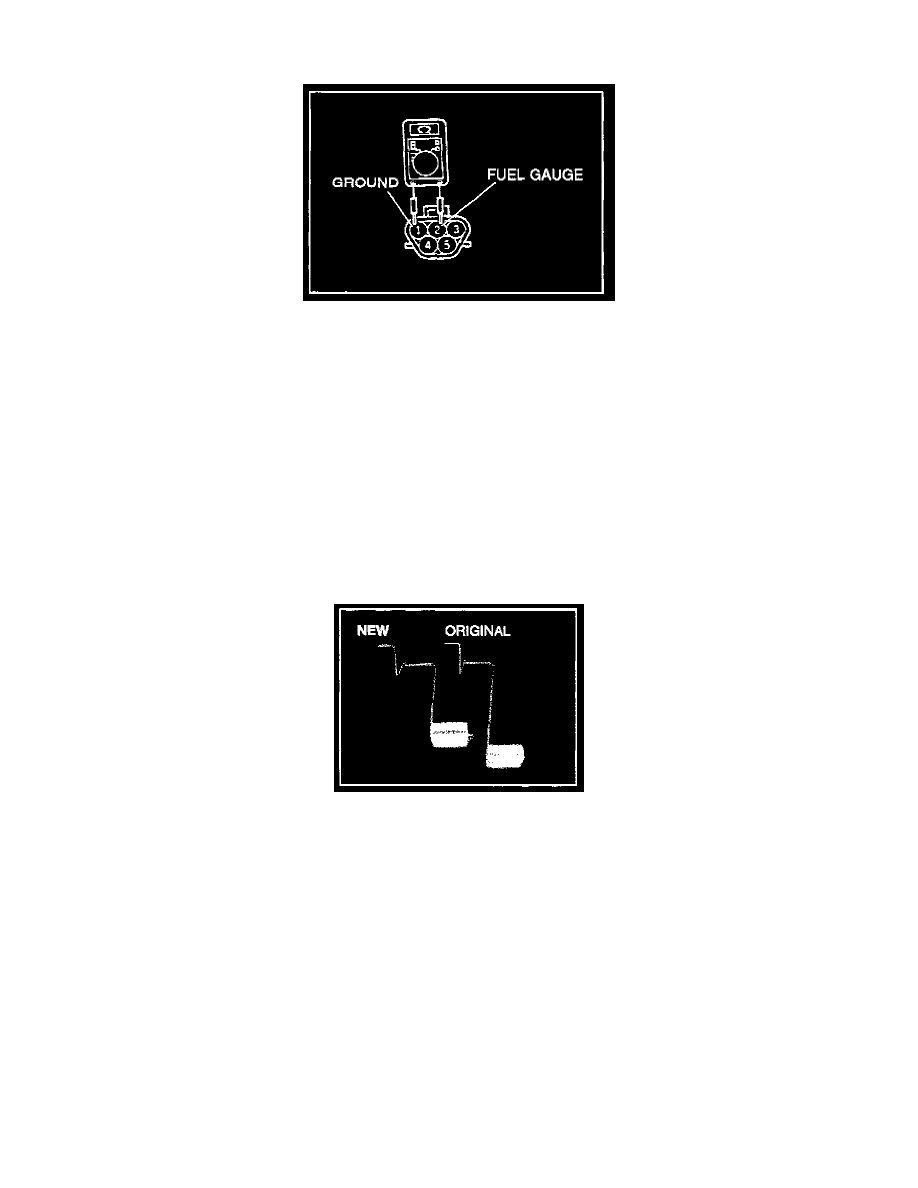
Attach the ohmmeter leads to the fuel pump connector pins as shown. Check the sending unit resistant with the float arm at the top of its travel
("FULL" position) and at the bottom ("EMPTY" position). The resistance readings must meet the following standard values:
FULL position (float arm UP) = 3 - 5 ohms
EMPTY position (float arm down) = 110 - 112 ohms
7.
Referring to the instructions in section 13C of the 1999 Galant service manual, reinstall the fuel pump sending unit into the fuel tank. Make sure to
align the marks on the tank and the fuel pump sending unit assembly. Proper alignment of these marks is necessary for correct fuel gauge
operation. Be careful with the fuel pump gasket during installation to prevent fuel leaks. The gasket can be reused, however, if there is any damage
to the gasket, replace it.
8.
Before returning the vehicle to the customer, thoroughly inspect the fuel pump sending unit assembly and all fuel connections to make sure there
are no fuel leaks.
PARTS INFORMATION
Part Number
Description
MR503060
Float Arm, fuel gauge sender
WARRANTY INFORMATION
Fuel Gauge Sender Float Arm Replacement
Nature Code: 51Z
Cause Code: 990
Labor Operation No. 135020XX
Time Allowance: 0.6 hr.
Warranty Coverage: 36 months/36,000 miles.
Special Warranty Information: Normal warranty procedures apply.