
Galant LS V6-3.0L SOHC (1999)
Fuel Pump Control Unit: Service and Repair
Removal and Installation
FUEL PUMP MODULE REPLACEMENT
1. Remove the rear seat cushion. (Refer to Rear Seat.)
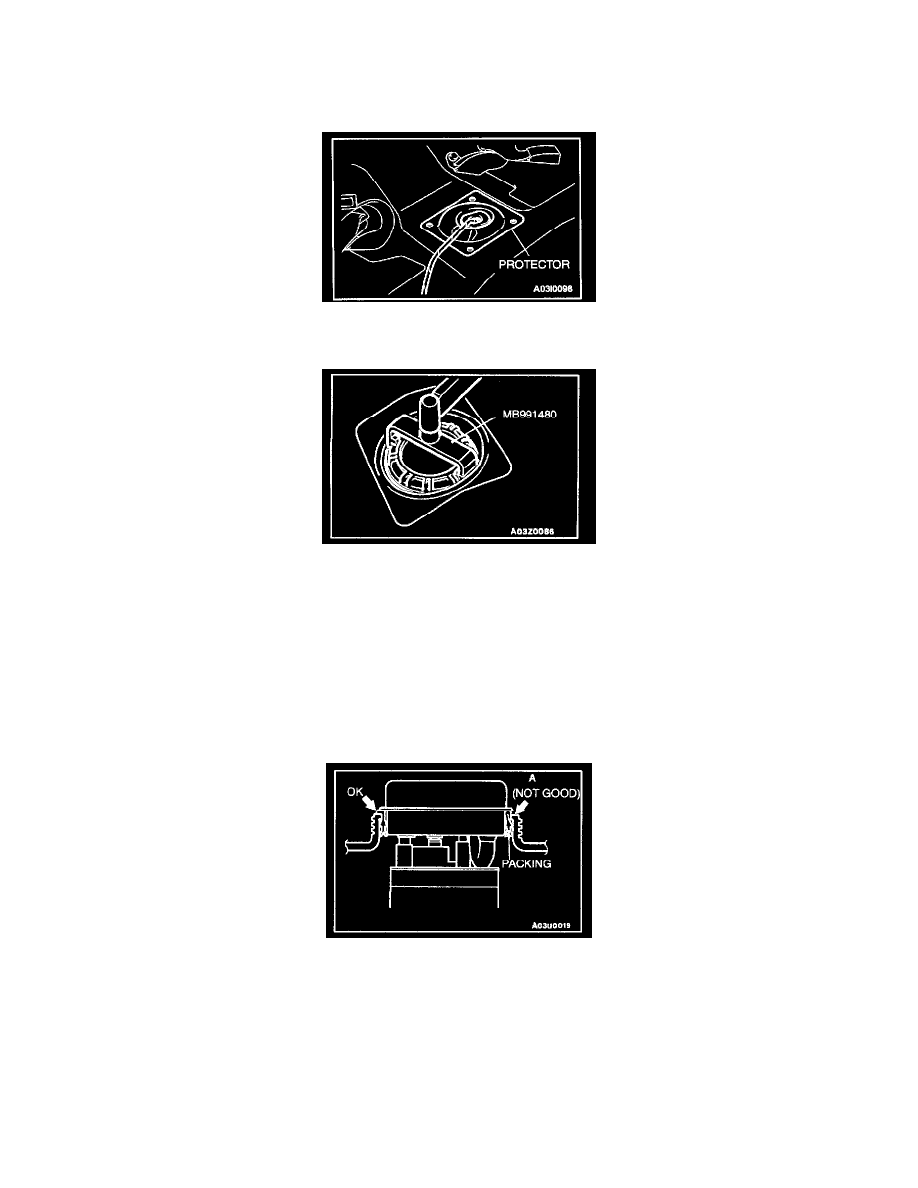
2. Remove the protector.
3. Bleed the residual pressure from inside the fuel pipe line to prevent the fuel from spraying out. (Refer to On-vehicle Service.)
4. Disconnect the hose and connector connections, and then use special tool MB991480 to remove the fuel pump module.
CAUTION: Install the packing to the fuel tank, and then install the fuel pump module to the fuel tank. Installing the packing to the fuel pump
module will damage the packing lip when installing the fuel pump module to the fuel tank, and fuel leakage will occur.
5. Check that the fuel tank packing is not damaged or deformed, and then securely install the packing to the fuel tank.
NOTE: If the packing is damaged or deformed, replace with new packing.
CAUTION:
-
Do not tilt the fuel pump module when installing.
-
The packing should not be folded over as shown by "A" in the illustration.
6. Apply soapy water to the inside of the packing, and then install the fuel pump module.
CAUTION: When tightening, be careful not to let the fuel pump module turn together with the cap. If the mating marks are misaligned, the float
may measure a remaining amount of fuel incorrectly, causing the low fuel warning light to malfunction.