
Lancer LS L4-2.0L SOHC (2002)
replaced. A sample copy of the customer notification letter is included in this bulletin. Due to the large number of vehicles involved in this campaign,
customer notification will be staggered over a three-month period, beginning at the end of September.
AFFECTED VEHICLES
2003-04 Outlander models produced before July 2003
2002-03 Lancer models produced before July 2003
2003 Lancer Evolution models produced before July 2003
PROCEDURE
IMPORTANT
Affected new or used inventory vehicles must be repaired before the vehicle is sold. A list of affected VINs in your dealership's inventory is enclosed
with this bulletin.
1.
Remove the air intake duct.
2.
Loosen the clamp at the intake hose connecti6n to the throttle body.
3.
Disconnect the air flow sensor underneath the air cleaner. Remove the air cleaner assembly.
4.
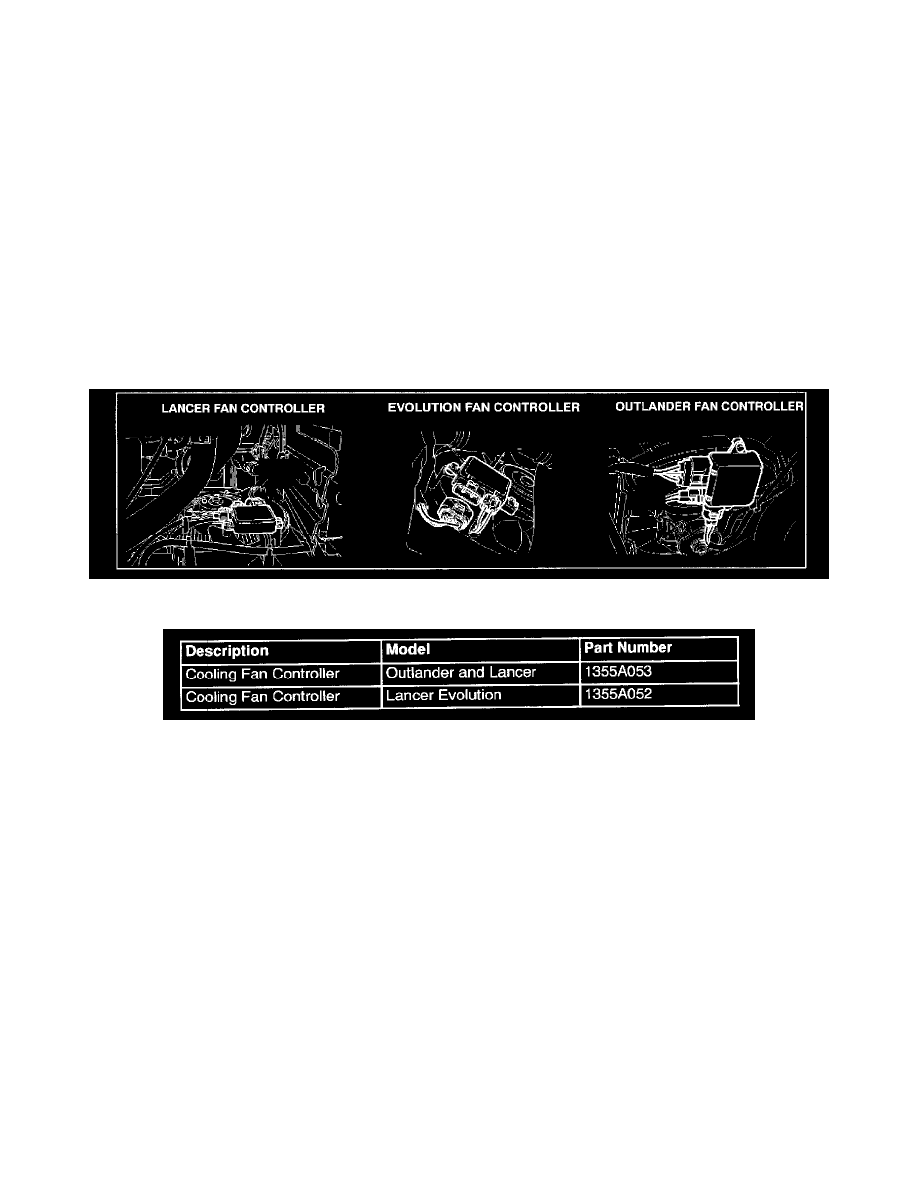
Disconnect the fan controller and remove it.
5.
Install the appropriate new fan controller listed in the PARTS INFORMATION section of this bulletin.
a.
Re-use the original fan controller bolts or screws and tighten to the specified torque:
Bolt: 3.92-4.90 Nm (2.9 - 3.6 in/lb)
Screw: 2.94-3.92 Nm (2.2 - 2.9 in/lb)
6.
Connect the fan controller harness to the new fan controller.
7.
Reinstall the air cleaner assembly and tighten to 8.0 - 10.0 Nm (5.9 - 7.4 in/lb).
8.
Tighten the clamp at the intake hose.
9.
Reinstall the air intake duct.
10.
Start the engine. Turn the A/C on and off to confirm proper operation.
PARTS INFORMATION
Use the Genuine Mitsubishi Parts listed below.
WARRANTY INFORMATION