
Lancer LS L4-2.0L SOHC (2002)
3. Wrap plastic tape around the shaft spline, and then install the TJ boot band (small) and TJ boot.
CAUTION:
^
The driveshaft joint use special grease. Do not mix old and new or different types of grease.
^
If the spider assembly has been cleaned, take special care to apply the specified grease.
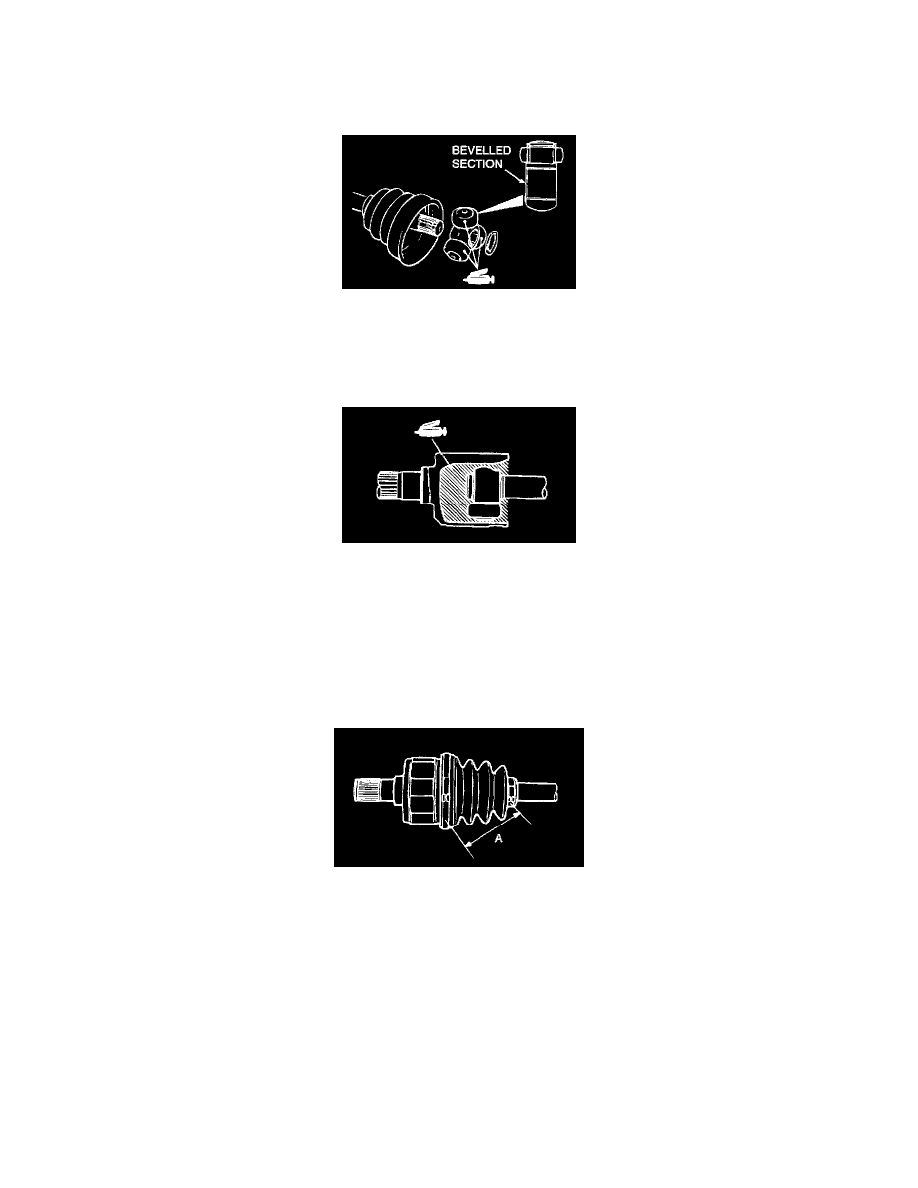
1. Apply the specified grease furnished in the repair kit to the spider assembly between the spider axle and the roller.
Specified grease: Repair kit grease
2. Install the spider assembly to the shaft from the direction of the spline bevelled section.
CAUTION: The driveshaft joint use special grease. Do not mix old and new or different types of grease.
3. After applying the specified grease to the T.J. case, insert the driveshaft and apply grease one more time.
Specified grease: Repair kit grease
Amount to use:
<LL, L> 125 ± 10 g (4.4 ± 0.4 oz.)
<M, SPORT> 135 ± 10 g (4.8 ± 0.4 oz.)
NOTE: The grease in the repair kit should be divided in half for use, respectively, at the joint and inside the boot.
>>C<< TJ BOOT BAND (SMALL)/TJ BOOT BAND (LARGE) INSTALLATION
Set the T.J. boot bands at the specified distance in order to adjust the amount of air inside the T.J. boot, and then tighten the T.J. boot bands
securely.
Standard value (A): 85 ± 3 mm (3.3 ± 0.12 inch)
INSPECTION
^
Check the driveshaft for damage, bending or corrosion.
^
Check the driveshaft spline part for wear or damage.
^
Check the spider assembly for roller rotation, wear or corrosion.
^
Check the groove inside TJ case for wear or corrosion.
^
Check the dynamic damper for damage or cracking.
^
Check the boots for deterioration, damage or cracking.
^
Check the dust cover for damage or deterioration.
RJ BOOT OR BJ BOOT (RESIN BOOT) REPLACEMENT