
Lancer LS L4-2.0L SOHC (2002)
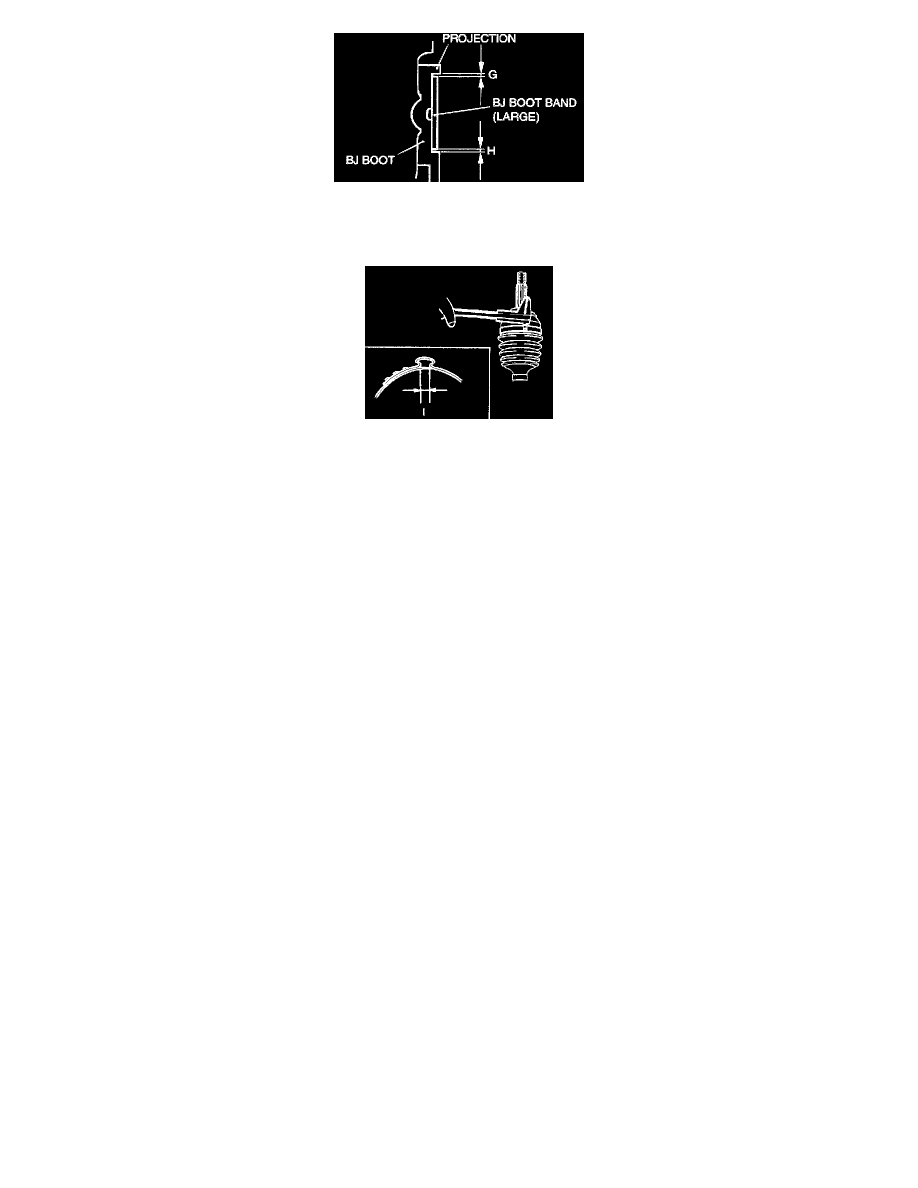
<For BJ boot>
Position the BJ boot band (large) so that there are even clearance at either end (G and H).
14. Use the special tool MB991561 to crimp the R.J. boot band (large) in the same way as in step 7.
15. Check that the crimping amount (I) of the boot band is at the standard value.
Standard value (I):
<For RJ boot> 1.0 - 1.5 mm (0.04 - 0.06 inch)
If the crimping amount is larger than 1.5 mm (0.06 inch)>
Readjust the value of (W) in step 12 according to the following formula, and then repeat the operation in step 14.
W = 3.0 mm (0.12 inch) - I
Example: I = 1.6 mm (0.06 inch), then W = 1.4 mm (0.055 inch).
If the crimping amount is smaller than 1.0 mm (0.04 inch)>
Remove the RJ boot band, readjust the value of (W) in step 12 according to the following formula, and then repeat the operations in steps 13 and
14 using a new RJ boot band.
W = 3.0 mm (0.12 inch) - I
Example: If I = 0.9 mm (0.035 inch), then W = 2.1 mm (0.08 inch).
<For BJ boot> 2.4 - -2.8 mm (0.10 - 0.11 inch)
<If the crimping amount is larger than 2.8 mm (0.11 inch)> Readjust the value of (W) in step 12 according to the following formula, and then
repeat the operation in step 14.
W = 5.5 mm (0.22 inch) - I
Example: If I = 2.9 mm (0.11 inch), then W = 2.6 mm (0.10 inch).
If the crimping amount is smaller than 2.4 mm (0.10 inch)> Remove the BJ boot band, readjust the value of (W) in step 12 according to the
following formula, and then repeat the operations in steps 13 and 14 using a new BJ boot band.
W = 5.5 mm (0.22 inch) - I
Example: If I = 2.3 mm (0.09 inch), then W = 3.2 mm (0.13 inch).
16. Check that the boot band is not sticking out past the place where it has been installed If the boot band is sticking out, remove it and then repeat the
operations in steps 13 to 15 using a new boot band.