
Mirage L4-1468cc 1.5L SOHC 12 Valve (1996)
(2) Move the timing belt tensioner to the water pump side and temporarily tighten the bolt so that the tensioner doesn't return.
(3) Remove the timing belt.
Caution: If the timing belt is to be re-used, use chalk to mark (on its flat side) an arrow indicating the clockwise direction.
TIMING BELT INSTALLATION
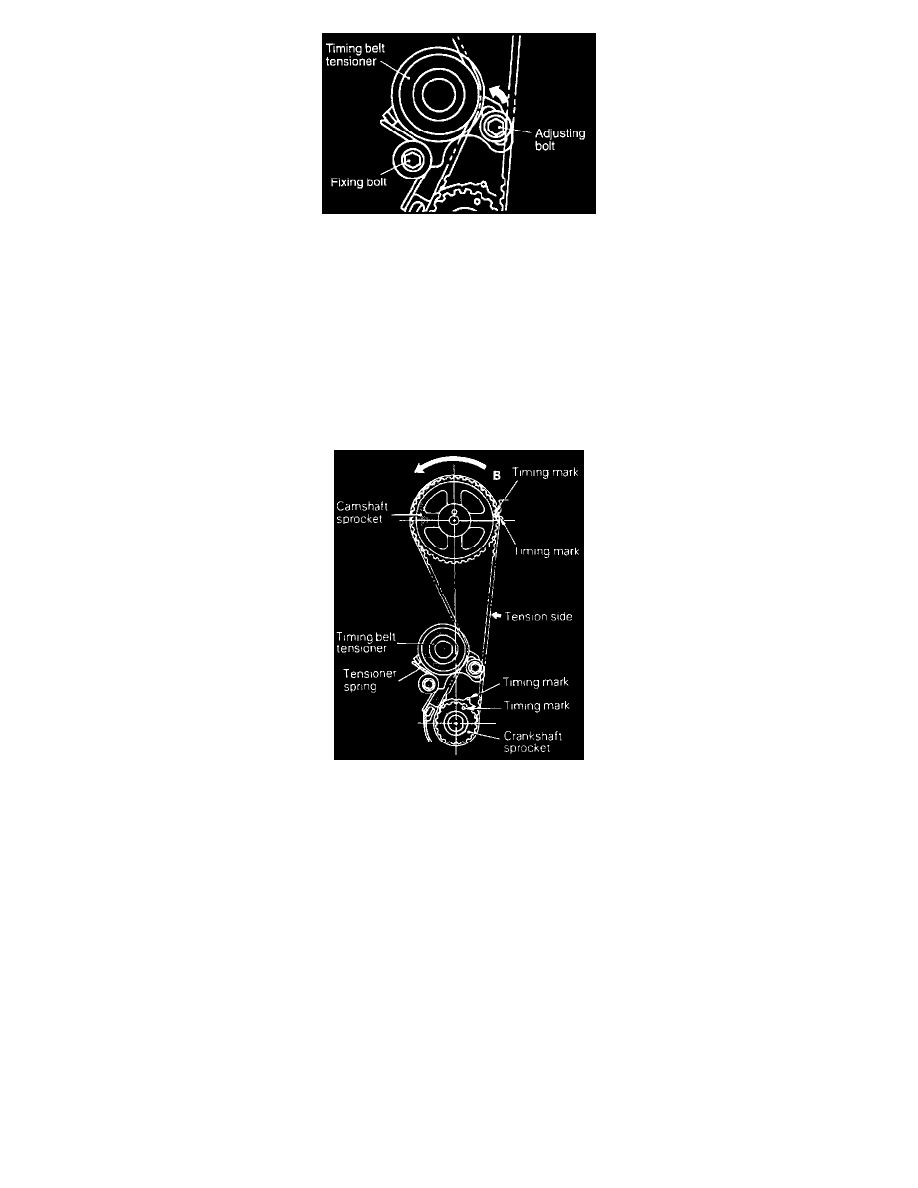
(1) Align the timing marks on the camshaft sprocket and crankshaft sprocket. (Now the piston in No.1 cylinder is at the top dead center on the
compression stroke.)
(2) Set the timing belt first on crankshaft sprocket and then keeping the tension side of belt tight, set on the camshaft sprocket.
Caution: If the timing belt is re-used, install so that the arrow marked on it at time of removal is pointing in the clockwise direction.
(3) Apply counterclockwise force (in the direction B) to the camshaft sprocket to give tension to the belt on tension side and make sure that all
timing marks are lined up.
(4) Install the crankshaft pulley temporarily. This is to prevent the belt from coming off when crankshaft is turned.
TIMING BELT LOWER COVER / TIMING BELT UPPER COVER INSTALLATION