
Mirage L4-1468cc 1.5L SOHC 12 Valve (1996)
Control Arm: Service and Repair
Front
1. Raise and support vehicle, then remove front wheel.
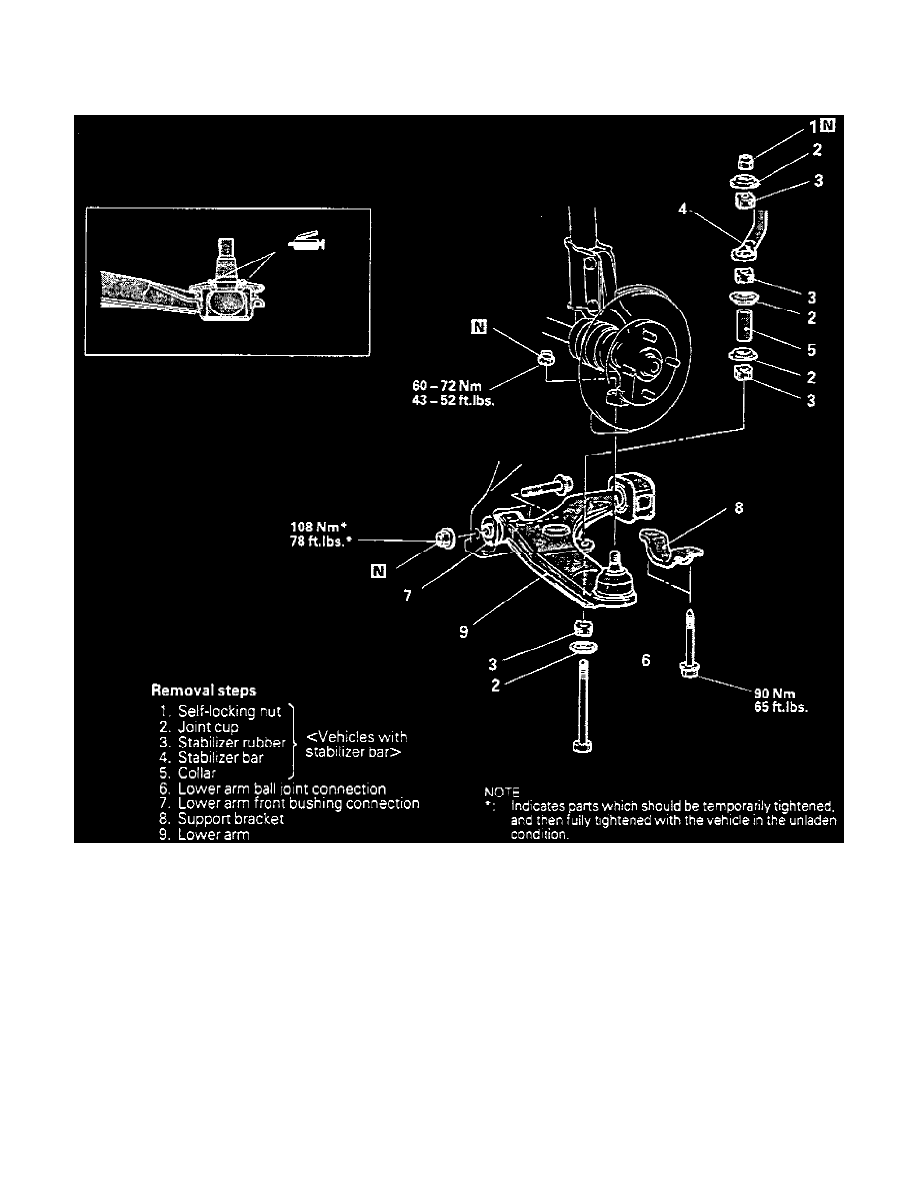
Fig. 4 Lower Control Arm Replacement
2. Remove lower arm in sequence shown, Fig. 2.
3. Reverse procedure to install, noting following:
a. Tighten stabilizer bar mounting bolt self-locking nut until 0.87 inch of bolt protrudes above nut.
b. Tighten all bolts and nuts to specifications.