
Mirage L4-1597cc 1.6L DOHC (1990)
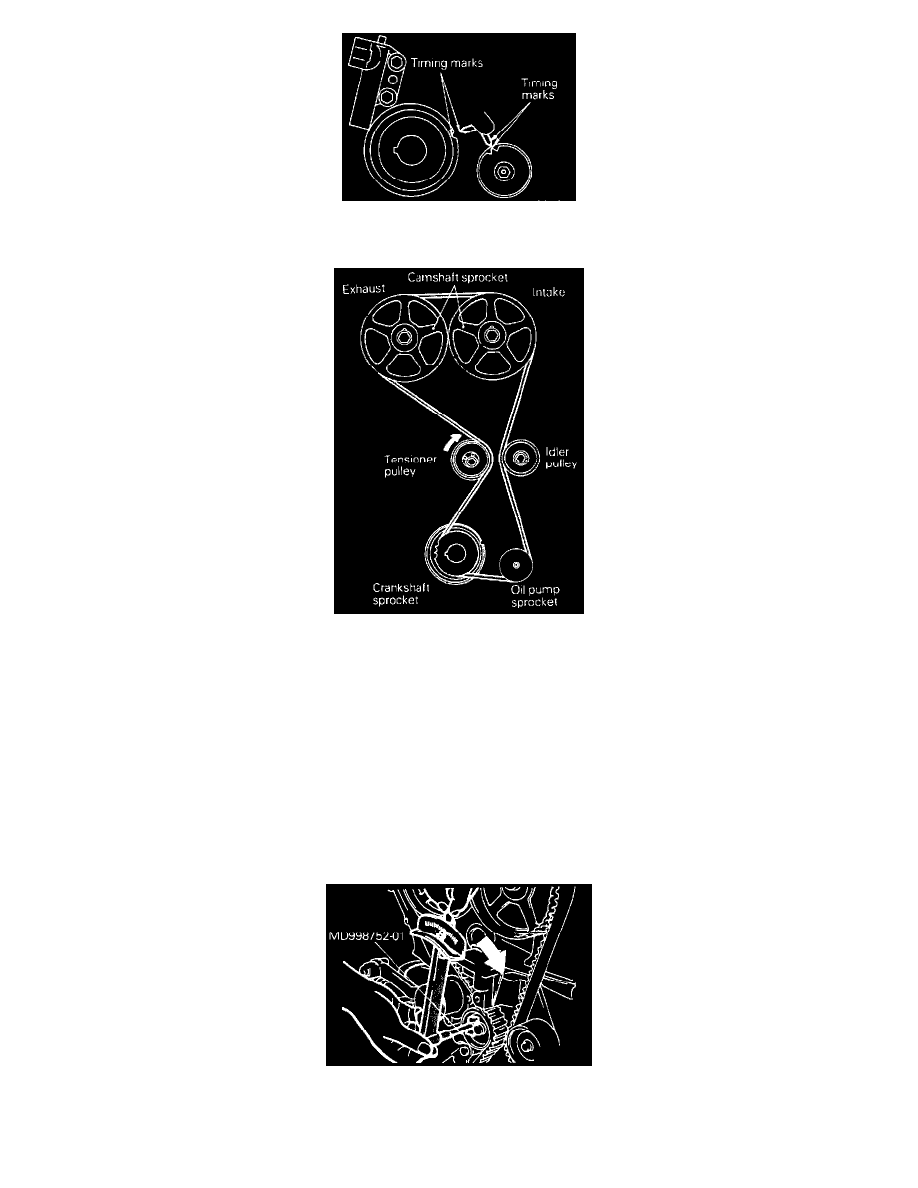
(2) Align the crankshaft sprocket timing marks.
(3) Align the oil pump sprocket timing marks.
(4) Install the timing belt around sprockets as follows:
(a) Install the timing belt around the tensioner pulley and crankshaft sprocket and secure the timing belt onto the tensioner pulley with your
left hand.
(b) Pulling the belt with your right hand, install it around the oil pump sprocket.
(c) Install the belt around the idler pulley.
(d) Install it around the intake camshaft sprocket.
(e) Turn the exhaust camshaft sprocket one tooth clockwise to align its timing mark with the cylinder head top surface (see illustration in
step 1). Then, pulling the belt with both hands, install it around the exhaust camshaft sprocket.
(f) Gently raise the tensioner pulley as shown by the arrow, so that the belt does not sag. and temporarily tighten the center bolt.
Adjustment of Timing Belt Tension
(1) After turning the crankshaft 1/4 turn counterclockwise, turn it clockwise to move the No.1 cylinder to top dead center.
(2) Loosen the center bolt, and then, as shown in the illustration, attach the special tool and a torque wrench and apply a torque of 2.6 - 2.8 Nm
(1.88 - 2.03 ft.lbs.). If the body interferes with the special tool and the torque wrench, use a jack to slightly raise the engine assembly.
NOTE: Use a torque wrench that is capable of measurement within a range of 0 - 3 Nm (0 - 2.2 ft.lbs.).