
Mirage L4-1597cc 1.6L DOHC (1990)
Fuel Tank: Testing and Inspection
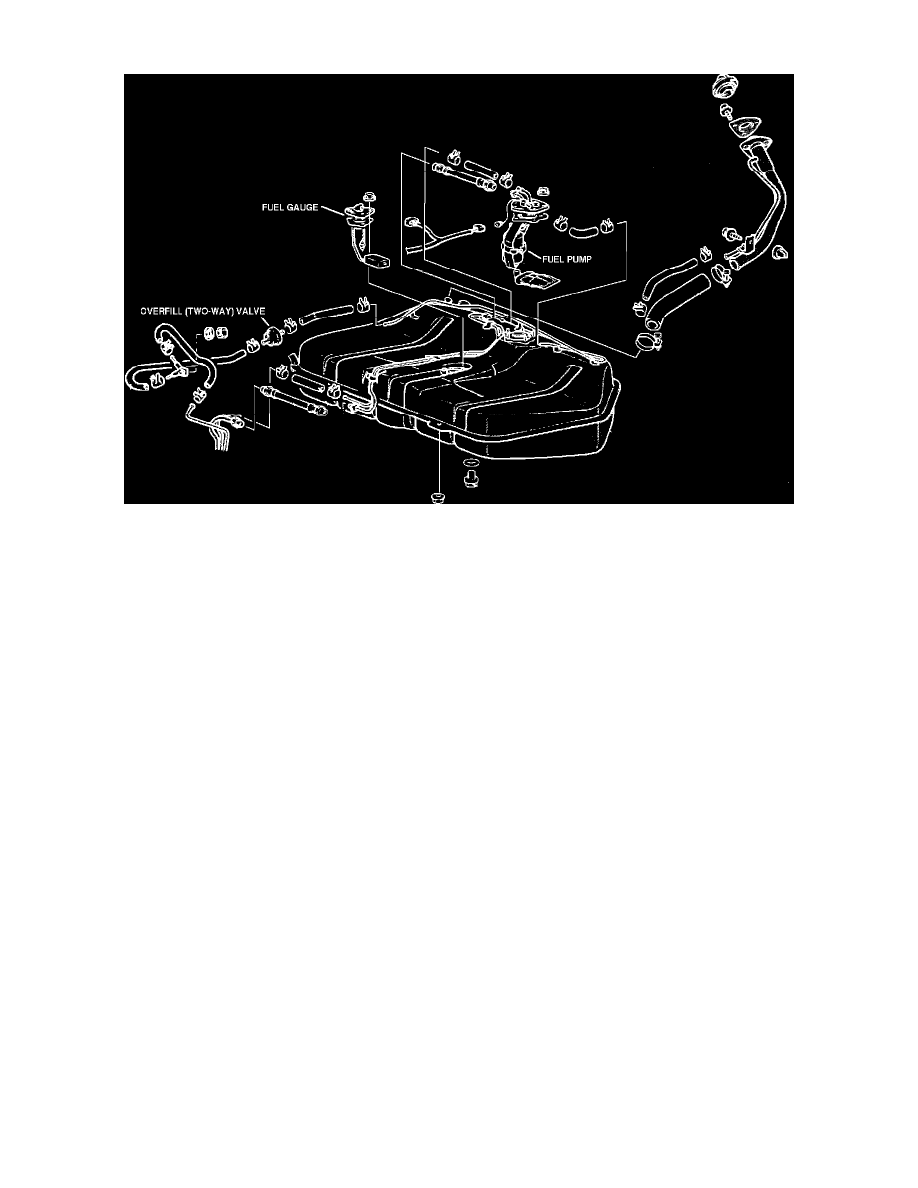
Fuel Tank And Components
NOTE: To perform a complete inspection as listed below it is necessary to remove the fuel tank. For these procedures refer to COMPONENT
REPAIR AND REPLACEMENT PROCEDURES.
INSPECTION:
1.
Check the hoses and the pipes for cracks or damage.
2.
Check the fuel tank cap for proper operation.
3.
Check the fuel tank for deformation, corrosion or cracking.
4.
Check the inside fuel of the tank for dirt or foreign material.
5.
Check the in-tank fuel filter for damage or restriction.
6.
Test the two-way valve for proper operation.
7.
To check the two-way valve, lightly breathe into the inlet and outlet. If air passes through after slight resistance, then the valve is good.
FUEL TANK LEAK TEST:
NOTE: Perform this test only after the fuel tank has been removed and cleaned.
1.
Plug all outlets as follows:
a.
Install the filler neck and hoses, upper neck assembly and filler cap.
b.
Install the fuel pump/fuel level sending unit assembly with the seal and plug the fuel lines.
c.
Install a short piece of fuel line on the fuel level sending unit vent tube.
2.
Apply air pressure to the tank through the vent tube. When air can be heard escaping from the filler neck cap, approximately 1.0 - 1.5 psi (7.0 -
10.0 kPa) pinch the fuel line hose to retain pressure.
CAUTION: More than 1.5 lbs. of pressure will permanently damage the tank.
3.
Test suspect area for leaks with a soap solution or by submersion. If a leak is detected, repair or replace the tank or leaking component.
WARNING: DO NOT attempt to weld on the fuel tank. Even after purging, the fuel tank presents a potentially fatal explosion hazard.