
Mirage L4-1597cc 1.6L DOHC Turbo (1989)
2. Never re-use a damaged drive belt.
(2) Remove the crankshaft sprocket bolts.
(3) Remove the crankshaft pulley bolts, and remove the crankshaft pulley.
2. REMOVAL OF ENGINE MOUNT BRACKET
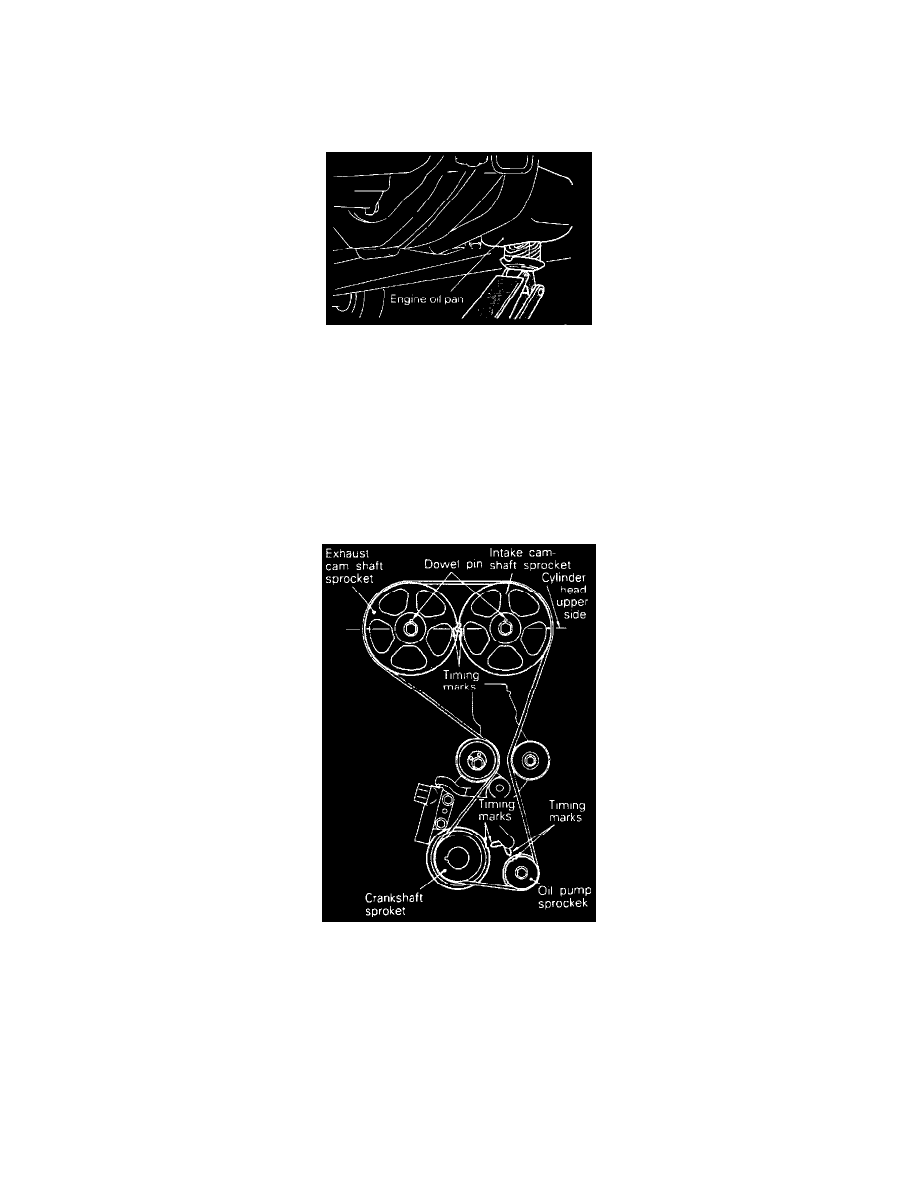
(1) With a wooden block placed against the oil pan part of the engine, jack up the vehicle.
Caution: Jack up gently, so as not to apply a load to the various parts.
(2) Remove the engine mount bracket.
3. REMOVAL OF DRIVE BELT
-
Before removing the drive belt, loosen the water pump pulley mounting bolts.
18. REMOVAL OF AUTO TENSIONER
(1) Turn the crankshaft clockwise and align the timing marks so as to bring the No.1 cylinder to compression top-dead-center position.
Caution: The crankshaft must always be rotated clockwise.
- At this time the timing marks of the camshaft sprocket and the upper surface of the cylinder head should coincide, and the dowel pin of
the camshaft sprocket should be at the upper side.
(2) Remove the auto tensioner.
19. REMOVAL OF TIMING BELT
Caution: Water or oil on the belt shorten its life drastically, 50 the removed timing belt, sprocket, and tensioner must be free from oil