
Mirage L4-1597cc 1.6L SOHC Turbo (1985)
Ball Joint: Service and Repair
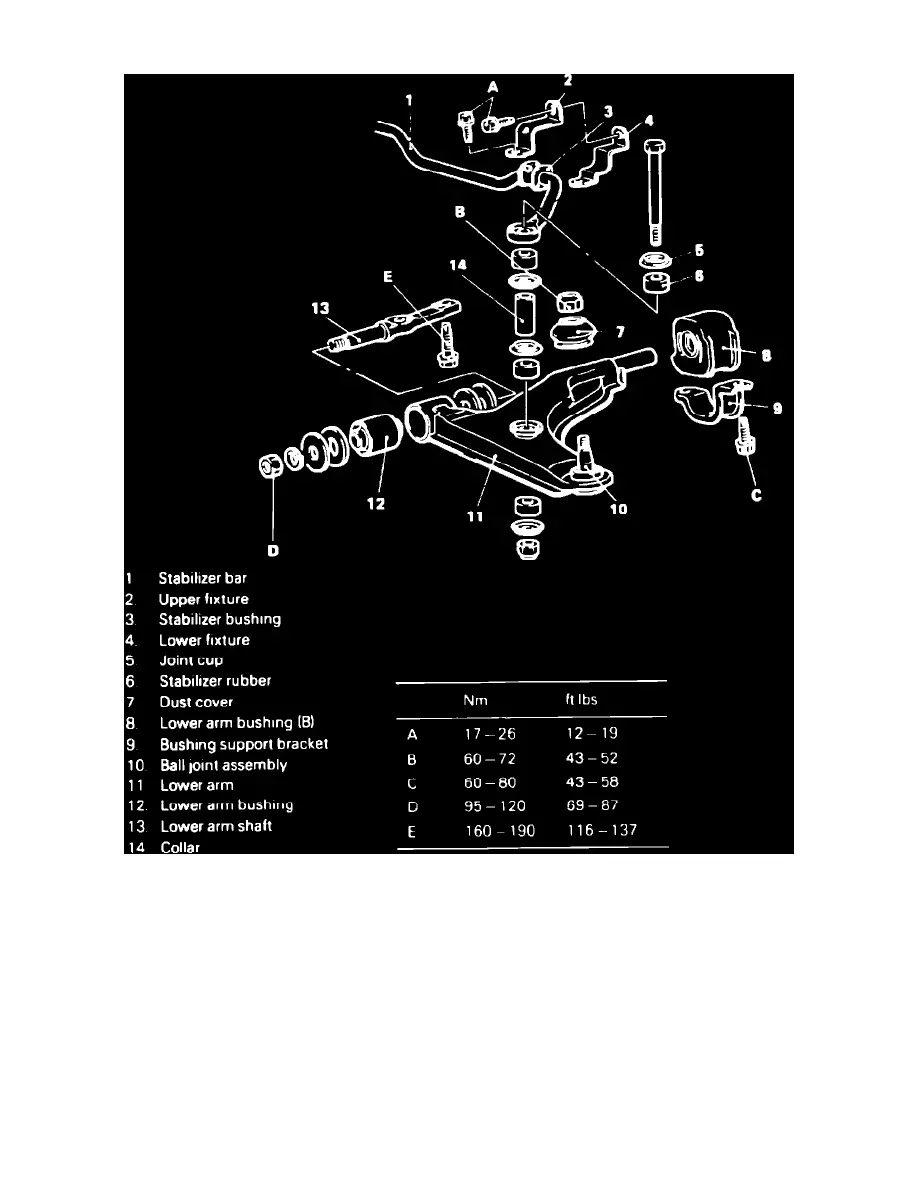
Fig. 7 Exploded view of lower control arm & stabilizer bar.
1.
Raise and support vehicle, then remove under cover from under body.
2.
Disconnect stabilizer bar from lower control arm, Fig. 7.
3.
Disconnect lower control arm ball joint from knuckle using a suitable tool.
4.
Remove bushing support bracket attaching bolts, then the bushing support bracket.
5.
Loosen lower control arm shaft nut, then remove lower control arm shaft attaching bolts.
6.
Remove lower control arm assembly from vehicle.
7.
Inspect control arm and bushings, replacing as necessary.
8.
Check ball joint starting torque. Starting torque should be 22-87 inch lbs. Replace lower control arm and ball joint assembly if starting torque is
not as specified.
9.
Check ball joint dust cover for cracks and damage. If necessary, remove defective dust cover and replace with new cover using tool No.
MB990800 or equivalent.
10.
Reverse procedure to install. Refer to Fig. 7 for torque specifications.