
Mirage L4-1597cc 1.6L SOHC Turbo (1985)
2.
Press the glass gently so that no adhesive is squeezed out from under the glass edge.
NOTE:
A.
Do not move the glass and mouldings after installing them onto the body.
B.
Place the glass in the original position.
C.
Use care not to cover the water drainage groove with adhesive.
3.
After bonding the glass to the body, apply 3M Super Fast Urethane Auto Glass Sealant (# 8609 or equivalent) completely around the outside
perimeter of the bonded area (Figure 5).
Figure 6
4.
Perform a water test for the newly bonded glass. Use a gentle cold water spray, being careful not to direct a powerful stream of water on the new
adhesive. Allow the water to flow over the edges of the glass. In the event there are leaks, carefully dry the leak area and apply sealant to the leak
point (Figure 6).
CAUTION
If it is necessary to move the vehicle, MOVE IT SLOWLY.
5.
Using a clean lint free cloth liberally dampened with GLOW Chemical Solvent GS-35, 3M Part number (8984 or equivalent) wipe away dirt from
the glass perimeter and the body. DO NOT DAMAGE THE NEW ADHESIVE SEAL.
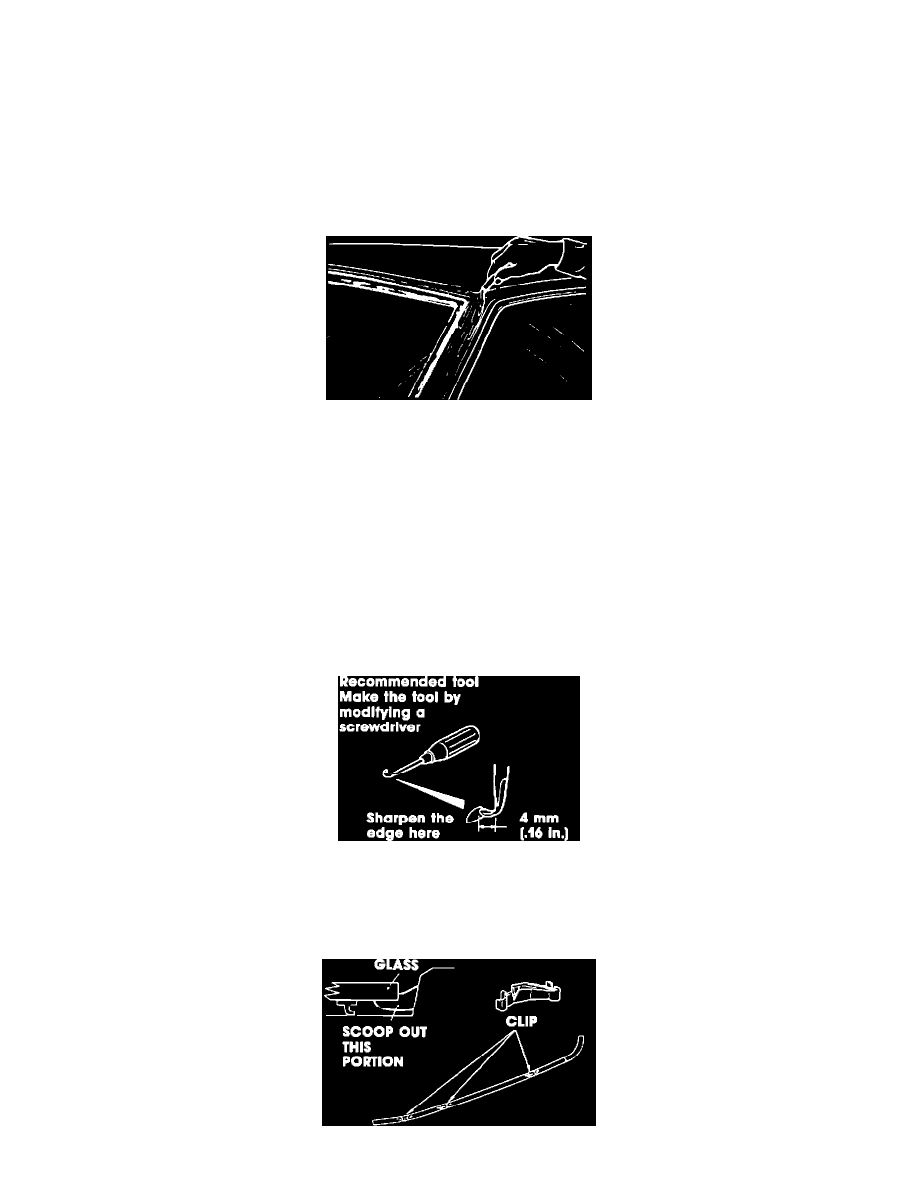
Window Moulding Replacement Procedure
Figure 7
WINDOW MOULDING WITH CLIP REPLACEMENT PROCEDURE
1.
Cut the old adhesive using a tool similar to figure 7.