
Mirage L4-1795cc 1.8L SOHC 16 Valve (1995)
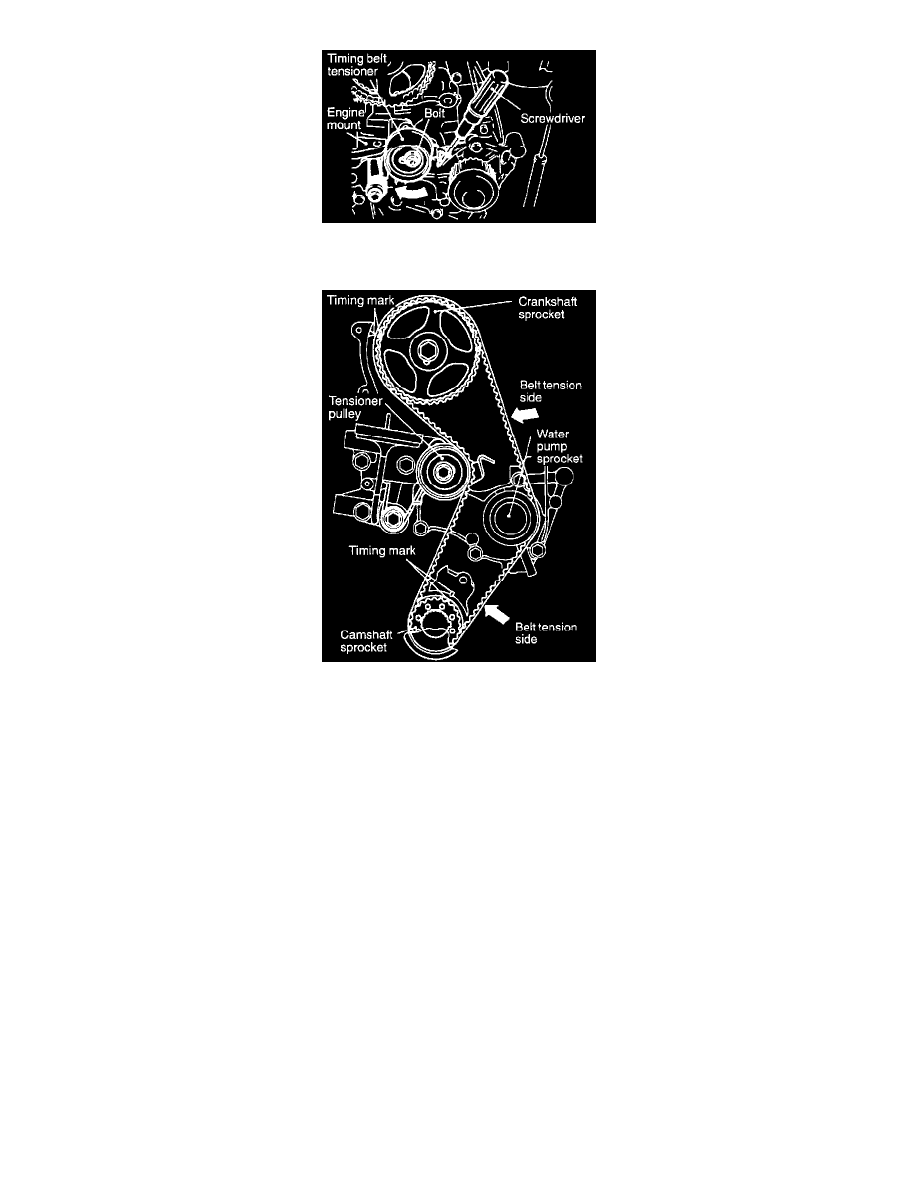
(1) With the timing belt tensioner bolt loosened, use a screwdriver to fully turn the timing belt tensioner as close to the engine mount as
possible, and then temporarily tighten the tensioner bolt.
(2) Align the camshaft sprocket and the crankshaft sprocket timing marks.
(3) Install the timing belt in the following order, while making sure that the tension side of the belt is not slackened.
1. Crankshaft sprocket
2. Water pump sprocket
3. Camshaft sprocket
4. Tensioner pulley
Caution: After installing the timing belt, apply force to turn the camshaft sprocket counterclockwise, and recheck that the belt is
fully tensioned and that each timing mark is in the proper position.
TIMING BELT TENSION ADJUSTMENT
(1) Initially loosen the fixing bolt of the tensioner pulley fixed to the engine mount side by 1/2 - 1/4 turn, and use the force of the tensioner
spring to apply tension to the belt.
(2) Turn the crankshaft clockwise for two rotations, and recheck that the timing marks on each sprocket are aligned.
Caution: As the purpose of this procedure is to apply the proper amount of tension to the tension side of the timing belt by using the
cam driving torque, turn the crankshaft only by the amount given above. Always turn the crankshaft clockwise.