
Mirage L4-1795cc 1.8L SOHC 16 Valve (1995)
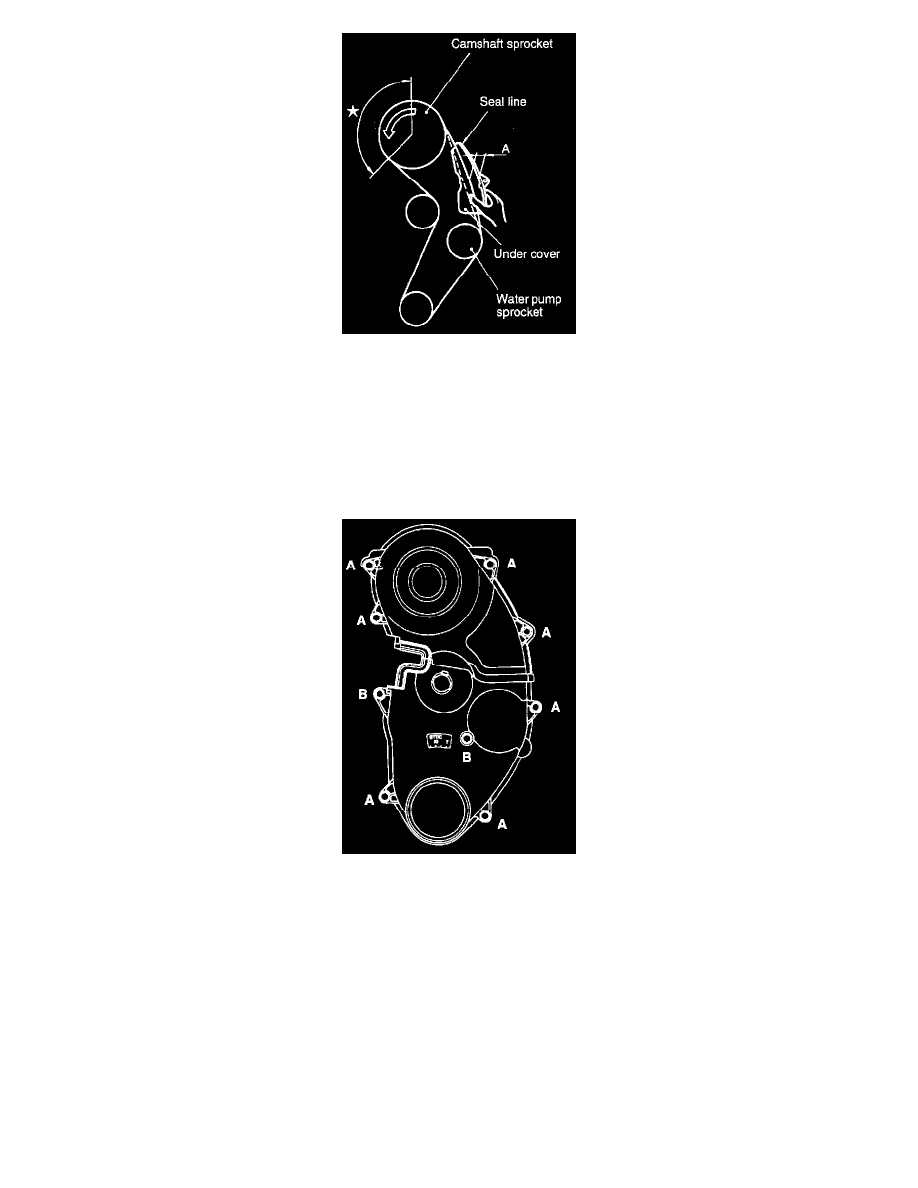
(3) Check that all belt teeth in the section marked with an "*" are lifted up and that the teeth in each sprocket are engaged. Then secure the
tensioner pulley.
(4) Lastly, lightly clamp the center of the span between the camshaft sprocket and the water pump sprocket on the belt tension side with your
thumb and forefinger as shown in the illustration. Then check that the clearance A between the reverse surface of the belt and the inside of
the under cover seal line is at the standard value.
Standard value: Approx. 30 mm (1.18 in.)
TIMING BELT LOWER COVER / TIMING BELT UPPER COVER INSTALLATION
Install the bolts, being careful not to mistake the bolt sizes.
Use:
A bolt: 6 x 18 (0.24 x 0.71)
B bolt: 6 x 30 (0.24 x 1.18)
[diameter x length mm (in.)]
CRANKSHAFT PULLEY / CRANKSHAFT BOLT INSTALLATION
NOTE: When installing the crankshaft pulley bolt, install so that the sharp side of the crankshaft pulley washer is at the pulley side.
(1) Apply engine oil to the bearing surface and to the thread section of the crankshaft bolt.