
Mirage Sedan DE L4-1468cc 1.5L SOHC MFI (1997)
Brake Pedal Assy: Testing and Inspection
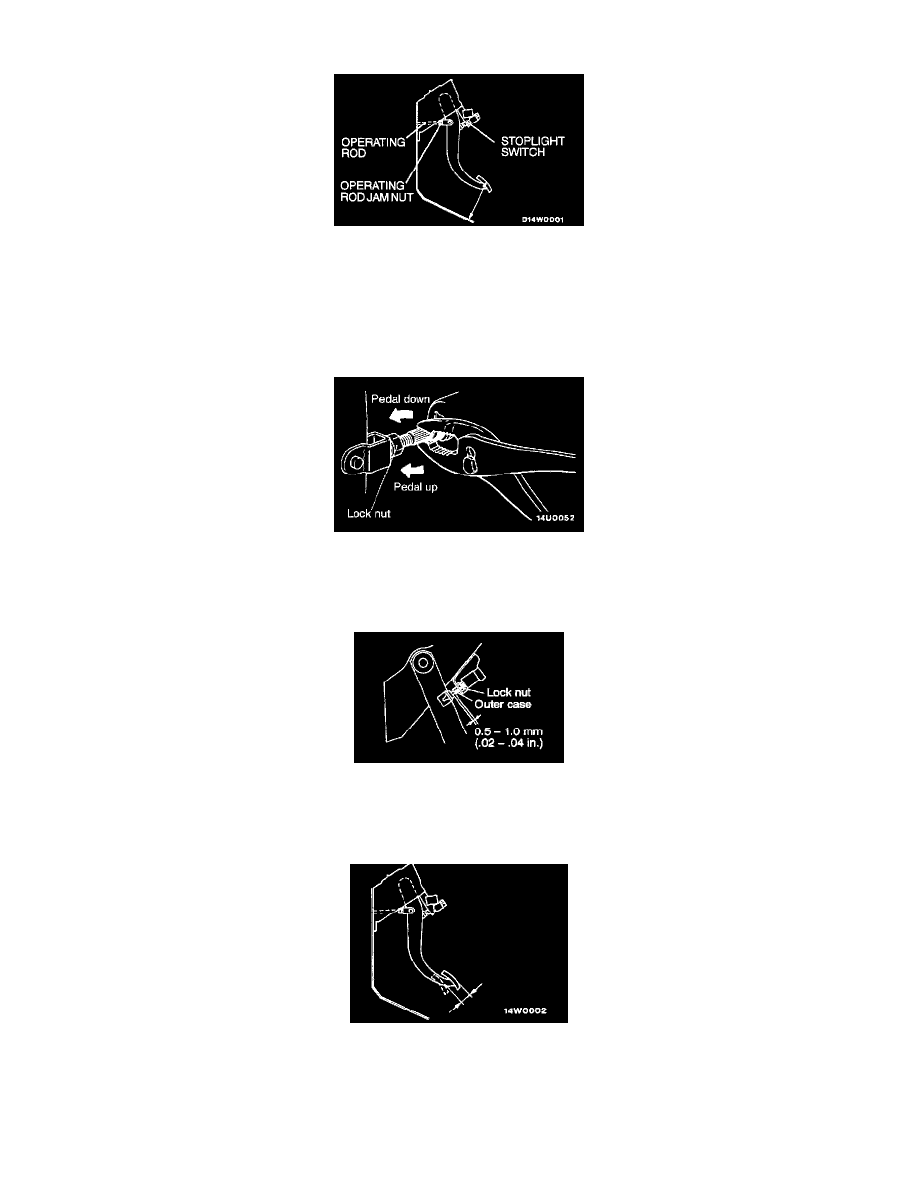
BRAKE PEDAL HEIGHT CHECK
1. Turn up the carpet under the brake pedal.
2. Measure the brake pedal height as illustrated. The standard value is 163.5 - 166.5 mm (6.44 - 6.56 inch) If the brake pedal height is not within the
standard value, follow the procedure below.
BRAKE PEDAL HEIGHT ADJUSTMENT
1. Disconnect the stop light switch connector.
2. Adjust the brake pedal height by turning the operating rod with pliers (with the operating rod lock nut loosened), until the correct brake pedal
height is obtained.
3. Secure by tightening the lock nut of the operating rod.
4. Push the stop light switch in the direction of the pedal stroke until it stops. The switch will slide if it is pushed firmly.)
5. Lift up the pedal until the operating rod is fully extended, and then slide the stop light switch back to the required position. Adjust the position of
the switch by turning it until the distance shown in the illustration is correct.
6. Connect the connector of the stop light switch.
7. Check that the stop light is not illuminated with the brake pedal released.
BRAKE PEDAL FREE PLAY
With the engine stopped, remove the vacuum in the power brake booster by depressing the brake pedal two or three times. Press the pedal down by
hand, and confirm that the amount of movement before resistance is met (the free play) is within 3 - 8 mm (0.12 - 0.31 inch)
NOTE: If the free play exceeds the standard value, it is probably due to excessive play between the retaining ring bolt and brake pedal arm.
Check for excessive clearance and replace faulty parts as required.