
Mirage Sedan DE L4-1468cc 1.5L SOHC MFI (1997)
Piston Ring: Service and Repair
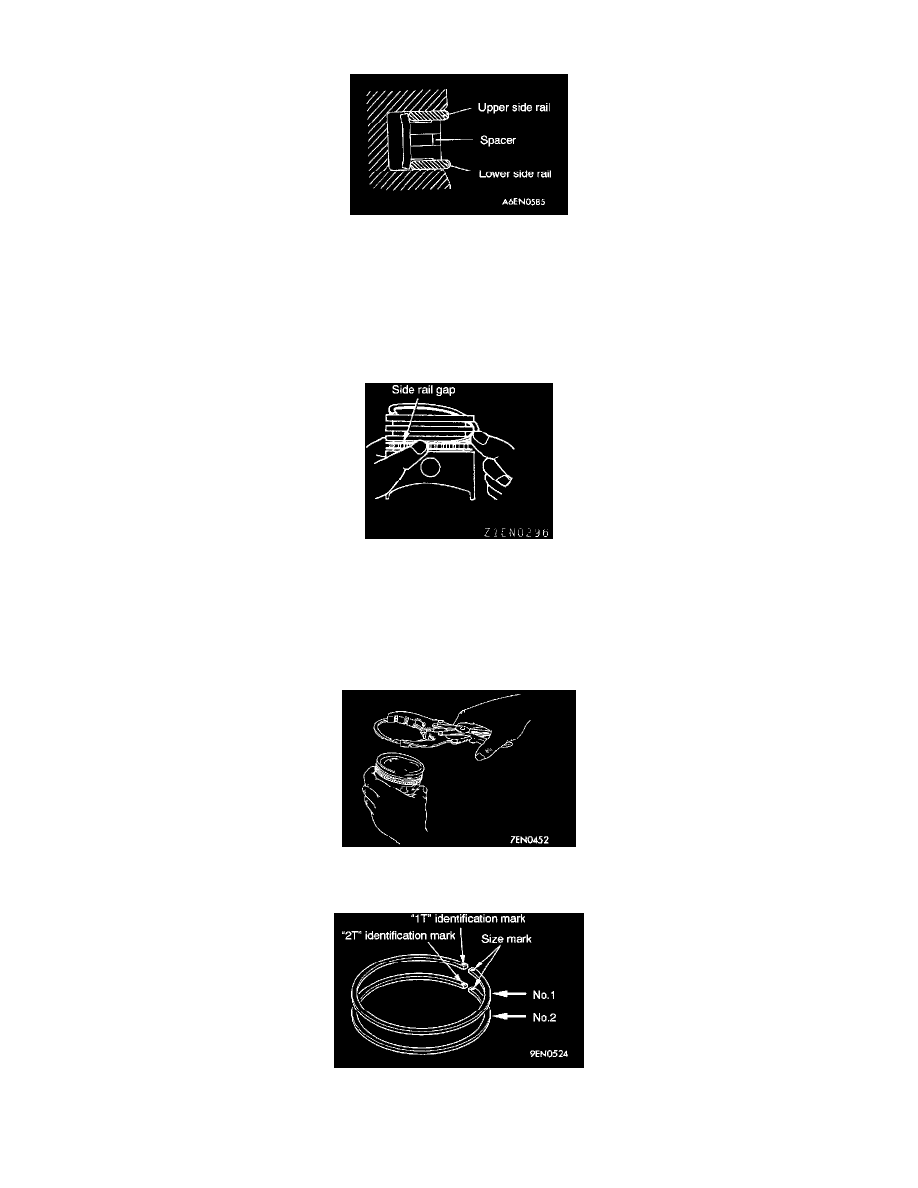
OIL RING
1. Fit the oil ring spacer into the piston ring groove.
NOTE: The side rails and spacer may be installed in either direction. Also, new spacers and side rails are colored for identification of their sizes.
Size/Identification
Standard: None
0.50 mm oversize: Blue
1.00 mm oversize: Yellow
2. Install the upper side rail. To install the side rail, first fit one end of the rail into the piston groove, then press the remaining portion into position
by finger. See illustration. Use of ring expander to expand the side rail end gap can break the side rail, unlike other piston rings.
NOTE: Do not use piston ring expander when installing side rail.
3. Install the lower side rail in the same procedure as described in step No. 2.
4. Make sure that the side rails move smoothly in either direction.
PISTON RING NO. 1 AND 2
1. Using piston ring expander, fit No. 2 and then No. 1 piston ring into position.
2. The ring end is provided with an identification mark. No. 1 ring "1T" and No. 2 ring "2T".
3. Install piston rings with identification mark facing up, to the piston crown side.
4. Piston rings have one of the following size marks stamped according to their size.