
Mirage Sedan LS L4-1834cc 1.8L SOHC MFI (1999)
Fuel Gauge Sender: Testing and Inspection
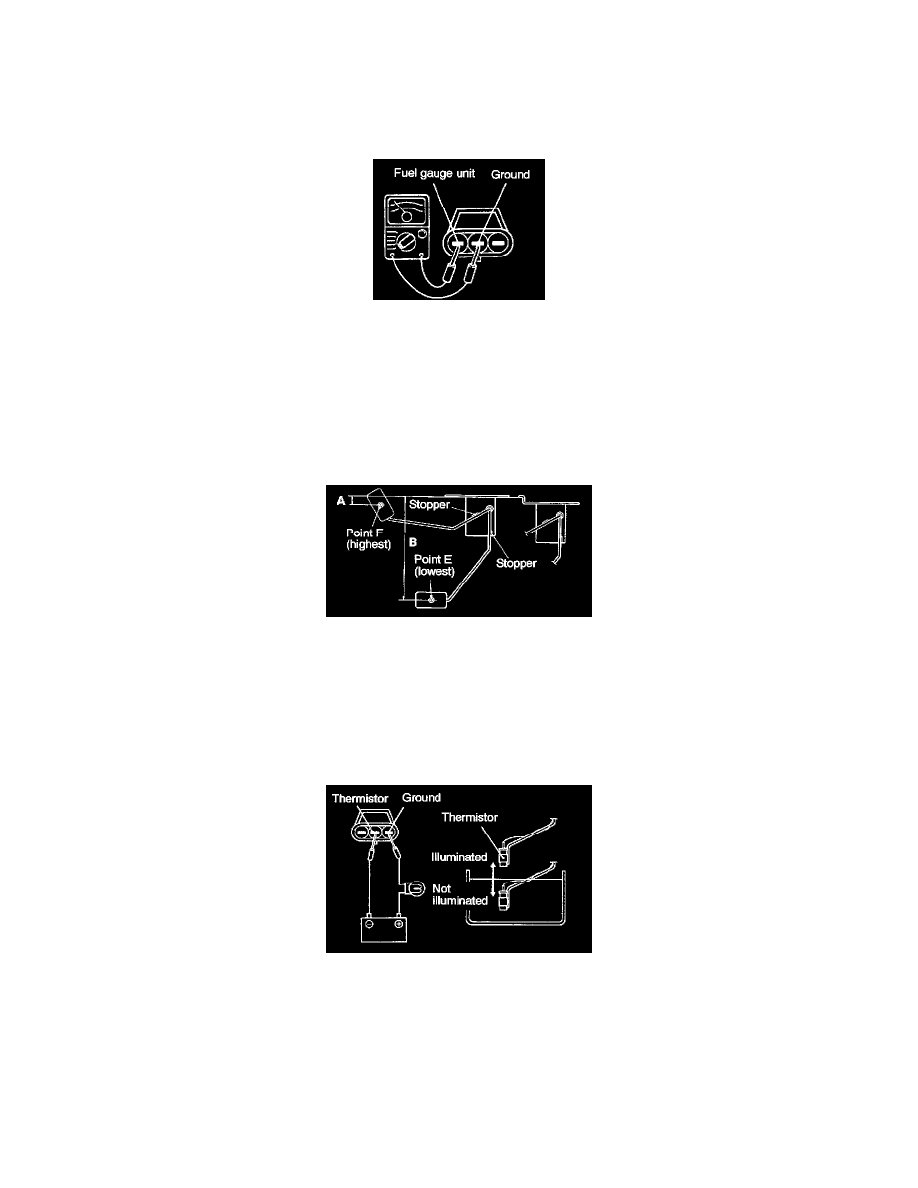
FUEL GAUGE UNIT CHECK
Remove the fuel gauge unit from the fuel tank.
FUEL GAUGE UNIT RESISTANCE
1. Check that the resistance value between the fuel gauge terminal and ground terminal is at standard value when fuel gauge unit float is at point F
(highest) and point E (lowest).
Standard value:
Point F: 0.9 - 5.1 ohm
Point E: 102.3 - 117.7 ohm
2. Check that resistance value changes smoothly when float moves slowly between point F (highest) and point E (lowest).
3. If all checks are correct, proceed to fuel gauge unit float height check. If any check is not correct, replace the fuel gauge unit.
FUEL GAUGE UNIT FLOAT HEIGHT
1. Move float and measure the height A at point F (highest) and B at point E (lowest) with float arm touching stopper.
Standard value:
A: 17.4 mm
B: 130.2 mm
2. Adjust the float arm to the standard value, then proceed to the thermistor check.
THERMISTOR
1. Connect fuel gauge unit (thermistor) to battery via test lamp (12 V - 3.4 W). Immerse in water.
2. Condition is good if lamp goes off when the thermistor is immersed in water and comes on when it is taken out of water.
CAUTION: After finishing this test, wipe the unit dry and install it in the fuel tank.
3. If all checks are correct, the fuel gauge unit is OK. If any check is not correct, replace the fuel gauge unit.