
Montero V6-3.8L SOHC (2005)
Brake Pedal Assy: Testing and Inspection
BRAKE PEDAL CHECK AND ADJUSTMENT
Brake Pedal Height
1. Turn up the carpet etc. under the brake pedal.
2. Measure the brake pedal height as illustrated.
Standard value: 192 - 195 mm (7.6 - 7.7 inches)
3. If the brake pedal height is not within the standard value, adjust as follows.
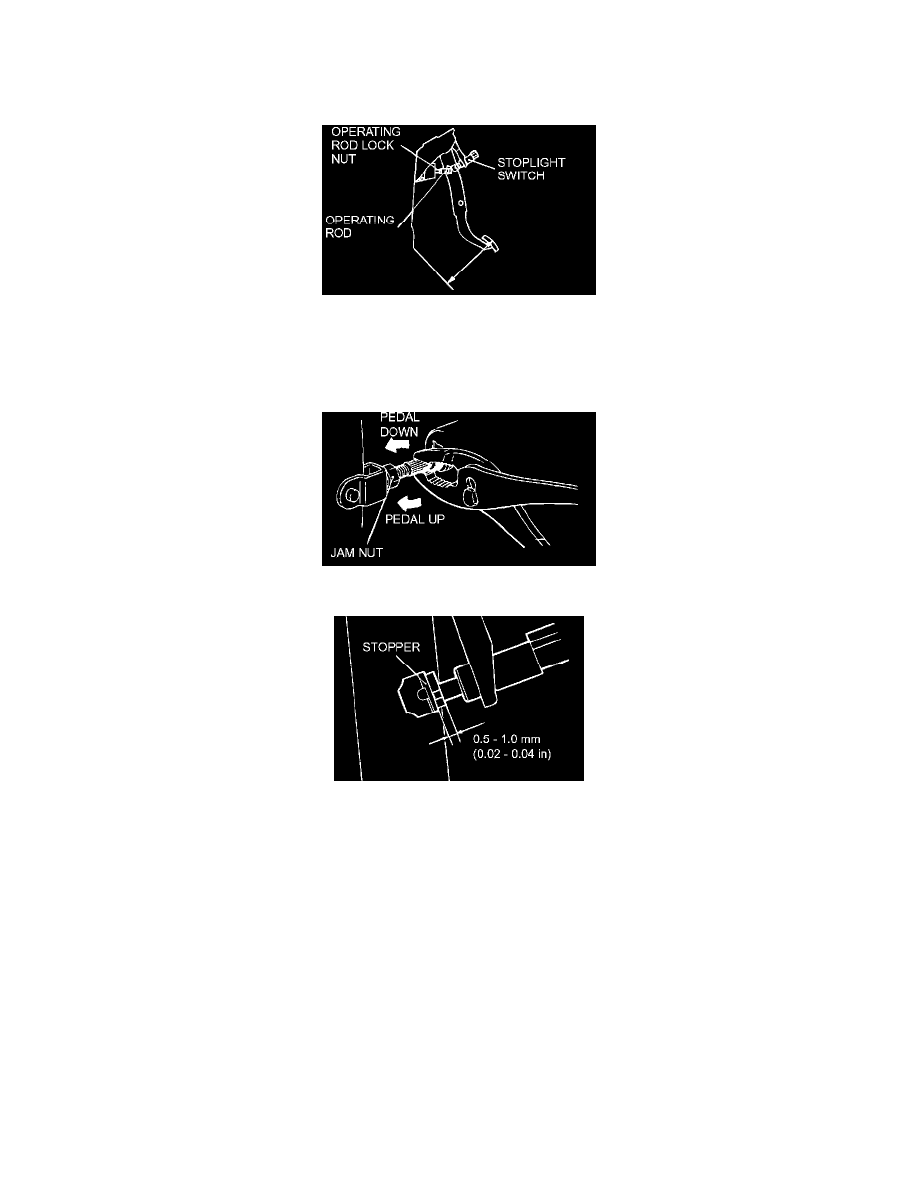
1. Disconnect the stoplight switch connector.
2. Rotate the stoplight switch 1/4 turn counterclockwise to loosen.
3. Loosen the operating rod jam nut. Turn the serrations of the operation rod with pliers to adjust the brake pedal height to the standard value.
4. Turn the stoplight switch until it contacts the stopper. During this step, secure the pedal by moving it forward by hand.
5. Turn the stoplight switch 1/4 turn clockwise to secure, and confirm that the clearance between the switch plunger and the stopper is as shown.
6. Connect the connector of the stoplight switch.
7. Check to be sure that the stoplight does not illuminate with the brake pedal released.
4. Check the key interlock and shift lock mechanisms.
5. Return the carpet etc. to its original position.
Brake Pedal Free Play
1. Turn the ignition switch to the "ON" position, and wait until the HBB pump motor stops.
NOTE: If the brake fluid inside the accumulator is not pressurized to a predetermined value, the pump motor will staff to run. Once the pump
motor has stopped, the brake fluid inside the accumulator is pressurized to the predetermined value. If the brake fluid inside the accumulator is
pressurized to a predetermined value, the pump motor will not staff to run.