
Montero V6-3.8L SOHC (2005)
1. Remove the oil pan mounting bolts.
CAUTION: Do not use the oil pan remover (MD998727). It will damage the oil pan (aluminum made).
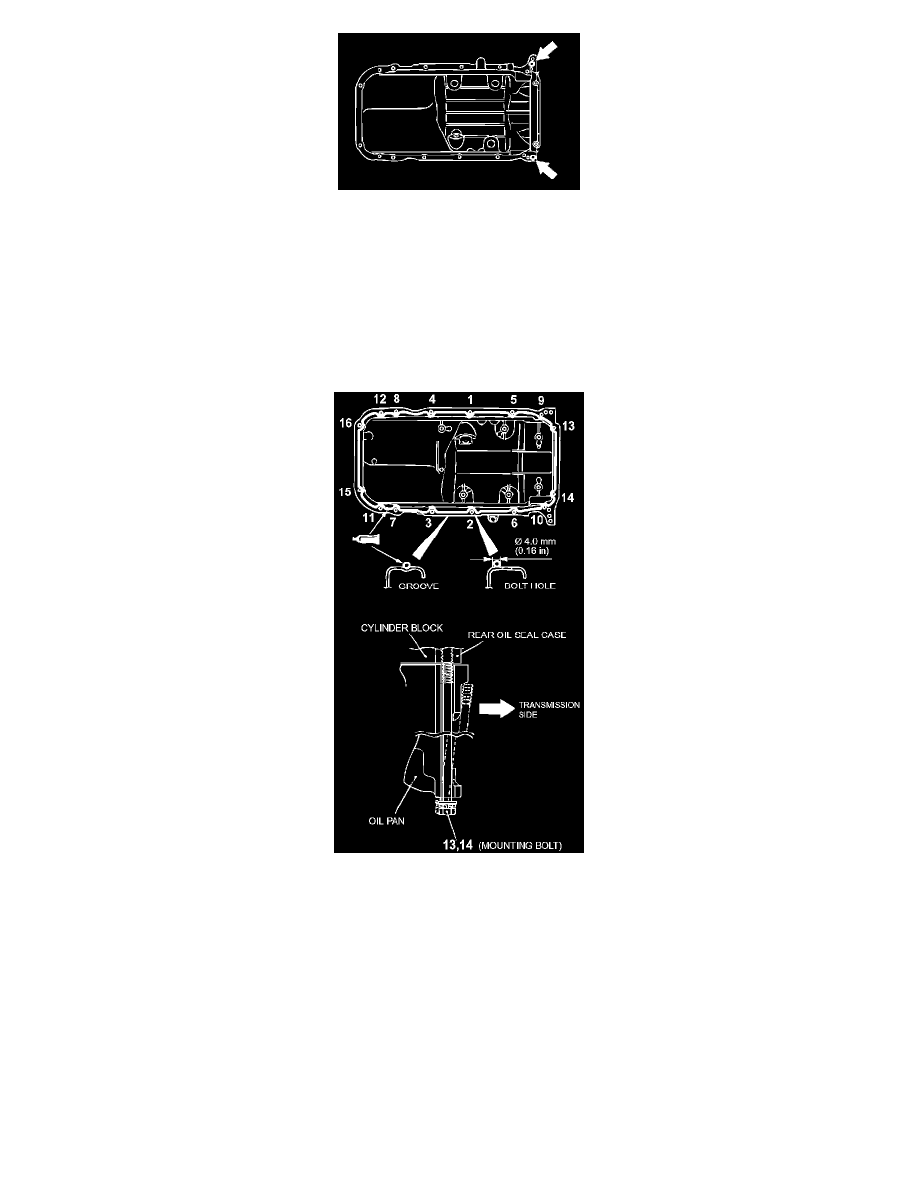
2. Screw the bolts (M10) securing the oil pan to the transmission assembly in the illustrated bolt holes, then remove the oil pan.
INSTALLATION SERVICE POINTS
>>A<< OIL PAN INSTALLATION
1. Remove sealant from the oil pan and cylinder block mating surfaces.
2. Degrease the sealant-coated surface and the engine mating surface.
3. Apply a bead of the sealant to the cylinder block mating surface of the engine oil pan as shown.
Specified sealant: MITSUBISHI GENUINE PART MD970389 or equivalent
NOTE: The sealant should be applied in a continuous bead approximately 4.0 mm (0.16 inch) in diameter.
4. Assemble the oil pan to the cylinder block within 30 minutes after applying the sealant.
CAUTION: The bolt holes for bolts 13 and 14 in the illustration are cut away on the transmission side. Be careful not to insert these bolts at
an angle.
5. Tighten the bolts in order of the numbers shown in the illustration.
INSPECTION
^
Check the oil pan for cracks.
^
Check the oil pan sealant-coated surface for damage and deformation.
^
Check the oil screen for cracked, clogged or damaged wire net and pipe.