
Montero 4WD V6-3.5L SOHC (1998)
2. Front Impact Sensor (R.H.) Removal
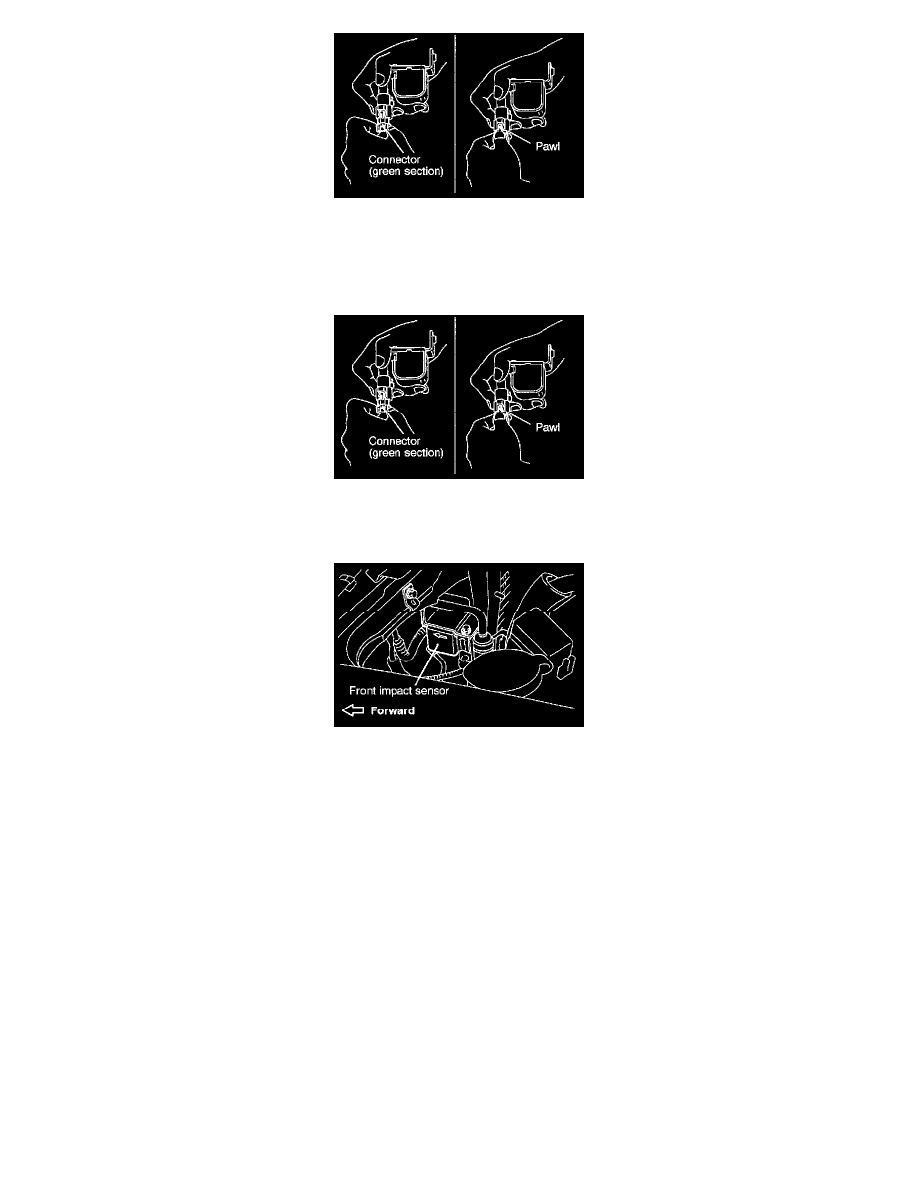
1. Slide the connector (green section) to release the lock.
2. Push down the pawl, and then disconnect the connector.
-
Reserve Tank
3. Front Impact Sensor (L.H.) Removal
1. Slide the connector (green section) to release the lock.
2. Push down the pawl, and then disconnect the connector.
Pre-installation Inspection
To mount the new front impact sensor, visually check it and measure the resistance between the terminals.
Installation
To install reverse the removal steps and note the following.
2. Front Impact Sensor (R.H.) Installation
1. Securely connect the connector.
2. Position the front impact sensor facing toward the front of the vehicle as shown by the arrow in the illustration, and install it securely.
3. Front Impact Sensor (L.H.) Installation
1. Securely connect the connector.
2. Position the front impact sensor facing toward the front of the vehicle as shown by the arrow in the illustration, and install it securely.
CAUTION: The SRS may not activate properly if a front impact sensor is not installed properly, which could result in the SRS system not
operating properly during a collision.
CAUTION: The SRS may not activate properly if a front impact sensor is not installed properly, which could result in the SRS system not
operating properly during a collision.