
Montero LS 4WD V6-2972cc 3.0L SOHC 12 Valve (1994)
20. Installation of timing belt.
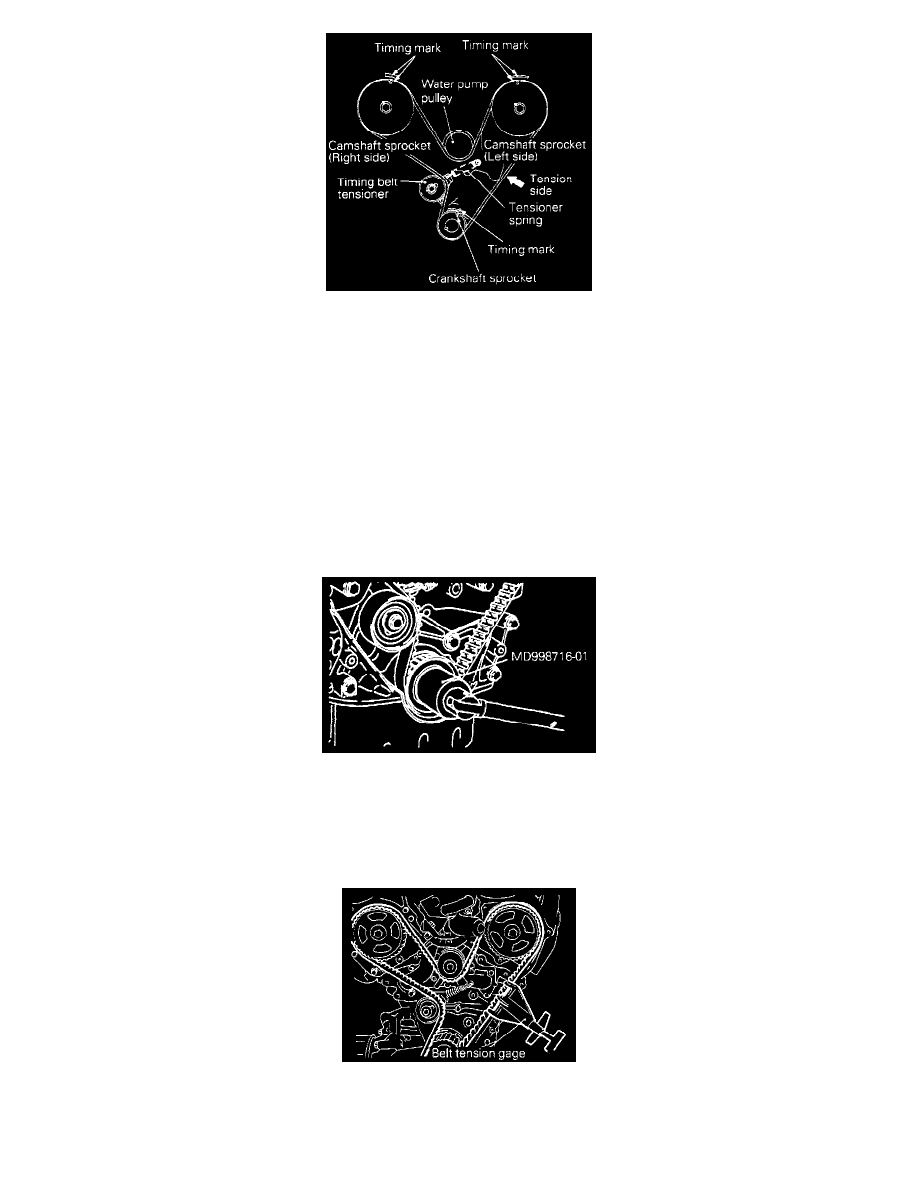
(1) Align the timing marks of the camshaft sprockets (on the right and left sides) and the crankshaft sprocket. (At the top dead point of the No. 1
cylinder compression stroke.)
(2) First, route the timing belt on the crankshaft sprocket, then on the camshaft sprocket on the side without slackness in the tight side.
(3) Next, run the timing belt onto the water pump pulley the camshaft sprocket on the left side, and the timing belt tensioner.
(4) Apply force counterclockwise to the camshaft sprocket on the right side. When the tight side of the belt is fault, check that the timing marks are
all aligned.
(5) Attach the flange.
(6) Back off the fixing bolts of the temporarily tightened tensioner one or two turns and tighten the timing belt with the tensioner spring force.
(7) Using the special tool, turn the crankshaft two turns in the normal rotational direction (clockwise).
NOTE:
-
Turn smoothly, but not in the opposite direction (counterclockwise).
(8) Re-align the sprockets timing marks and tighten the tensioner fixing bolts.
(9) Measure belt tension with a belt tension gage at the indicated place.
Standard value: 200-300 N (44.1-66.1 lbs.)