
Montero Sport V6-3.5L SOHC (2004)
and the seat belt pre-tensioner.
1. Disconnect the negative (-) and positive (+) battery cables from the battery terminals, and then remove the battery from the vehicle.
CAUTION: Wait at least 60 seconds before proceeding with any further work after the disconnection of the battery cables. (Refer to SRS Service
Precautions)
2. Carry out deployment of the seat belt pre-tensioner according to the following procedure.
Seat belt pre-tensioner
1. Remove the seat belt with pre-tensioner from the vehicle.
CAUTION: Once disconnected, both electrodes of the seat belt pre-tensioner are short-circuited automatically to prevent accidental deployment
caused by static etc. Still, in consideration of accidental deployment, store the air bag module on a flat area with deployment surface facing up.
Also, do not place anything on top of it.
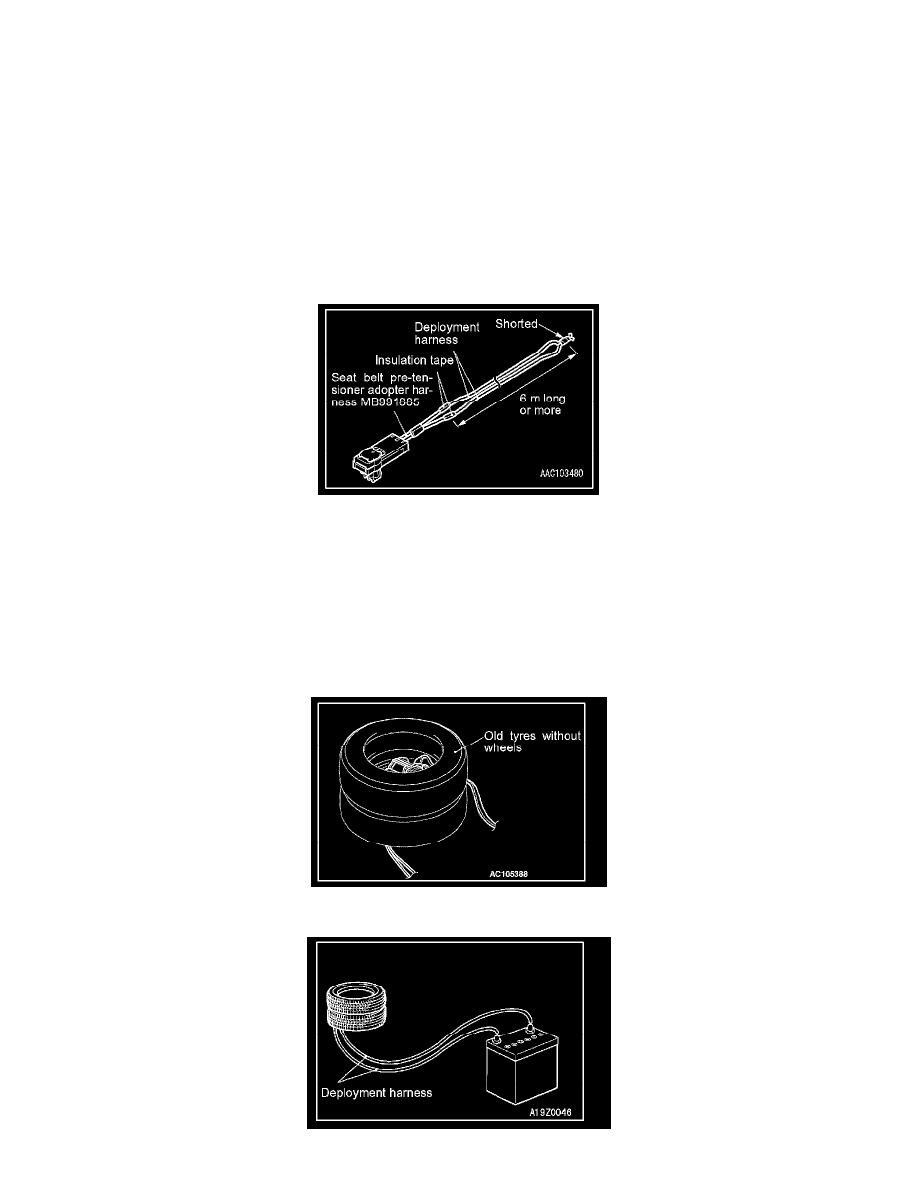
2. Prepare two operation harnesses longer than 6 m to connect with the pretensioner adapter harnesses (MB991885) and insulate the connections
with tape. Furthermore, connect one end of the operation harnesses with the other to short-circuit.
NOTE: Short-circuiting both ends of the operation harness prevents the pretensioner from accidental deployment caused by static, etc.
3. Route a thick wire through the holes in the seat belt retractor bracket to secure at the top of the wheel (convex part). (two locations)
4. Connect the seat belt pre-tensioner connector to the the SRS air bag adapter harness with the operation harness attached.
5. Pull out the seat belt outside the tyre.
CAUTION: Place the connector of the SRS air bag adapter harness so that it is not clamped by the tyres at deployment.
6. Place an old tyre (without a wheel) on the tyre, to which the seat belt with pre-tensioner is secured.