
Montero Sport V6-3.5L SOHC (2004)
CAUTION: The primer strengthens the adhesive, so be sure to apply it evenly around the entire circumference. However, a too thick application will
weaken the adhesive.
Do not touch the coated surface.
3. Soak a sponge in the primer, and apply evenly to the windshield and the body in the specified places.
4. Allow the windshield to dry for at least three minutes after applying primer.
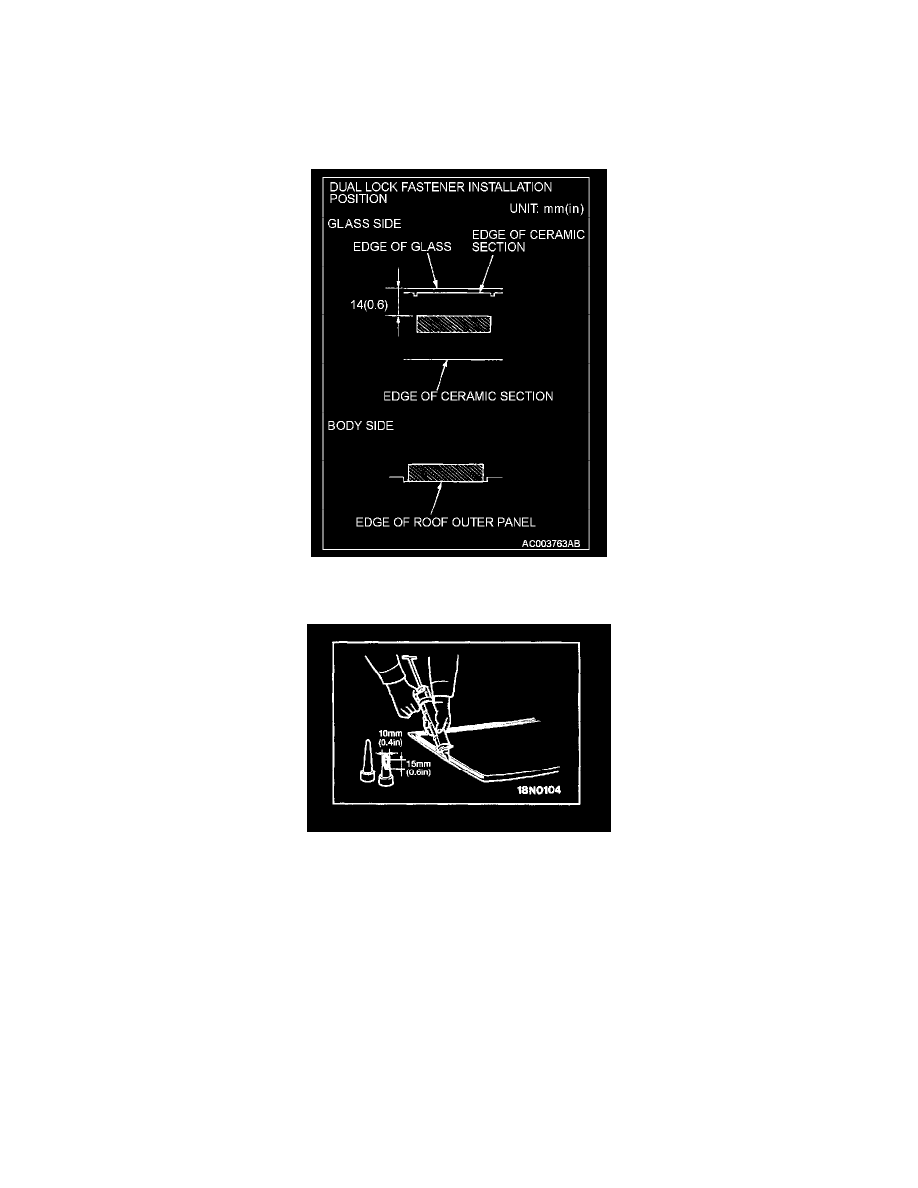
5. Install the dual lock fasteners to the windshield in the position shown in the illustration.
6. Install the dual lock fasteners to the body flange in the positions that are corresponding to those on the windshield.
7. Fill a sealant gun with adhesive. Then apply the adhesive evenly around the windshield within 30 minutes after applying the primer.
NOTE: Cut the tip of the sealant gun nozzle into a V shape to simplify adhesive application.
8. Align the mating marks on the windshield and the body, and lightly press the windshield evenly so that it adheres completely.
9. Use a spatula or similar tool to remove any excessive adhesive. Clean the surface with 3M(TM) AAD Part number 8906 or equivalent. Avoid
moving the vehicle until the adhesive sets.
CAUTION: Do not move the vehicle unless absolutely necessary.
When testing for water leakage, do not pinch the end of the hose to spray the water.
10. Wait 30 minutes or more, and then test for water leakage.