
Montero Sport ES 2WD L4-2.4L SOHC (1999)
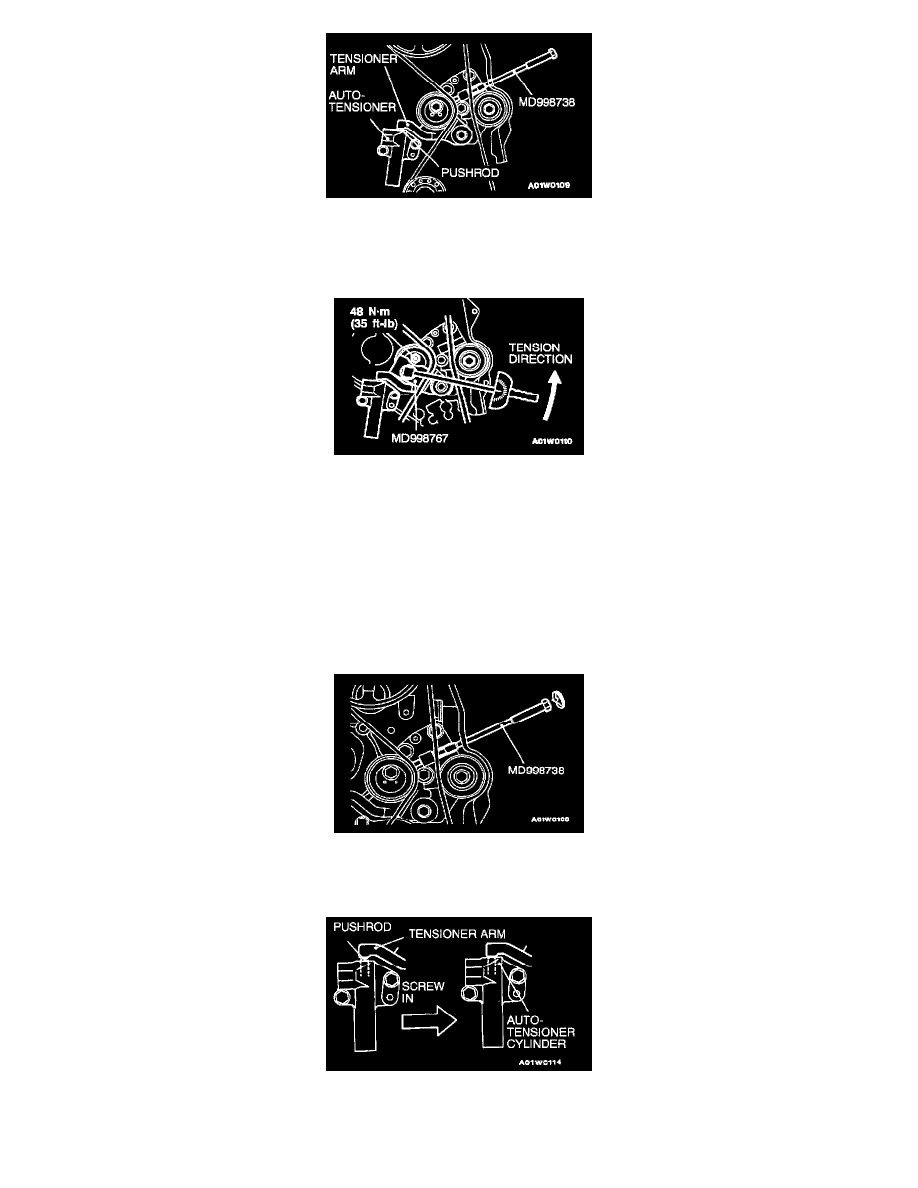
7. Remove the rubber plug from the rear of the timing belt cover assembly. Then screw in special tool MD998738 by hand until the tensioner arm
is touching the auto-tensioner pushrod.
>E< TIMING BELT TENSION ADJUSTMENT
1. Turn the crankshaft 1/4 of a revolution counterclockwise, then turn it clockwise until the timing marks are aligned.
CAUTION: When tightening the fixing bolt, make sure that the tension pulley does not turn with the bolt.
2. Loosen the tension pulley fixing bolt, and then use special tool MD998767 and a torque wrench to tighten the fixing bolt to the specified
torque while applying tension to the timing belt.
Standard value: 3.5 Nm (31 inch lbs.)
<Timing belt tension torque>
Tightening torque: 48 Nm (35 ft. lbs.)
3. Remove the setting pin that has been inserted into the auto-tensioner, and then remove special tool MD998767.
4. Turn the crankshaft two turns clockwise, and wait for approximately 15 minutes.
5. Insert special tool MD998738 again and turn it by hand until the end of special tool MD998738 touches the tensioner arm.
CAUTION: Turn special tool MD998738 slowly 1/4 of a turn at a time.
6. Once the end touches, keep turning special tool MD998738 until the auto-tensioner pushrod retracts and the tensioner arm contacts the
auto-tensioner cylinder.
7. Check that the amount by which special tool MD998738 has been screwed in is within the standard value range.