
Montero Sport LS 2WD V6-3.0L SOHC (1998)
Make sure to pay close attention to the measurements shown on the template in step 2. The new rectangular- shaped hole should start at the
bottom of the original "T"-shaped hole, and extend exactly 21 mm above the top of the "T". The 21 mm dimension is critical for proper striker
operation.
4.
Reinstall the mat into the cargo area.
5.
Fold down the third-seat and verify that latches operate properly and the seat is secure when latched. If the seat does not latch securely, go to step
6.
6.
If the seat latches operate improperly and/or the seat is not secure, use the following steps to correct the condition.
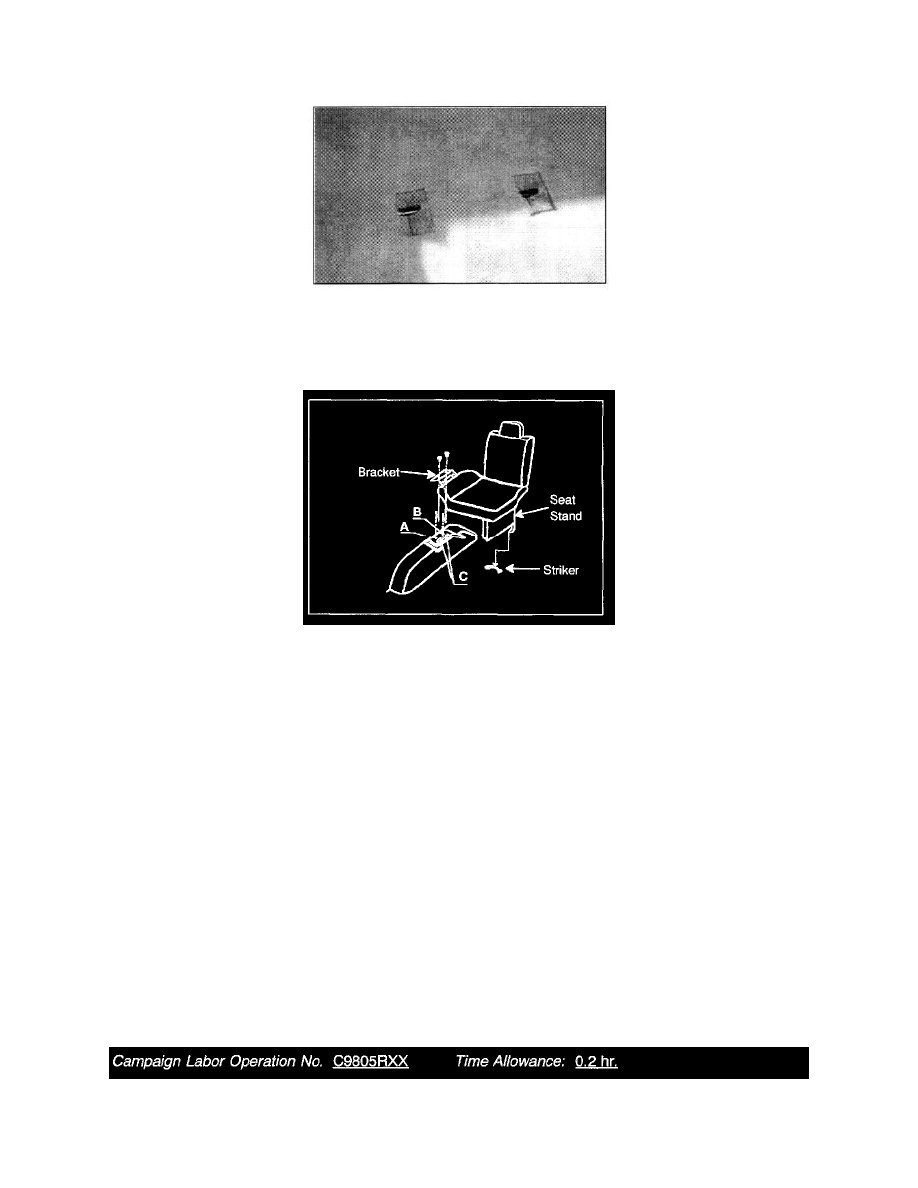
a.
Loosen (but do not remove) the third-seat bracket bolts (A,B,C in the illustration) on the wheel rear wheel housing.
b.
Latch the third-seat securely into the striker.
c.
Tighten bolt A.
d.
Tighten bolt B.
e.
Release the third-seat latch from the striker and fold up the seat.
f.
Tighten bolts C.
g.
Latch third-seat again and verify that the latches operate properly.
PARTS INFORMATION
No parts are required for this campaign.
CAMPAIGN CLAIM INFORMATION
Claims for this campaign must be entered as "C"-type claims using the "E-5" option on your Diamond Network Warranty System's main menu.
Rear Cargo Area Mat Modification
CAMPAIGN CLAIM SAMPLE - CAMPAIGN C9805RXX