
Montero Sport LS 2WD V6-3.0L SOHC (1998)
3.
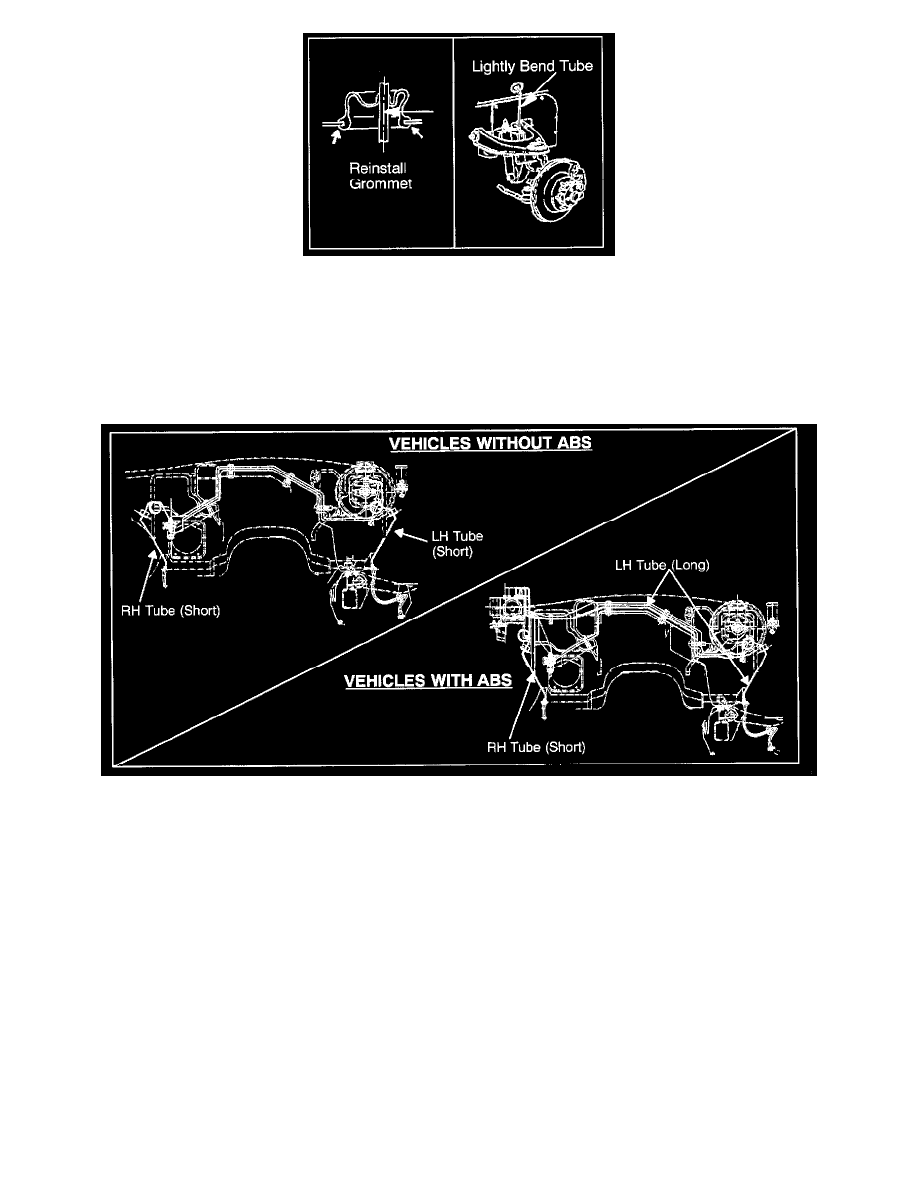
Center the Tube in the Grommet
Reinstall the grommet removed in step 2. Make sure it is securely mounted in the wheel housing panel. Center the tube in the grommet by lightly
bending the tube where it passed through the grommet. Again, measure the clearance as shown in step 1 to make sure the clearance is at least 6 mm
(0.024 in) between the complete circumference of the tube and grommet.
NOTE:
The grommet is designed to reduce the amount of water and dust entering the engine compartment. Slight grommet damage is acceptable.
Replace the grommet only if it is torn or severely damaged.
4.
Replacing the Brake Tubes.
If you discover damage to either or both of the brake tubes, replace the damaged tube(s), then refill and bleed the brake system. Refer to section 35
in the service manual for brake tube torque specifications and brake bleeding procedures.
After replacing the damaged tube, securely install the grommet into the wheel housing panel. Referring to step 1, make sure the new tube is
properly centered in the grommet. If it is not, center the tube as shown in step 3.
NOTE:
When replacing the long (LH) tube (on ABS equipped vehicles) it is necessary to disconnect the air conditioner pipe and heater hose at the
bulkhead. After replacing the LH brake tube, make sure you do the the following procedures:
^
Connect the A/C pipe and recharge the refrigerant
^
Connect the heater hose and refill the engine coolant.