
Montero Sport LS 2WD V6-3.0L SOHC (1998)
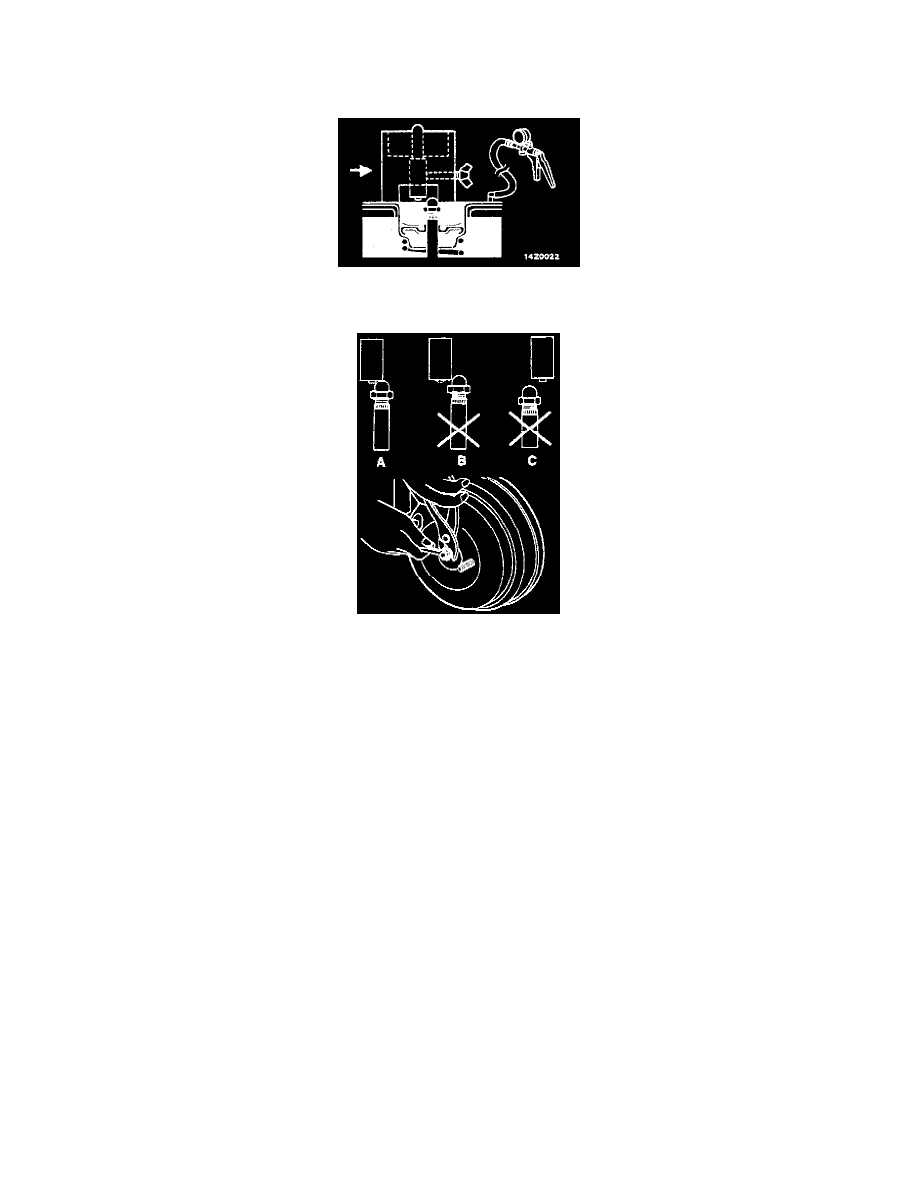
1) Set the special tool MB991714 in the master cylinder.
2) Set the special tool shaft to a position where it lightly contacts the master cylinder's piston.
3) Turn the thumb bolt to fix the shaft.
4) Using a hand vacuum pump, apply a negative pressure of -66.7 kPa (19.6 inch Hg) on the brake booster.
5) Reverse the special tool MB991714 to shift it from the center of the brake booster.
6) Slide the special tool MB991714 toward the center, and confirm that the protrusion of the shaft contacts the end of the brake booster pushrod
as shown in drawing A on the left.
If the state is as shown in drawings B and C on the left, adjust the pushrod length with the following steps to achieve the state shown in A.
B: If a section other than the shaft protrusion is contacted, shorten the pushrod.
C: If there is no contact with the shaft, lengthen the pushrod.
Post-installation Operation:
-
Evaporative Emission Canister Assembly Installation.
-
Brake Fluid Supplying.
-
Brake Line Bleeding.
-
Brake Pedal Adjustment.