
Montero Sport LS 2WD V6-3.0L SOHC (1998)
IMPORTANT
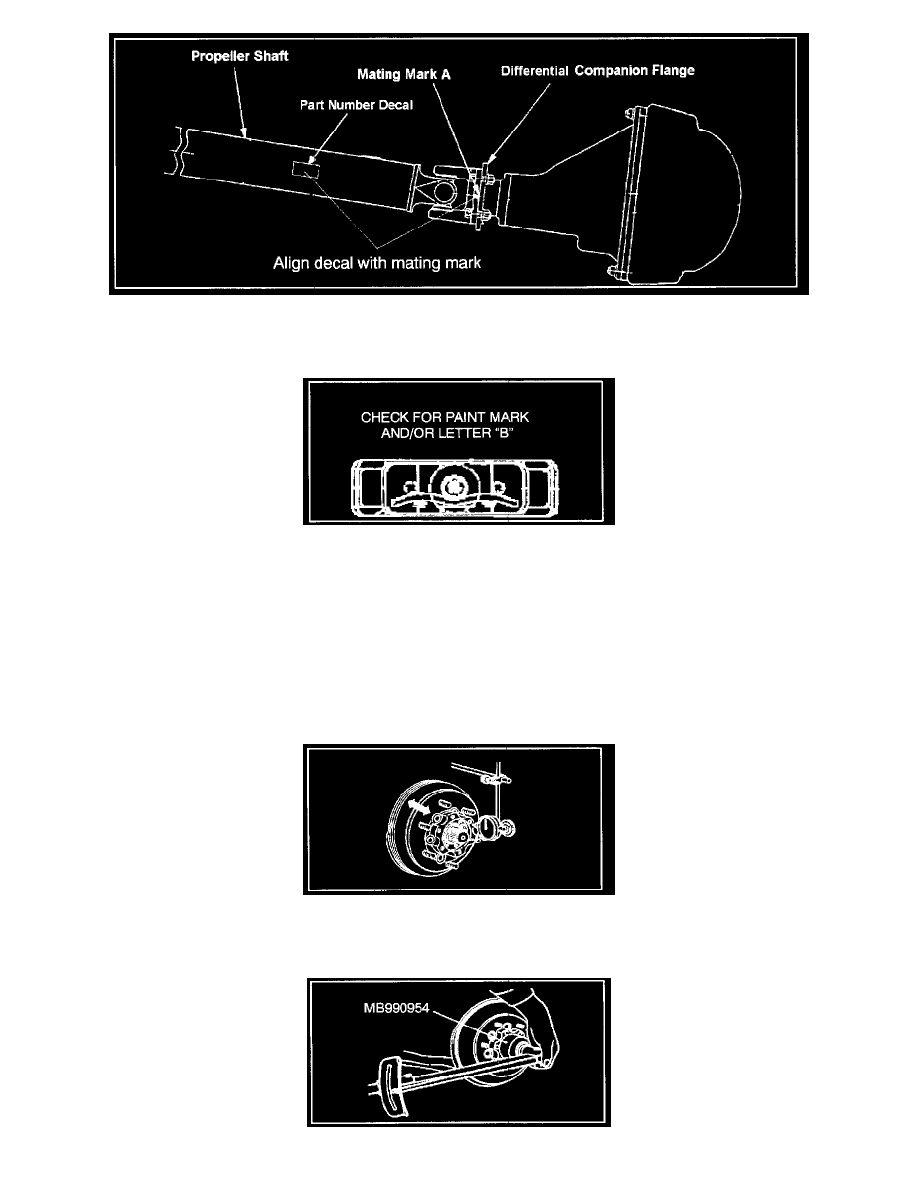
Before removing the old propeller shaft, place a mating mark on the differential companion flange at the location of the propeller shaft part number
decal. Install the new propeller shaft with its part number decal aligned with the mating mark.
5.
(2WD Only) Inspect the transmission mount. If there is a paint mark and/or the letter "B" applied to the rubber portion as shown, it is an improved
design transmission mount and does not need to be replaced unless damage is found. Improved design mounts have been used in vehicle
production since 10/98.
If no paint mark and/or the letter "B" is found, replace the mount with the appropriate part in the PARTS INFORMATION section of this bulletin.
6.
Check the front hub end play:
NOTE:
A quick check for free play can be made by grasping the wheel and tire assembly and wobbling it. If you hear a clicking noise or observe any
movement, end play is excessive and should be adjusted by following Step 6b below.
a.
Install a dial gauge as shown. Move the hub in the axial direction (in and out) and measure how far the front wheel bearing moves.
If the hub moves 0.05 mm or more, end play is excessive. Go to Step b below to adjust end play.