
Montero Sport LS 2WD V6-3.0L SOHC (1998)
20. Check for gas leaks using a leak detector.
If a gas leak is detected, re-tighten the connections, and then repeat the charging procedure from evacuation in step(12).
21. Start the engine.
22. Operate the air conditioning and set to the lowest temperature (MAXIMUM COOL).
23. Fix the engine speed at 1,500 rpm.
CAUTION: If the bulk container can is inverted, liquid refrigerant may be drawn into the compressor damaging it by hydraulic lock. Keep the
bulk container upright to ensure that refrigerant is charged in gas state.
24. Tighten the handle of the adaptor valve (valve open) to charge the required volume of refrigerant.
25. After charging with refrigerant, turn the handle of the adaptor valve back all the way (valve closed).
26. Tighten the charging valve handle (valve closed). Remove the quick joint (for low-pressure) from the low-pressure service valve.
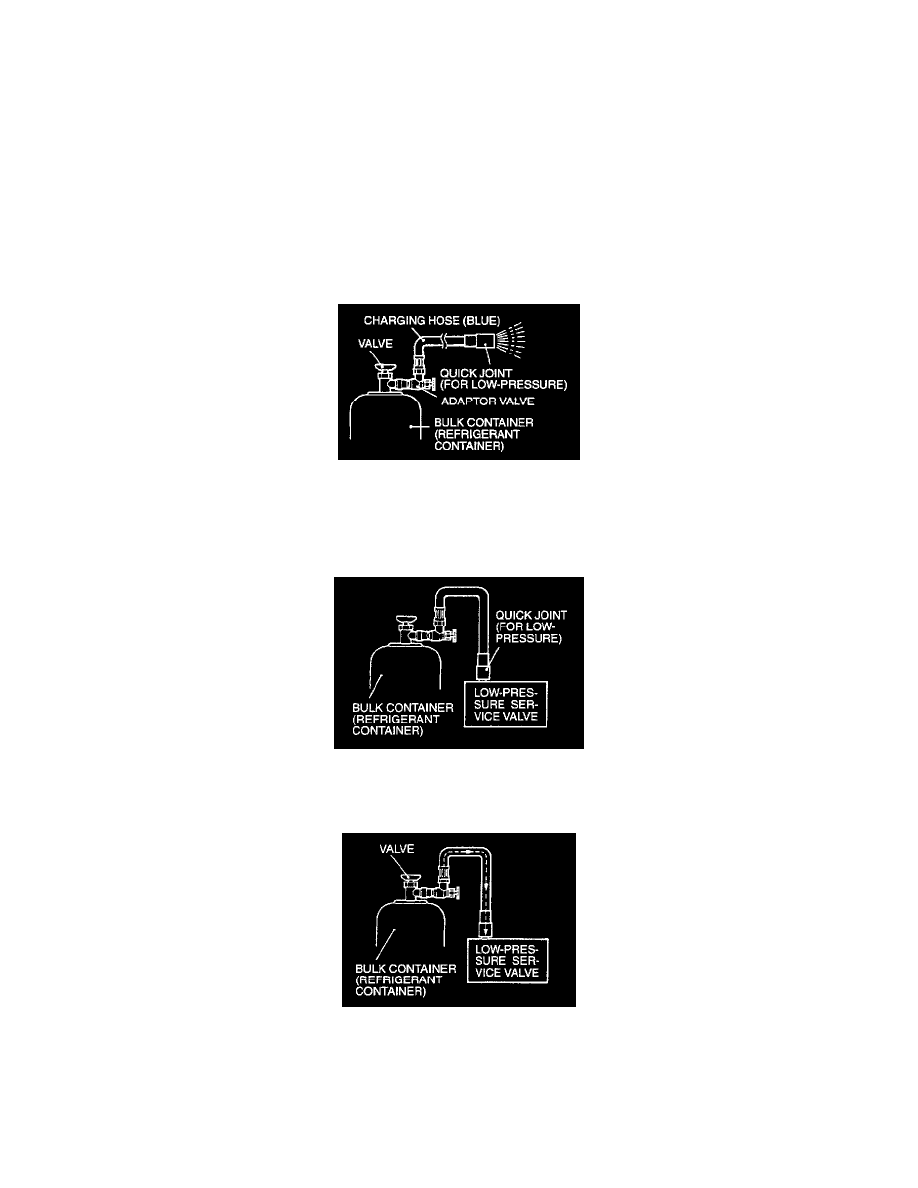
Correcting Low Refrigerant Level In Case the Bulk Container Is Used
1. Install the adaptor valve with the handle turned all the way in (valve close) to the bulk container.
2. Connect the charging hose (blue) to the adaptor valve.
3. Connect the charging hose (blue) to the quick joint (for low-pressure).
4. Open the valve of the bulk container.
5. Turn the handle of the adaptor valve to bleed the air.
6. Install the quick joint (for low-pressure) to the low-pressure service valve.
NOTE: The low-pressure service valve should be connected to the suction hose.
7. Start the engine.
8. Operate the air conditioner and set at the lowest temperature (MAXIMUM COOL).
9. Fix the engine speed at 1,500 rpm.
CAUTION: If the bulk container is inverted, liquid refrigerant may be draw into the compressor damaging it by hydraulic lock. Keep the bulk
container upright to ensure that refrigerant is changed in gas state.