
Montero Sport LS 2WD V6-3.0L SOHC (1998)
Use special tools MD998715 and MB990767 to remove the crankshaft pulley from the crankshaft.
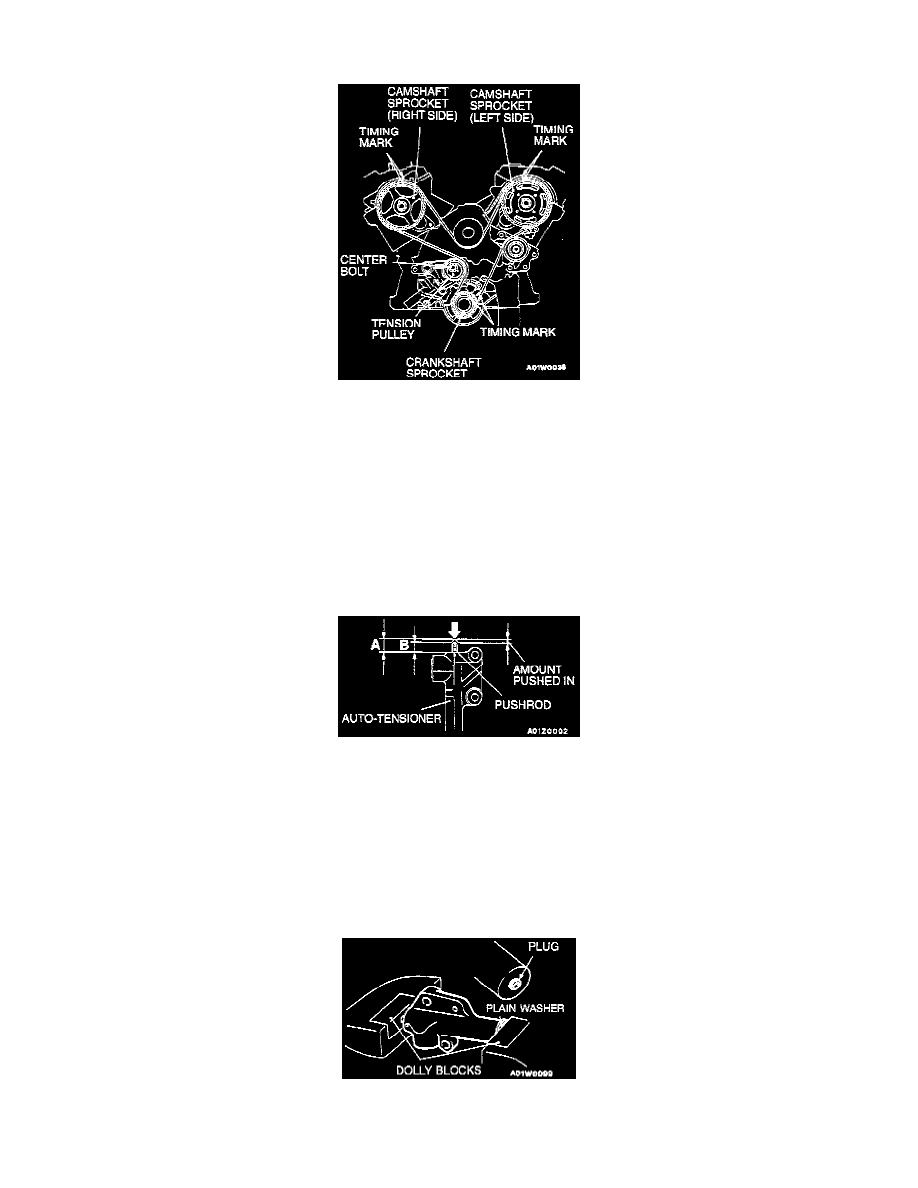
<C> Timing Belt Removal.
CAUTION: Never turn the crankshaft counterclockwise.
1. Turn the crankshaft clockwise to align each timing mark and to set the number 1 cylinder to compression top dead center
2. If the timing belt is to be reused, chalk mark the flat side of the belt with an arrow indicating the clockwise direction.
3. Loosen the center bolt of the tension pulley, and then remove the timing belt.
INSTALLATION
Installation in reverse order as removal.
Installation Service Points
>A< Auto-tensioner Installation.
1. While holding the auto-tensioner by hand, press the end of the pushrod against a metal surface (such as the cylinder block) with a force of 98 -
196 Nm (72 - 145 ft. lbs.) and measure how far the pushrod is pushed in.
Standard value: Within 1 mm (0.04 inch)
A: Length when no force is applied
B: Length when force is applied
A - B: Amount pushed in
2. If it is not within the standard value, replace the auto-tensioner.
CAUTION: Place the auto-tensioner perpendicular to the jaws of the vice.
CAUTION: If there is a plug at the base of the auto-tensioner, insert a plain washer onto the end of the auto-tensioner to protect the plug.