
Montero Sport XLS 4WD V6-3.5L SOHC (2002)
effort). This will relieve the pressure in the accumulator.
CAUTION
If pressure is left in the power assist system, brake fluid will spill when removing the accumulator.
3.
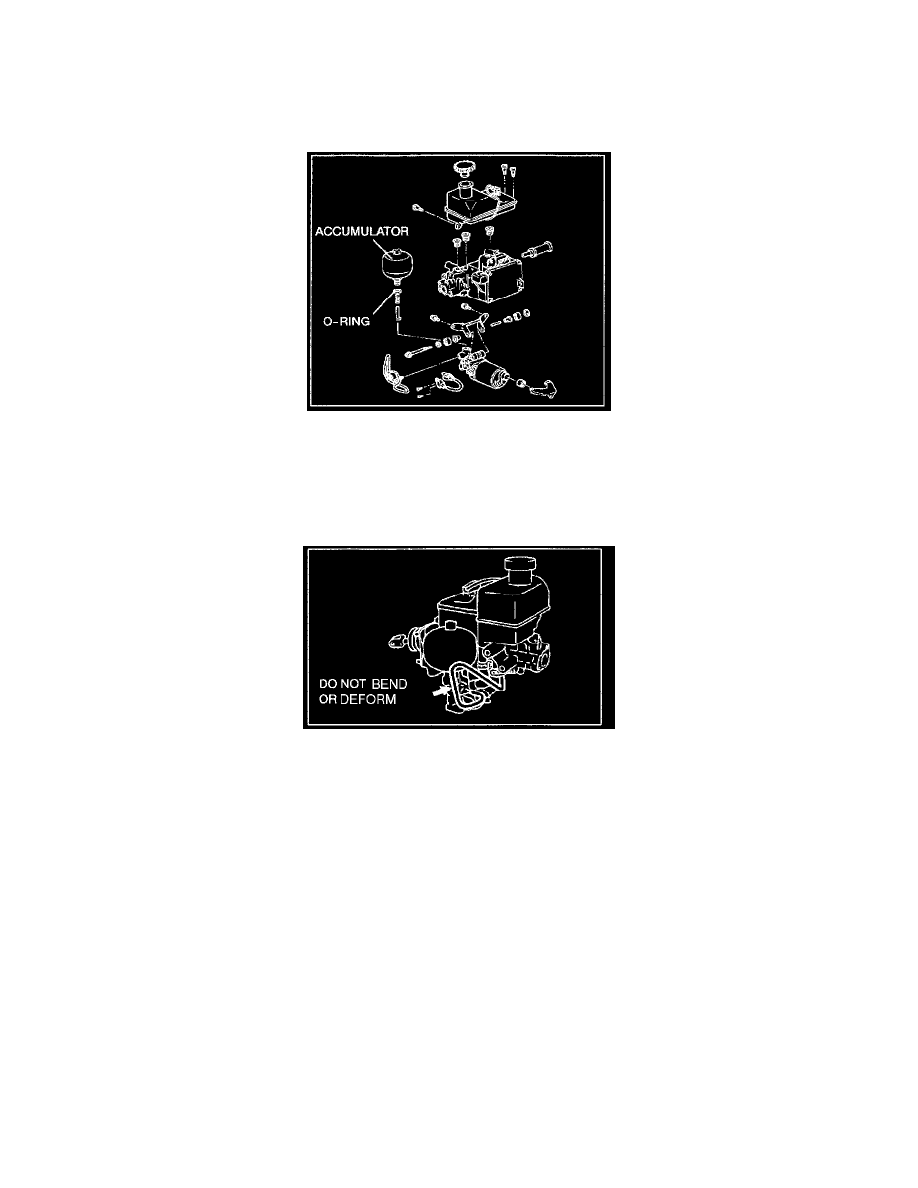
Use a 21 mm socket to remove the accumulator. Place a cloth under the accumulator to prevent brake fluid spillage.
Remove the accumulator vertically to prevent metal shavings from accidentally entering the HBB. Remove the 0-ring.
CAUTION
DO NOT USE AIR TOOLS TO REMOVE OR INSTALL THE ACCUMULATOR.
Use of air tools will likely result in shearing the nut from the top of the accumulator.
CAUTION
USE CARE TO PREVENT BENDING OR DEFORMING THE TUBE.
WARNING
THE NITROGEN GAS INSIDE THE ORIGINAL ACCUMULATOR MUST BE DISCHARGED BEFORE DISPOSAL. SEE STEP 7.
4.
Install the new accumulator provided in the kit (listed in the PARTS INFORMATION section of this bulletin):
a.
Be sure to use the new 0-ring (from the kit) at the bottom of the threaded area of the accumulator.
b.
Be sure to install the accumulator vertically. DO NOT USE AIR TOOLS TO INSTALL THE NEW ACCUMULATOR.
c.
Tighten to 53.9 Nm (40 ft/lbs).
5.
Bleed air from the HBB system as follows:
a.
Turn the ignition on. The HBB pump motor should come on automatically.
b.
When the HBB pump motor stops, turn off the ignition. Depress the brake pedal up to 40 times, until the pedal becomes hard (high pedal
effort). Pump the brake pedal slowly, about one stroke per second.
c.
Repeat Steps 5a. and 5b. four times.