
Montero Sport XLS 4WD V6-3.5L SOHC (2002)
8. Fill the inside of the BJ boot with the specified amount of the specified grease.
Specified grease: Repair kit grease 120 g (4.2 oz)
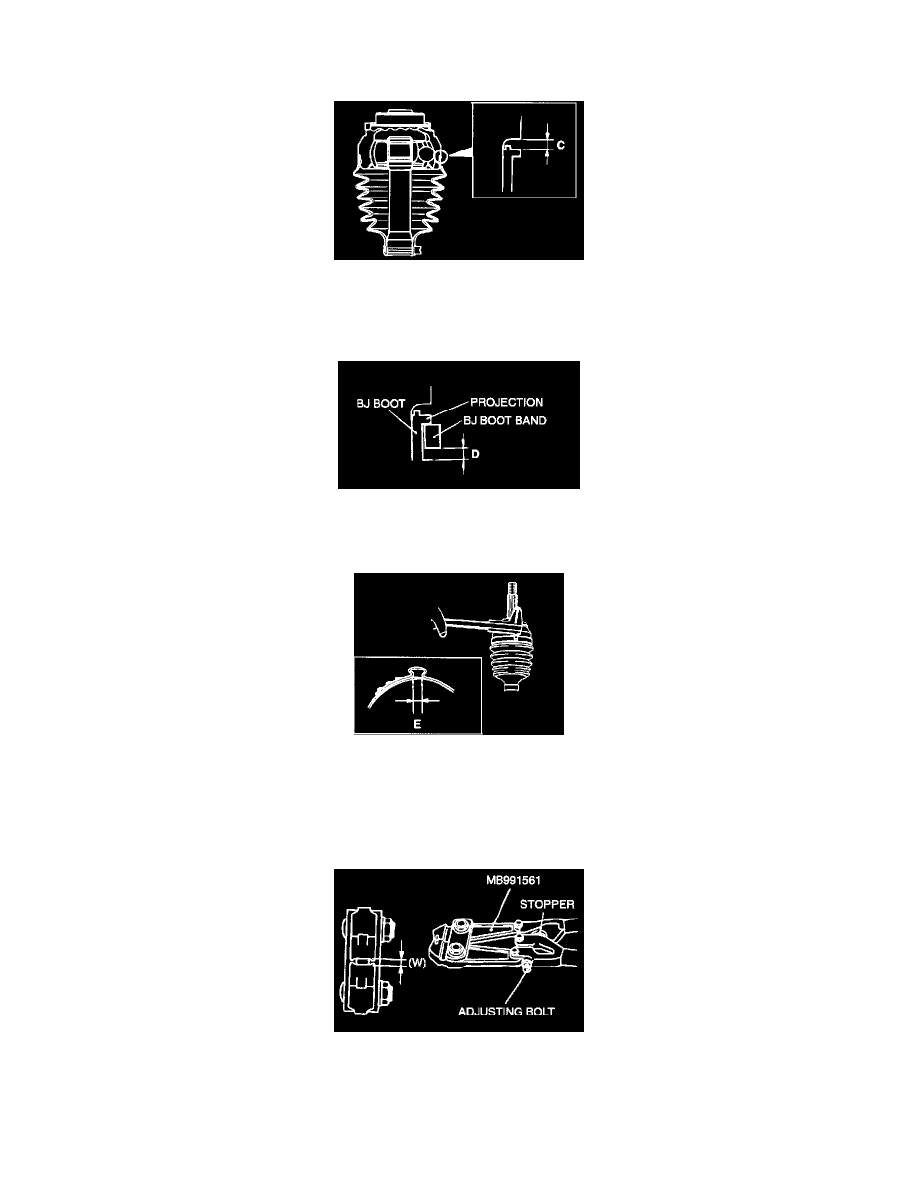
9. Install the BJ boot band (large) so that there is the clearance (c) between it and the BJ housing is at the standard value.
Standard value (c): 0.1 - 1.55 mm (0.004 - 0.061 inch)
10. Follow the same procedure as in step 3 to adjust the size of the opening (W) shown on special tool MB991561 so that it is at the standard value.
Standard value (W): 3.2 mm (0.13 inch)
11. Place the BJ boot band (large) against the projection at the edge of the boot, and then secure it so that there is a clearance left as shown by (D) in
the illustration.
12. Use special tool MB991561 to crimp the BJ boot band (large) in the same way as in step 5.
13. Check that the crimping amount (E) of the BJ boot band is at the standard value.
Standard value (E): 2.4 - 2.8 mm (0.09 - 0.11 inch) <If the crimping amount is larger than 2.8 mm (0.11 inch)> Readjust the value of (W) in
step 10 according to the following formula, and then repeat the operation in step 12. W = 5.8 (0.23 inch) mm - E Example: If E = 2.9 mm (0.11
inch), then W = 2.9 mm (0.11 inch). Of the crimping amount is smaller than 2.4 mm (0.09 inch)> Remove the BJ boot band, readjust the value of
(W) in step 10 according to the following formula, and then repeat the operating in steps 11 and 12 using a new BJ boot band. W = 5.8 (0.23 inch)
mm - E Example: If E = 2.3 mm (0.09 inch), then W = 3.5 mm (0.14 inch).
14. Check that the BJ boot band is not protruding past the place where it has been installed. If so, remove it and repeat the operations in steps 11 to 13
using a new BJ boot band.