
Montero SR 4WD V6-3.5L SOHC (1997)
8. Using a crankshaft spacer tool No. MD998769, or equivalent, rotate the crankshaft a quarter of a turn counterclockwise. Then rotate it
back clockwise to verify that all the timing marks are in alignment.
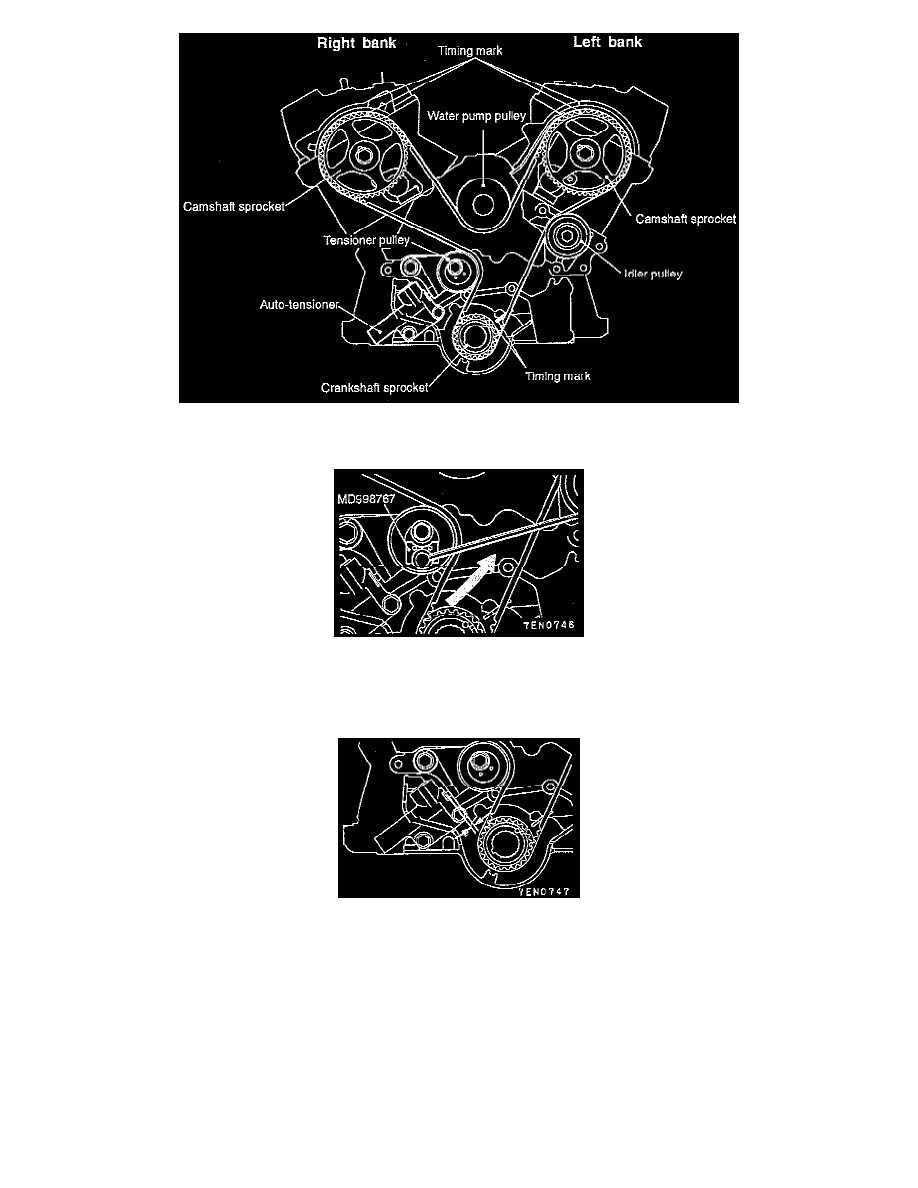
9. Install a torque wrench and tension pulley wrench tool No. MD998767, or equivalents, on the tensioner pulley.
10. Torque it to 4.4 Nm (3.3 ft. lbs.) with the torque wrench.
11. While holding the tensioner pulley in position, tighten the center bolt to 48 Nm (36 ft. lbs.).
12. Rotate the crankshaft two turns clockwise and let it stand for approximately 5 minutes.
13. Check to see whether the metal wire inserted when the auto tensioner was installed can be removed without any resistance.
NOTE: If the metal wire can be removed without any resistance, it means that the belt is correctly tensioned. Therefore, remove the metal
wire. In this condition, check that the projection of the rod of the auto tensioner is within the standard value of 3.8 - 5.0 mm (0.150 - 0.196
inch).
14. If the metal wire cannot be removed easily, repeat steps, 9 through 12, until correct belt tension is obtained.