
Montero SR 4WD V6-3.5L SOHC (1997)
3. Check that the return spring is set to the spring stopper of the 2-4WD shift lug, and then install the control lever in the position shown by
the arrow.
4. Apply specified adhesive to the threads of the lever assembly mounting bolts, and then tighten the transfer control lever.
Specified adhesive: 3M Stud Locking No. 4170 or equivalent.
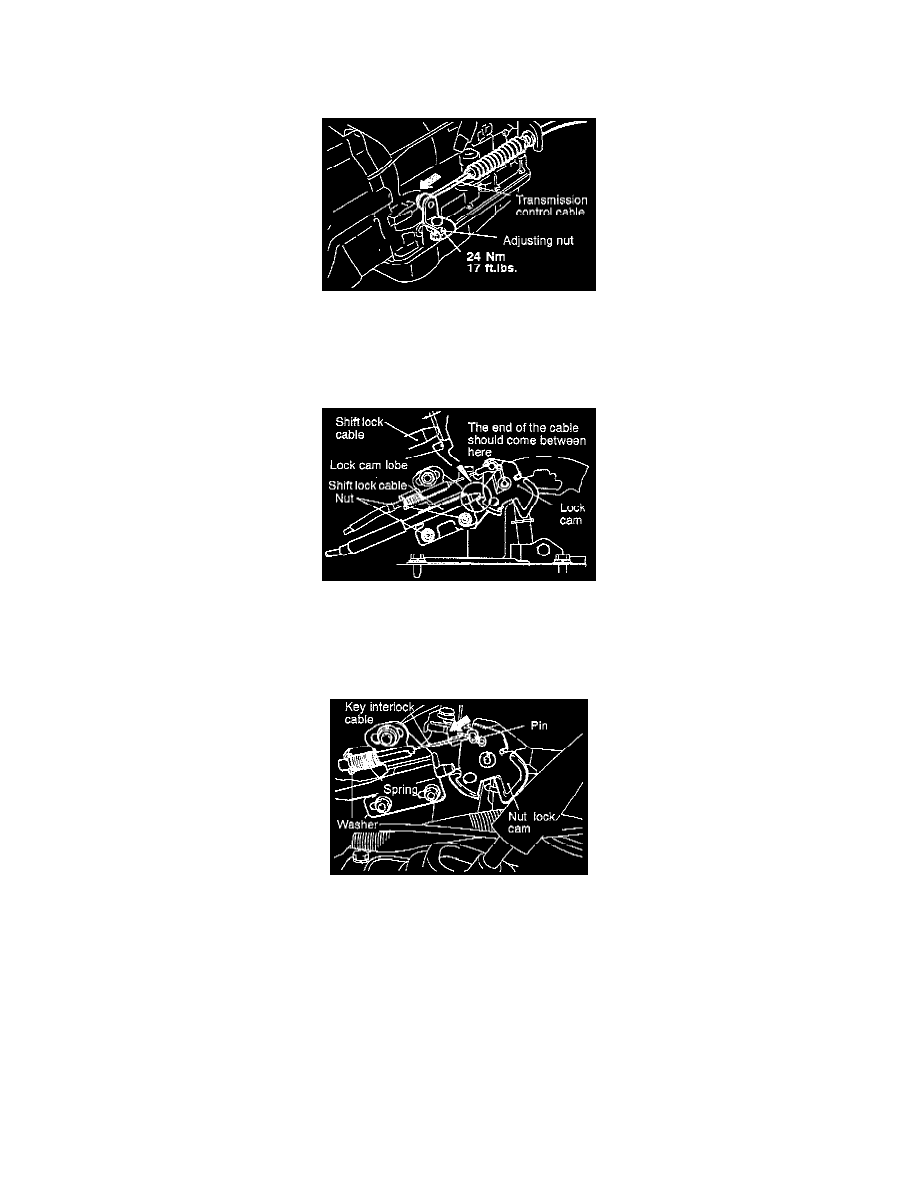
E. Transmission control cable installation (selector lever assembly side). (3)
After installing the transmission control cable, adjust it by the following procedure.
1. Move the selector lever to the N position.
2. Loosen the adjusting nut, gently pull the end of the transmission control cable in the direction of the arrow and then tighten the adjusting
nut to the specified torque.
F. Shift lock cable installation (selector lever assembly side). (2)
1. Move the selector lever to the P position.
2. Adjust the shift lock cable so that the end of the cable (red mark) is at the position shown in the illustration, and then tighten the nut to the
specified torque to clamp the shift lock cable.
3. After installing the shift lock cable, check the shift lock mechanism.
G. Key interlock cable installation (selector lever assembly side). (1)
1. Move the selector lever to the P position.
2. Install the spring and washer that are inserted onto the key interlock cable as shown in the illustration.
3. Gently push the lock cam until the pin stops in the direction of the arrow mark as shown in the illustration, and then tighten the nut to the
specified torque to clamp the key interlock cable.
4. After installing the key interlock cable, check the key interlock mechanism.
NOTE: Operational steps after installation as follows:
1. Install front console assembly.