
Montero XLS 4WD V6-3.5L SOHC (2001)
Drive Belt: Testing and Inspection
Drive Belt Tension Check and Adjustment
DRIVE BELT(FOR GENERATOR, WATER PUMP, POWER STEERING PUMP)(CHECK CONDITION)
Generator, Water Pump, Power Steering Pump Drive Belt Tension Check and Adjustment
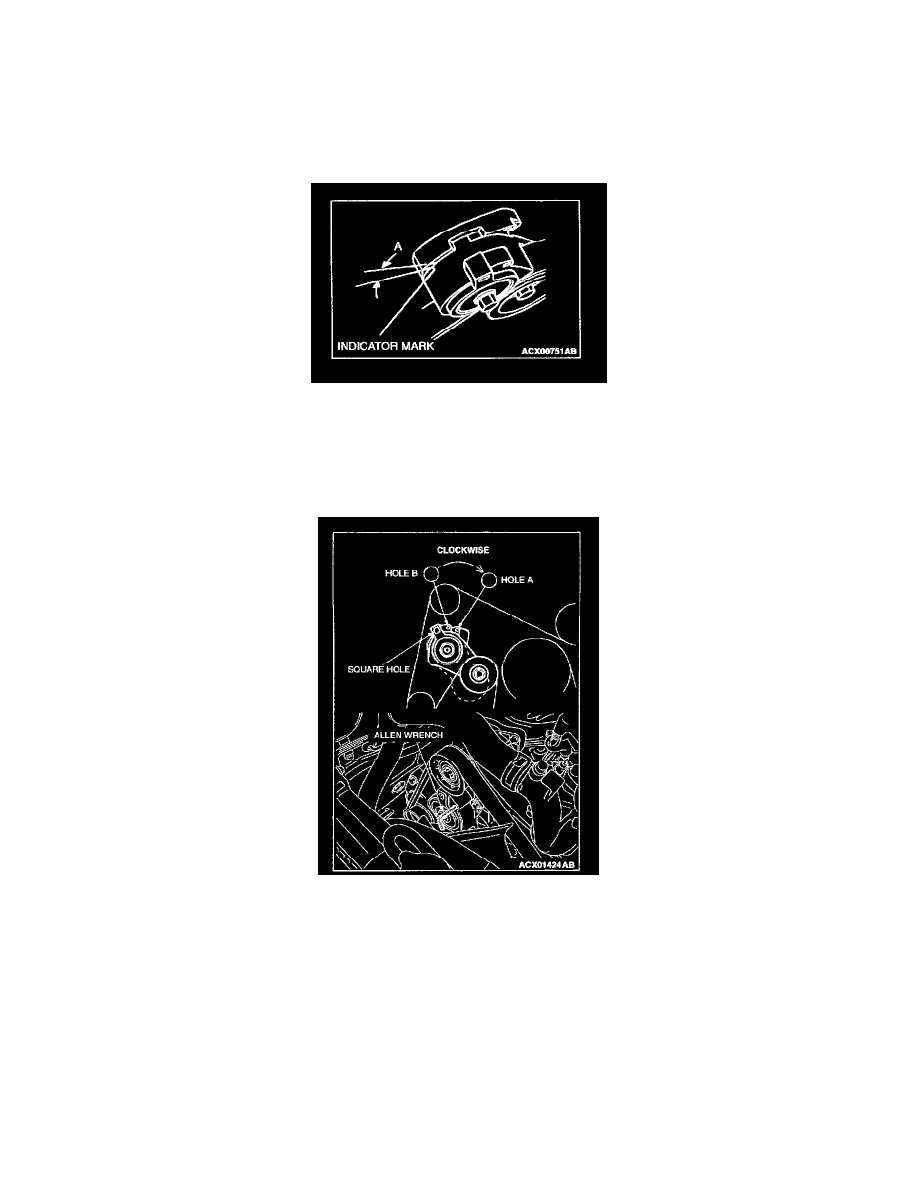
CAUTION: Perform the check after rotating the engine in the normal direction (one revolution or more).
1. Check that the indicator mark of the auto-tensioner is located between the marks shown as "A" on the tensioner bracket.
2. If the mark is located out of the space "A," replace the drive belt.
NOTE: Since the auto-tensioner is used, it is not necessary to adjust the tension of the belt
Check of auto-tensioner
1. Run the engine at idling speed and then stop it to check whether the drive belt is centered on the auto-tensioner pulley.
2. Insert a 1/2 inch breaker bar into the square hole on the drive belt auto tensioner, and rotate it clockwise until the tensioner touches the stopper.
3. Align hole B with hole A, and insert a 5.0 mm (0.20 inch) Allen wrench to hold the tensioner. Then loosen the drive belt, and then remove the
drive belt auto tensioner.
4. Move the auto-tensioner right and left by using a 1/2 inch breaker bar or similar tool to verify that it moves smoothly.
5. If some abnormality is found during the above mentioned check (1) and (3), replace the auto-tensioner.
6. Install the drive belt auto tensioner with Allen wrench inserted.