
Montero XLS 4WD V6-35L SOHC (2001) Engine Timing Belt Specifications - Page 1432
2. Align hole B with hole A, and insert a 5.0 mm (0.20 inch) Allen wrench to hold the tensioner. Then loosen the drive belt, and then remove the
drive belt auto tensioner.
<<B>> POWER STEERING OIL PUMP ASSEMBLY/A/C COMPRESSOR ASSEMBLY REMOVAL
1. Do not disconnect the hoses to remove the pump and compressor.
2. Support the removed pump and compressor with a wire, etc. so that they will not get in the way while working.
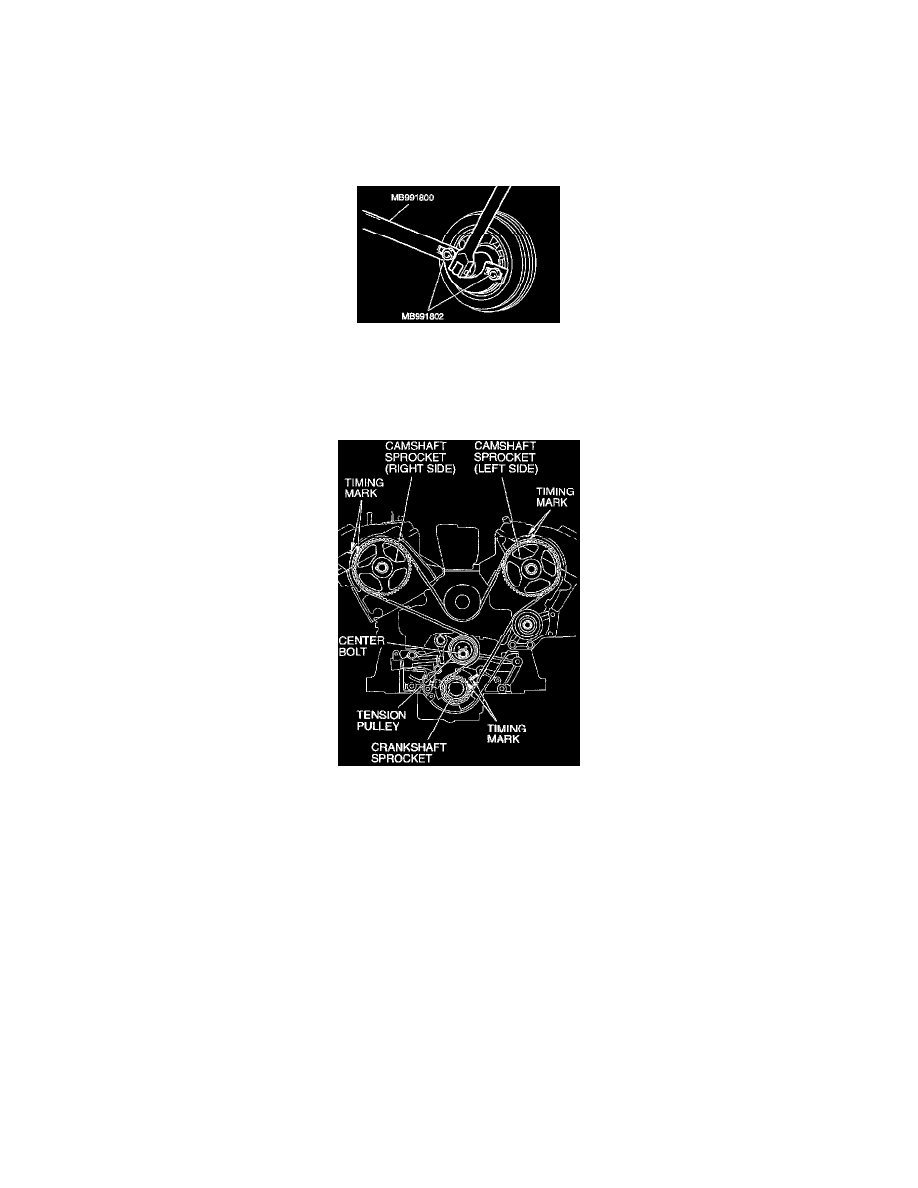
<<C>> CRANKSHAFT PULLEY REMOVAL
Use special tools MD991800 and MB991802 to remove the crankshaft pulley from the crankshaft.
<<D>> TIMING BELT REMOVAL
CAUTION: Never turn the crankshaft counterclockwise.
1. Turn the crankshaft clockwise to align each timing mark and to set the number 1 cylinder to compression top dead center.
2. If the timing belt is to be reused, chalk mark the flat side of the belt with an arrow indicating the clockwise direction.
3. Loosen the center bolt of the tension pulley, and then remove the timing belt.
INSTALLATION SERVICE POINTS
>>A<< TIMING BELT INSTALLATION
1. Align the timing marks of the camshaft sprocket with those of crankshaft sprocket.
CAUTION: The camshaft sprocket (right side) can turn easily due to the spring force applied, so be careful not to get your fingers caught.
2. Install the timing belt by the following procedure so that there is no deflection in the timing belt between each sprocket and pulley.
1. Crankshaft sprocket
2. Idler pulley
3. Camshaft sprocket (Left side)
4. Water pump pulley
5. Camshaft sprocket (Right side)
6. Tension pulley