Montero XLS 4WD V6-3.5L SOHC (2001)

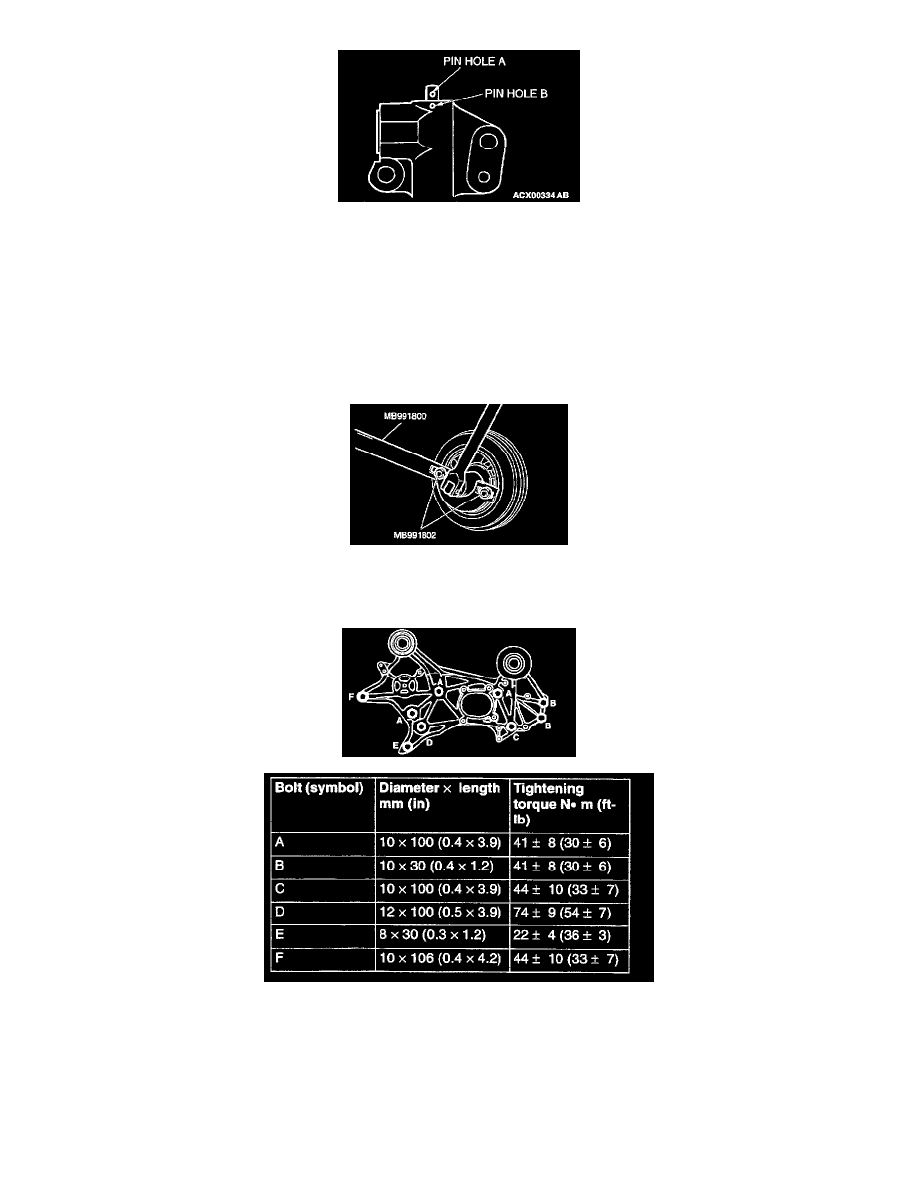
4. Slowly compress the pushrod of the auto-tensioner until pin hole A in the pushrod is aligned with pin hole B in the cylinder.
5. Insert the setting pin into the pin holes once they are aligned.
NOTE: If replacing the auto-tensioner, the pin will already be inserted into the pin holes of the new part.
CAUTION: Do not remove the setting pin from the auto-tensioner.
6. Install the auto-tensioner to the engine.
>>C<< CRANKSHAFT PULLEY INSTALLATION
Use special tools MD991800 and MB991802 to install the crankshaft pulley.
>>D<< ACCESSORY MOUNT ASSEMBLY INSTALLATION
Install the bolts, and tighten them to the specified torque.
>>E<< DRIVE BELT AUTO TENSIONER INSTALLATION
1. Install the drive belt auto tensioner with the Allen wrench inserted.
