
Montero XLS 4WD V6-3.5L SOHC (2001)
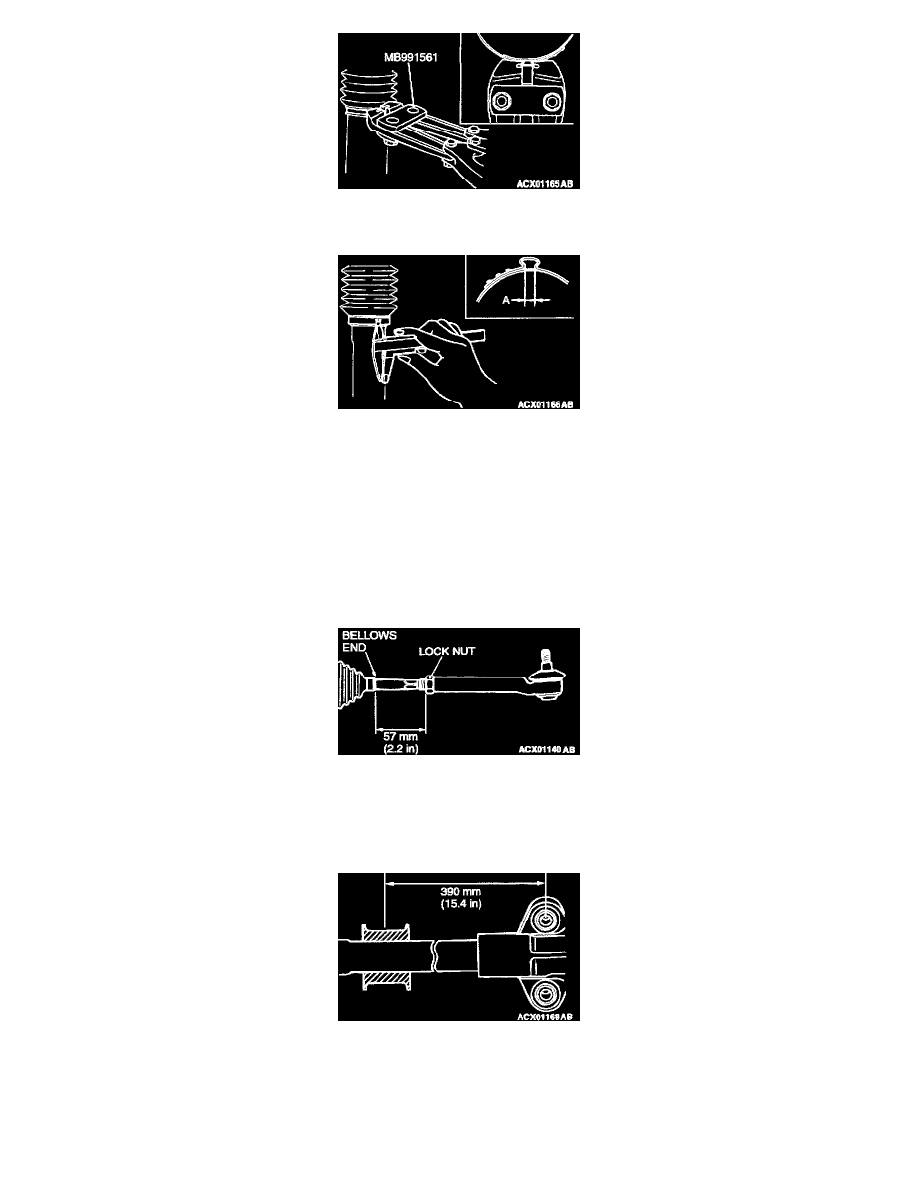
CAUTION: Hold the rack housing, and use special tool MB99156t to crimp the bellows band securely. Crimp the bellows band until special
tool MB991561 touches the stopper.
Use special tool MB991561 to crimp the bellows band.
Check that crimped width (A) is within the standard value.
Standard value (A): 2.4 - 2.8 mm (0.09 - 0.11 inch)
<When more than 2.8 mm (0.11 inch)>: Readjust the dimension (W) of step (1) to the value calculated by the following equation, and repeat
step (2).
W = 5.5 mm (0.22 inch) - A
[Example: if (A) is 2.9 mm (0.11 inch), (W) is 2.6 mm (0.10 inch).] <When less than 2.4 mm (0.09 inch)>: Remove the bellows band,
readjust the dimension (W) of step 1. to the value calculated by the following equation, and use a new bellows band to repeat steps 2. to (3).
W = 5.5 mm (0.22 inch) - A [Example: if (A) is 2.3 mm (0.09 inch), (W) is 3.2 mm (0.13 inch).]
>>N<< Tie Rod End/Tie Rod End Lock Nut Installation
Screw in the tie rod end to achieve the right and left length as illustrated. Lock with the lock nut.
NOTE: Tighten the locknut to the specified torque after installing the gear box assembly onto the body and adjusting the toe-in.
>>O<< Gear Mount Rubber Installation
Install the gear mount tuber on the rack housing so that the dimension shown in the illustration can be obtained.
TIE ROD END BALL JOINT DUST COVER REPLACEMENT
If the dust cover is damaged accidentally during service work, replace the dust cover as follows:
1. Remove the clip ring and then remove the dust cover.