
Montero XLS 4WD V6-3.5L SOHC (2001)
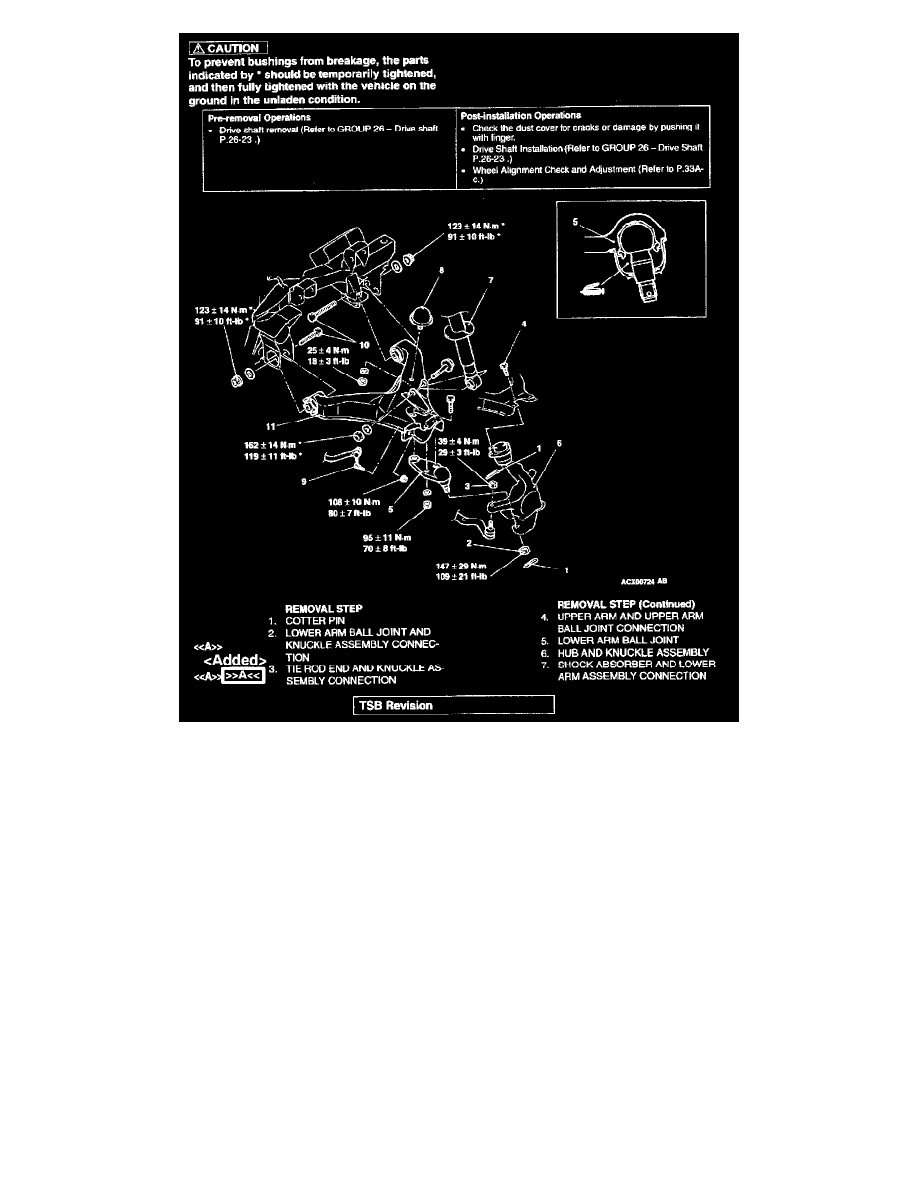
CAUTION
Ensure grease does not come into contact with the ball joint threads and tapers.Wipe off the grease if contaminated.
7. Install the ball joint to the dust cover.
8. Secure the dust cover with the clip ring.
9. Engage the tie rod end ball joint with the knuckle.
NOTE
The retainer is secured in a predetermined position by tightening the ball joint nut to the specified torque.
INSPECTION
^
Check the bushing for wear and deterioration.
^
Check the lower arm for bend or breakage.
^
Check the lower arm for deterioration or damage.
^
Check all bolts for condition and straightness.
LOWER ARM BALL JOINT ROTATION STARTING TORQUE CHECK