
Pickup 2WD L4-23L DSL Turbo (1984) Body and Frame Paint: Damage Identification & Repair
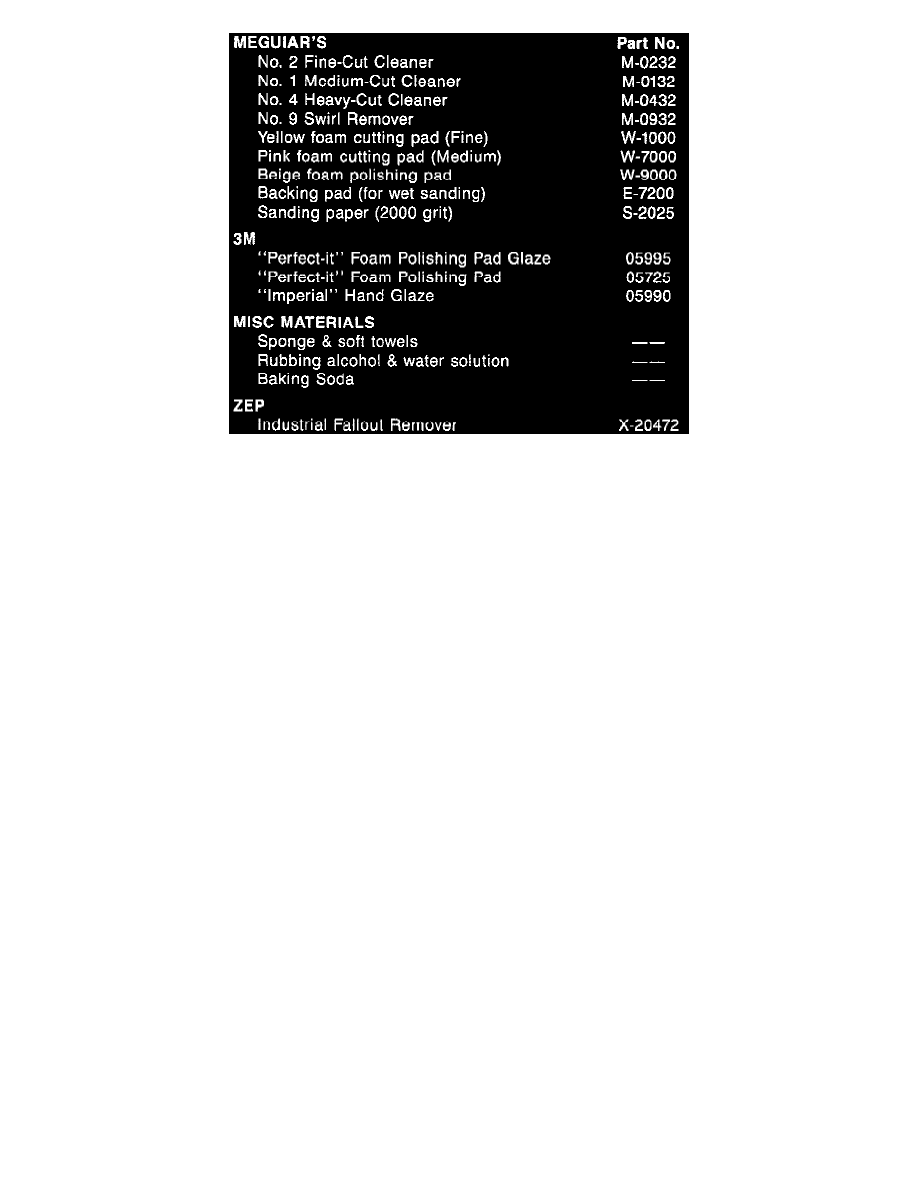
There are numerous brands available for repairing paint damage. Listed are a few examples:
NOTE:
Use only one (1) manufacturer's system. Do not mix products.
Repair Procedures
The goal in correcting paint damage is to repair it, not to cover it up. This means removing only a thin part of topcoat that is damaged. The maximum
amount of topcoat that can safely be removed is 0.5 mil, (.0005"). That's the MAXIMUM. Clearcoat thickness is approximately 0.8-1.5 mils. If you
remove too much of the clearcoat, this will leave a dark spot or a haze in the paint which cannot be repaired by buffing.
The following general instructions should be used to repair any paint damage. See minor, major and rail dust repair information for additional
instructions.
General Instructions
1)
Wash the vehicle to remove loose dirt. Remove any road tar with a silicone wax & tar remover. Dry the vehicle with soft cotton towels. A chamois
is not recommended - as it may hold dirt and scratch the paint surface.
2)
Inspect the paint finish, preferably under fluorescent light and in natural light, to identify any paint damage.
3)
All repairs should be done out of direct sunlight and the vehicle1s surface should be allowed to cool down before starting.
4)
When attempting to repair, do not remove more than 0.5 mil of the topcoat. That's the safety margin.
5)
A variable speed rotary buffer is recommended (1200-1800 RPM).
6)
Start by buffing a small section two feet by two feet. We recommend using foam pads rather than wool pads.
7)
Avoid buffing edges or character lines where the paint is thinner.
8)
Use a small amount of product on the pad. Too much cleaner will load up the pad and waste material.
9)
Do not buff dry any cleaner on the paint surface.
10)
Use a soft cotton towel to wipe off all remaining product.
11)
Use only light pressure and the weight of the machine during buffing. Keep the pad flat on the surface. Allow the cleaner to do the work.
Minor Damage Repair
1)
Measure the paint thickness with a mil gauge and record the measurements on a sheet of paper. These measurements will help you to track the
amount of paint removed.
2)
Start buffing the affected areas by using the least aggressive cutting pad and least aggressive cleaner. Repeat this step if necessary. (Remember to
re-measure the paint thickness after buffing.)