
Pickup 2WD L4-2.3L DSL Turbo (1984)
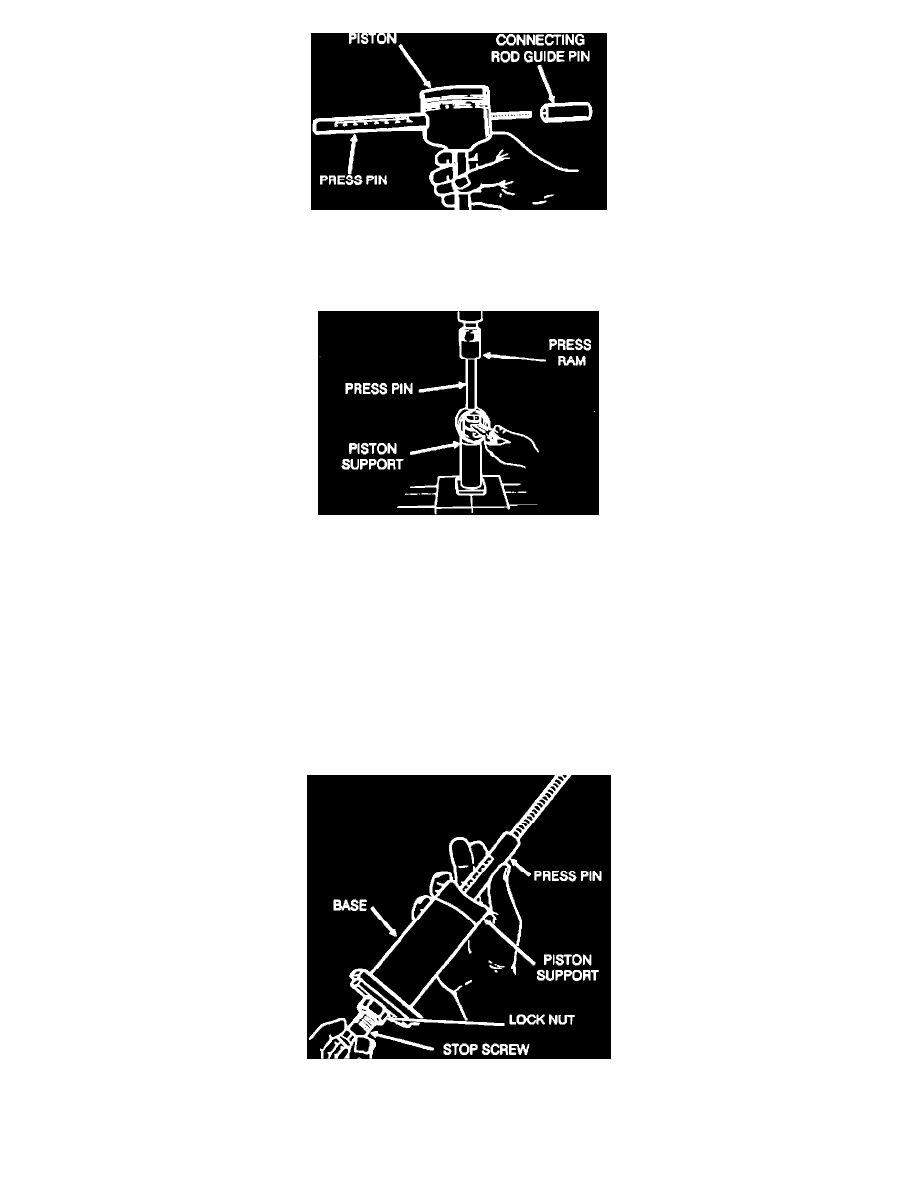
Figure 3
3.
Insert the press pin through the piston pin hole. Refer to the application chart on Page 4 to select the correct connecting rod guide pin. Thread the
guide pin onto the threaded portion of the press pin. See Figure 3.
Figure 4
4.
Position the piston assembly on the piston support in the press. With the press pin up as shown in Figure 4, insert the guide pin through the hole in
the piston and through the hole in the piston support.
5.
Press the piston pin out of the assembly (Figure 4).
NOTE:
Make certain that the piston support seats squarely against the piston and that the piston pin will slide through the hole in the piston
support.
6.
Remove the piston pin from the press pin.
Piston Pin Installation
Figure 5
1.
Thread the stop screw and lock nut assembly into the base. Fit the correct piston support on top of the base. Insert the press pin, threaded end up,
into the hole in the piston support until its end touches the stop screw. See Figure 5.