
Pickup 2WD L4-2.3L DSL Turbo (1984)
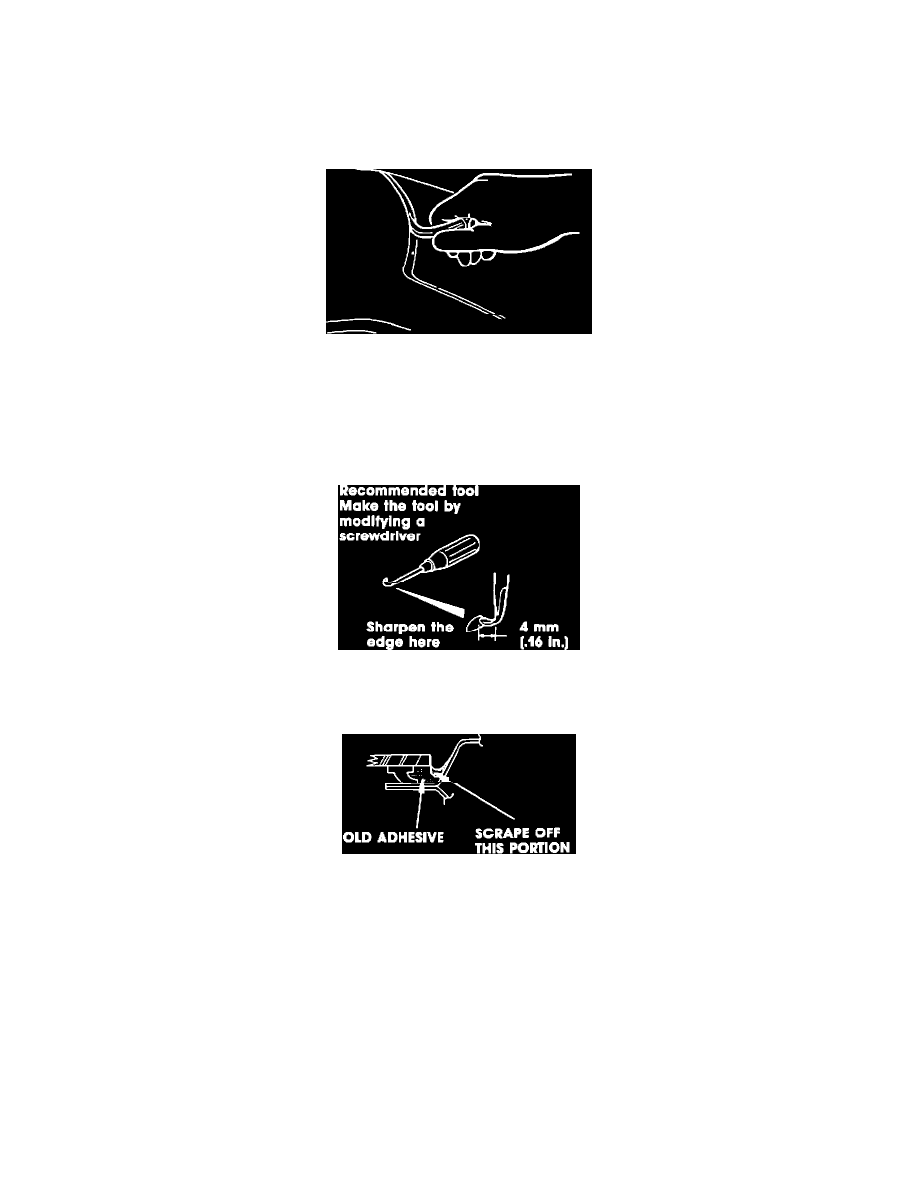
Figure 8
2.
Scoop out the old adhesive at the clip installation point, then apply 3M Super Fast Urethane Auto Glass Sealant (# 8609 or equivalent) to the clip
installation point and install the molding (Figure 8).
NOTE:
For the clip positions, refer to the applicable Service Manual. BE CAREFUL NOT TO DAMAGE THE GLASS OR THE BODY.
Figure 9
BONDED TYPE WINDSHIELD MOULDING REPLACEMENT PROCEDURE
1.
Use a screwdriver to carefully pry up the moulding end. Then by hand pull off the moulding from the windshield (Figure 9).
NOTE:
If the moulding adheres too firmly to remove by hand, use a knife to remove the moulding.
Figure 7
2.
Refer to Figure 7 for special tool make directions.
Figure 10
3.
Using the special tool scrape off the old adhesive to a uniform thickness (Figure 10).
NOTE:
Do not scrape off more adhesive than necessary for moulding installation. Do not damage the coated surfaces. If the painted surface is
damaged, touch up with paint.