
Pickup 2WD L4-2350cc 2.4L SOHC 8 Valve (1996)
1.
Make sure the ignition is in the OFF position, then connect the MUT-II scan tool to the data link connector. Turn the ignition switch ON. Confirm
the MUT-II scan tool communicates properly. Turn the ignition switch OFF for 12 seconds, then proceed with Step 2.
2.
Check the MIL ("Check Engine" light) with IGN ON and engine OFF. Does the MIL illuminate momentarily? If YES, proceed to Step 3. If NO,
repair the condition. Check the MIL again and then continue.
3.
Start engine. If the MIL illuminates with the engine running, refer to service manual section 13 to correct any existing DTC(s), then continue. If
the MIL does not illuminate, go to Step 4.
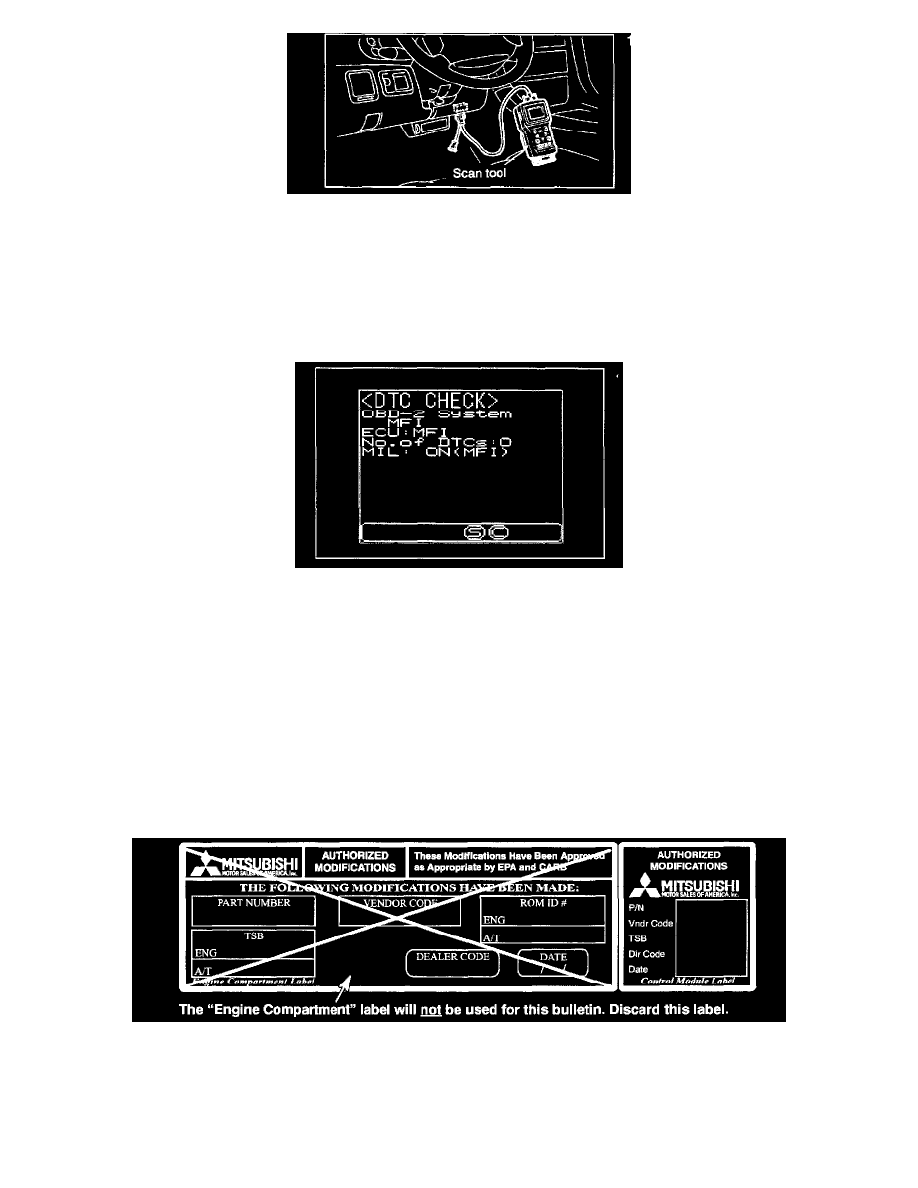
4.
With the MUT-II scan tool, check for MIL status ON (see note below). If MIL status is ON, and the "Check Engine" light is not illuminated, go to
Step 5 (replace the ECM). If MIL status is OFF, the vehicle has the correct ECM and no further action is needed.
NOTE:
Location of MIL status using MUT-II:
a.
Select MFI
b.
Select DTC, and read MIL status.
5.
Refer to the chart in the PARTS INFORMATION section of this bulletin and choose the correct ECM for the vehicle you are repairing.
THE FOLLOWING THREE STEPS ARE REQUIRED BY LAW.
6.
Using a ball-point pen, enter the appropriate ECM part number, this Emissions Recall Bulletin number (EMR-02-OO1), your dealer code, and the
current date on the "Control Module" Label (part no. MSSF-024G-00).
7.
Place the "Control Module" label on the new ECM.